How to Get the Restoration Hardware Look For Less

by
Tiffany from Dream Design DIY
(IC: blogger)
4 Materials
$20
6 Hours
Easy
Most of us aren't given the opportunity to scour through piles of aged barn wood or salvaged pine timbers from 100-year-old buildings in Great Britain. But most of us do own a paintbrush, paint, and maybe some glaze.My point is, you can achieve a very similar look to Restoration Hardware's beautiful aged finishes for a mili fraction of the cost. I was able to achieve an aged whitewash finish on my current dining table with common supplies I had on hand.
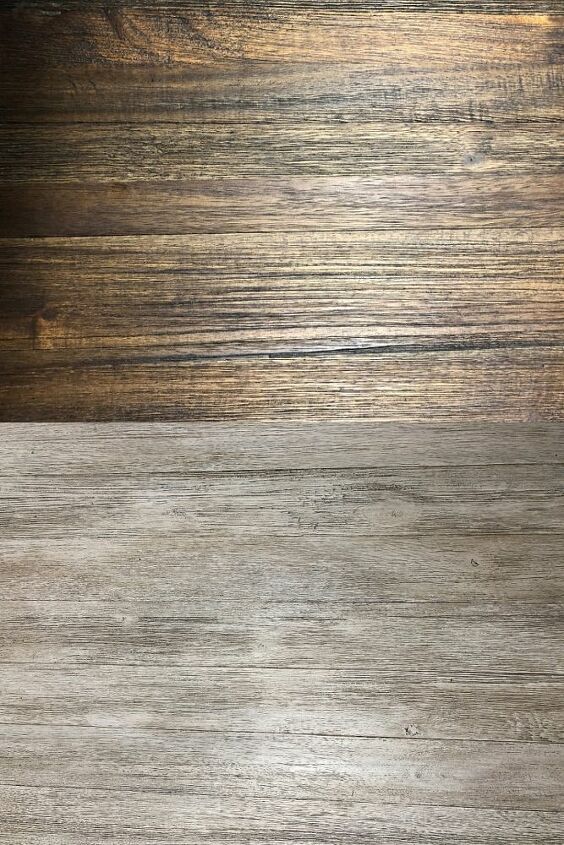
As you will see in the tutorial below, I was able to achieve the Restoration Hardware aged look by using a dry brushed, whitewashed painting technique, then applying a brown-gray glaze. Whitewashing wood gives it a dull, more worn, gray look, and allows the grooves and marking to "pick up" the white. The glaze adds another layer of semi-transparent color, tinting the more pronounced white areas and again allowing more grooves and markings to "pick up" the dark glaze color. You can choose any color or number of colors to achieve your desired look. Are you ready? Grab that piece of furniture and let's get started!Here is how my table started out. Not horrible by any means, but dark and didn't jive with the whiter, brighter farmhouse look I was going for.
Protect the area under your furniture using the canvas drop cloths. Sand your piece of furniture. I admit that I didn't sand my table and I am probably going to be a [Nervous Nellie] anytime someone uses it for fear they will scratch the new finish off. If I had to do it all over again I would at least lightly sand it. A little bit of sanding will help the paint adhere, especially since you won't be applying a primer. After sanding, vacuum and clean your piece of furniture. For the dry brushing, whitewashing technique, create a 1:1 mixture of water with white latex paint and stir. You can add more water to dilute the paint if you prefer. Dip just the tip of your chip brush in the paint water mixture and blot the end on a newspaper several times.
With a light stroke, go back and forth with the grain of the wood, applying a light coat. Because you're applying a light stroke of diluted paint, the wood grain and the imperfections in the wood will pick up the white quite nicely, while avoiding a heavy coverage.
Apply as many coats until you are happy with the look. I achieved my desired look in four coats.
My goal was to cover just enough of the wood to look white, while also allowing the more pronounced wood grain to show through. Allow the paint to dry. At this point, you can leave your furniture as is. I was able to achieve some variety in the wood grain with just this first step. However, it looked too gray for me and I wanted to warm it up since I already have lots of gray in my house. So I moved onto the next step by adding a glaze. Create a 1:4-8 ratio of paint to glaze mixture and stir. The more glaze you add the longer time you have to "work" with it. I mixed brown and black latex paint to make a brown-gray color. Then I mixed a 1:4 paint to glaze ratio.
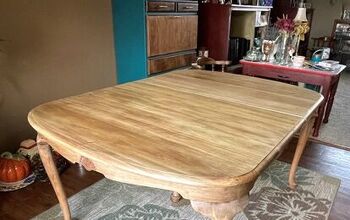
You don't need a lot of the mixture. I only used about one cup of paint glaze mixture for my whole table. Apply the paint-glaze mixture to a small section with the chip brush. Allow it to sit for a few seconds to one minute then wipe it off with your rag or t-shirt. For a darker look, let it sit longer before wiping it off. When you are just starting out, I suggest allowing the glaze to sit for a shorter period of time, then as you get comfortable with the technique allow it to sit for a longer time to achieve your desired look. If you accidentally let it sit too long, wet your rag and wipe it off and start again.Here is the table half glazed.
Apply a sealer. Because I didn't sand it or use a primer, I applied two coats of a triple-thick poly for extra protection.
Here is another close up to see how the wood grain picks up the paint and glaze colors.
I am so happy with how this turned out and it brightened up the space.If you love the farmhouse look then check out how to turn a bifold door to look like a barn door...I promise you will never look at a bifold door again. Also see how cheap and easy it is to add a farmhouse look to the end of your cabinets with this farmhouse cabinet trim.Thanks for checking out this post! Come by and say hi to me at Dream Design DIY!Happy DIY-ing,Tiffany
Enjoyed the project?
Resources for this project:
See all materials
Any price and availability information displayed on [relevant Amazon Site(s), as applicable] at the time of purchase will apply to the purchase of this product.
Hometalk may collect a small share of sales from the links on this page.More info

Want more details about this and other DIY projects? Check out my blog post!
Published January 29th, 2020 2:05 PM
Comments
Join the conversation
4 of 10 comments
-
-
 Tiffany from Dream Design DIY
on Feb 25, 2020
Thanks so much

-
-
-
 Joy
on Feb 29, 2020
I really appreciate this post. My daughter has an old and heavy dining set made of solid pine. I’m looking forward to trying this technique. Wish us luck, we’ve never attempted anything like this before but I’m feeling confident
-
 Tiffany from Dream Design DIY
on Feb 29, 2020
Awesome Joy! Good luck and let me know if you have any problems.
-
-










Frequently asked questions
Have a question about this project?
I have a cherry wood table that I painted black years ago - would I have to strip the black paint off to achieve this look?
Can this be done on a cherrywood table
U didn’t mention the sealer under materials. What did u use?