Antique Waterfall Dressers - Hardware Makeover

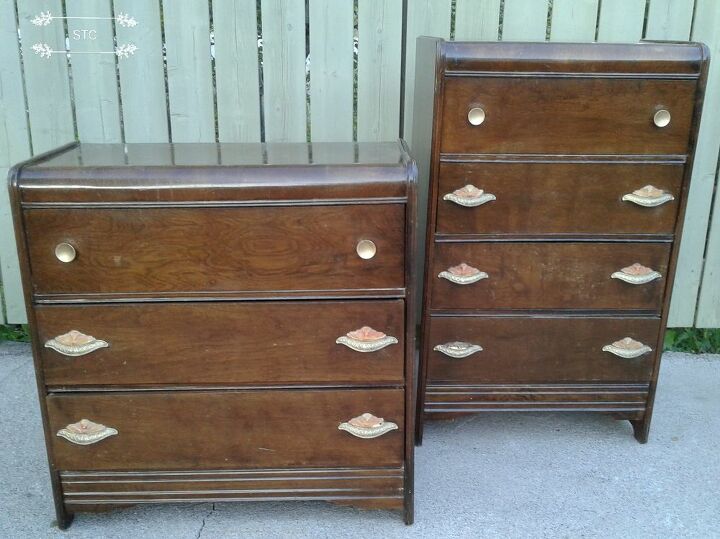
The previous post gave insights on how I completed a makeover on a 1940's Waterfall Style dresser set. This post however will be about the icing added onto the cake, the pretty embellishments. This style of dresser is known to characterized by brass handles with molded bakelite...a.k.a plastic. They stole the show on the furniture as you can see below.
It was beautiful but my problem was one of them had the bakelite missing, gone, poof, no more! I searched online and they were not like the ones I had and the used full sets cost up to $100!
I was going to resort to buying new handles when my sweet neighbor said, "you can make that sure girl." With that tiny seed implanted in my head, the process began to take root and grow! I'd first need to make a template, then find plastic to cut it out of. Luckily for me I keep things others toss, these sheets were part of an outdated geometry kit. I rolled and stretched it with my pen to get the curve and I drew the flower markings on the back of the plastic to make them pop on the front.
I had the shape, I had the bend and I had some floral markings but I didn't have the curved 3D look of the original handle? Hmm, how can I do that? Ding, ding, ding with my brand new heat gun I had just gotten at Amazon! So with limited tools, actually I used the round edge of my seam ripper to push and mold the heated plastic into shape, it worked perfect! I was screaming,"I did it!"
Of course when I showed my neighbor she laughed and said, "I told you that you could make it." It was a wonderful feeling to have saved the original handles to use on my furniture treasures.
The new accent I made was glued onto the metal with my reliable E6000 glue, it was secured with painters tape until the glue set up.
Once it was dry, I lightly sanded the plastic to give it some teeth for the paint to grip onto and primed all of the bakelite with a super adhesive primer. After it had dried I then spent the next few hours shading with two shades of green chalk paint seen in the photo. If I applied too much I added more primer on again as I tried to achieve a marbled look to hopefully detract from the fake bakelite! Last but not least, I applied 3 coats of polyurethane to the marbled designs to protect my masterpieces!😉
The brass was last, it would undergo a transformation too but to protect my hand painted portion I used plastic wrap to seal them up from the spray paint I was going to use.
Okay, okay, hold the applause until you see them close up!
Here are the fruits of my labor, a side by side comparison for you to judge me on how I did. Remember please though I have no prior experience in doing this and I tried my best!
To make the insides of the furniture as pretty as the outside I purchased these beautiful, scented drawer liners at the dollarstore.
You simply measure, cut and fit them in each drawer bottom, there were 6 sheets per box. I stained the interior of the drawers too so this pop of pretty white lining the bottom really pops.
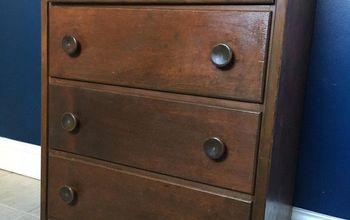
Here's the final test, showing you the before and the after please give me a pass! The only thing I see wrong is the top single handles need a hint of the peacock color to stand out against the brown wood. I haven't found a way yet...but I will! Any and all suggestions appreciated, be sure to check out how I updated the wood and mirror finishes here http://www.hometalk.com/diy/bedroom/furniture/antique-dresser-set-makeover-the-wood-43914264" target="_blank"> http://www.hometalk.com/diy/bedroom/furniture/antique-dresser-set-makeover-the-wood-43914264...
Enjoyed the project?
Resources for this project:
See all materialsComments
Join the conversation
-
 RENE
on Mar 17, 2023
Just ran across this old post. Assume you figured out how to add a bit of color to those 2 pulls. My idea was to paint a small disk to put behind them.
-
 Skilled Thrifty Creatives
on Mar 19, 2023
I like that idea thanks so much. When I finished it...I finished it I lost my motivation to go back. I had forgotten all about it until now...lol! Maybe its time for a revisit?
-
-
-
-
 Skilled Thrifty Creatives
on Oct 08, 2023
Thank you Daisy, I take great pride in them.
-
-








Frequently asked questions
Have a question about this project?
You are amazing. What a great idea
I think you did a great job! Could you paint just the inside (it looks like there is a little dip in the center of each handle) of the top round handles the peacock blue? You can seal the blue using one of the craft paint clear coats.
You did a great job! Maybe make a little polymer clay ball to sit in the dip of the round handles?? You could paint them or use colored clay to match???