Apothecary Chest From Plain Dresser

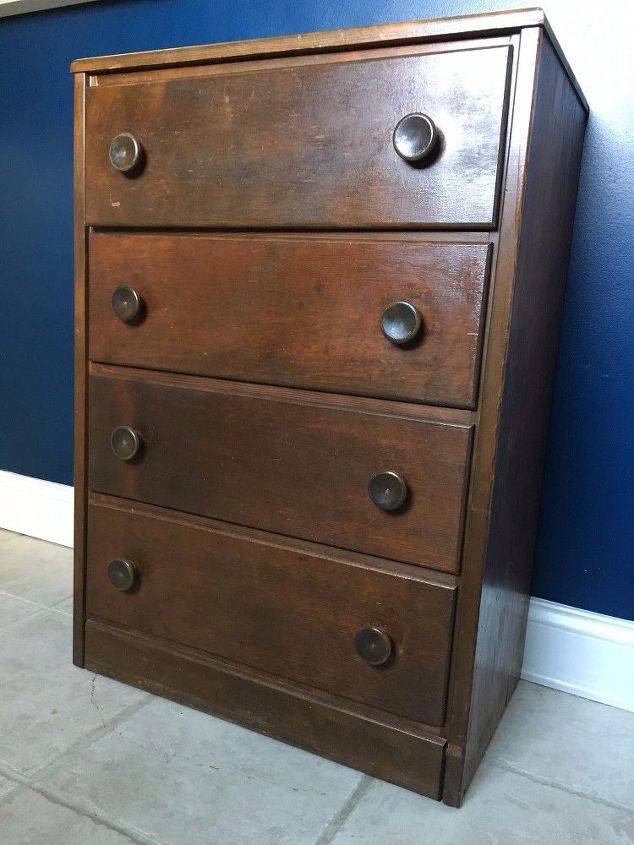
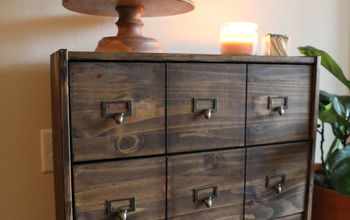
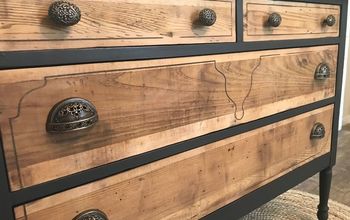
Turn a plain Jane dresser into an apothecary chest. Once all your friends know that you made it, they will want one too!
Begin by removing all of the hardware from the dresser then filling the holes with wood filler.
Remove the drawers and measure the length of each drawer. If you are adding three false fronts on to each drawer, divide your measurement by 3 to determine how large each false front will be.
(The cinder block is inside my drawer because I did all of my work on the floor and needed stability. This is not necessary if you have a work area where you can clamp your drawers safely)
Use a straight bit in your router.
You will need to make a guide for your router so your grooves are straight.
Determine the distance between the bit and the edge of the router plate.
Place a piece of board on the front of the dresser and clamp it secure.
Place your router on the drawer front to determine the depth of your bit and adjust accordingly. I used a 5/8" bit.
Before you begin to router, measure again and again - use the old adage, measure twice, cut once.
Using the piece of wood as your guide, router two grooves into the drawer front. You will have to move your guide with each groove you make.
(This was the first time I used a router so I was very nervous. I watch a few YouTube videos first then practiced on a piece of scrap wood before making any cuts to my dresser. Once you've got the hang of how to use the router, you'll be ready to go.)
Once all of your drawer fronts are routed, sand the entire dresser including the drawers.
Wipe everything with a mild soap and water.
Allow to dry.
Prime and paint the entire dresser including the drawer fronts as you like.
I did not paint the top of my dresser. Instead I chose to stain it a dark walnut.
When the paint and stain are dry, put a light coating of wax or sealant on the entire dresser and drawer fronts.
To determine where the hardware should be placed on the drawer fronts, make a guide.
Cut the guide the size of the false fronts and find the center.
Lay your hardware on top of the guide to determine where the nail holes will be made.
Lay your guide on each false front and using the guide, mark where the nail holes will be.
Pilot holes do not have to be drilled as the nails are very tiny and will easily be able to be screwed into the wood.
Your new apothecary chest is not ready for you to enjoy and be the envy of everyone!
Enjoyed the project?
Resources for this project:
See all materialsComments
Join the conversation
-
 Emily Harris
on Jun 20, 2024
Just love it!
-
-
 Omaifi
on Jun 20, 2024
Wow, it's amazing! I'm always impressed by people who can do such things, turning everyday furniture into something unique and eye-catching. If you're inspired to look for new furniture that has a unique twist, have you checked out Perigold? They have a wide range of stylish and upscale furniture pieces that might catch your eye. It's a great place to find something that stands out and adds a special touch to your home.
-












Frequently asked questions
Have a question about this project?
Wow!! Love it so much now I need to find a chest of drawers. Where would you get the trimmings?? Thanks
This is a great project but I am concerned about how these drawers open. Are the small pulls strong enough?
Typing error says now it’s not ready to use and enjoy. It is ready and gorgeous ❤️