How to Raise the Value of Your Home With DIY Hardwood Floors

This post is sponsored by Malibu Wide Plank.
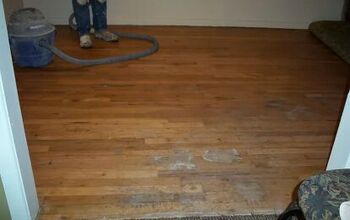
Our historic home has so many charming features, but the plywood floors in the Upstairs Bedroom Edition weren't one of them. While we painted them as a temporary fix, we always had plans to install hardwood flooring to match the rest of the house.
After much searching, I finally found the perfect solution in Malibu Wide Plank Flooring. Their premium quality and durability caught my attention immediately, and I knew it was exactly what we needed.
Table of contents
Bedroom Floor Before:
Tools and Materials
- Malibu Wide Plank Flooring
- Hammer and chisel
- Broom
- Flooring spacers
- Frog tape
- Chalk line reel
- Nail gun
- Rubber mallet
- Measuring tape
- Pencil
- Miter saw
Malibu Wide Plank Pacific Grove French Oak 3/4 in. T x 5 in. W Wire Brushed Solid Hardwood Flooring
Choosing the Perfect Planks
For the bedroom, I chose the Pacific Grove French Oak from Malibu's collection.
The grain pattern is absolutely beautiful, and the color perfectly matches the hardwoods in the rest of our home.
The wide planks add a spacious feel to the room, and the clarity of the grain brings a sophisticated touch to the space.
Prepping the Space
Once we cleared out the room, it was time to get started with a little prep work.
First, we removed all the quarter round from the edges of the old plywood flooring.
After that, we swept away all the dirt and debris to make sure we had a clean surface to work on.
To ensure proper installation, we placed flooring spacers along one side of the room.
Because our home is older, the walls aren’t perfectly symmetrical, so I dropped a chalk line to keep our first row of boards straight.
Installing the First Row
Malibu Wide Plank Flooring uses a tongue-and-groove design, which made installation incredibly easy.
I lined up the first board along the chalk line and secured it in place with a nail gun.
From there, we nailed down the entire first row along the line to create a solid foundation for the rest of the room.
Measuring and Cutting
As we worked through each row, there were times when we had to make cuts to fit the planks perfectly at the end.
To do this, we measured the length of the plank we needed, cut it using a miter saw, and secured it into place with a tapping bar, a rubber mallet, and a nail gun.
We made sure to stagger the planks, laying them in a diagonal pattern for a more dynamic look.
To keep nails from being visible, we nailed the planks along the edge of the bottom groove before starting the next row.
Finishing the Installation
When we reached the final row near the back wall, a few planks needed to be ripped with a table saw to fit into the last gap.
After the floor was complete, we installed a threshold to connect the bedroom floor with the hallway.
We cut two pieces of red oak to bridge the gap and nailed a transition piece on top. We also installed two additional transition pieces under the closet doors to complete the look.
Why Hardwood is a Great Choice
I love hardwood floors because they’re not only beautiful but also incredibly durable and water-resistant.
One of the best things about solid hardwood like this is that it can be re-sanded, re-stained, and re-finished.
With the entire plank made of French oak, we’ll have the option to update or change the color of the floors in the future if we ever want a refresh.
The Final Result
The difference these hardwood floors have made in the bedroom is incredible.
The project not only updated the space but also increased the value of our home. Now, the bedroom feels like part of the house and truly feels like home.
Huge thanks to Malibu Wide Plank for sponsoring this project!
Enjoyed the project?

Comments
Join the conversation
-
-
 Aud62616903
on Oct 15, 2024
A great, precise video - no waffling. The room looks great, well done!
-











Frequently asked questions
Have a question about this project?
Do u need to put down something under the planks
The inside bottom of my microwave is peeling. Is it safe to use, and what can I use to fix it.