Easy Leaded or Stained Glass Windows With Metal Tape!

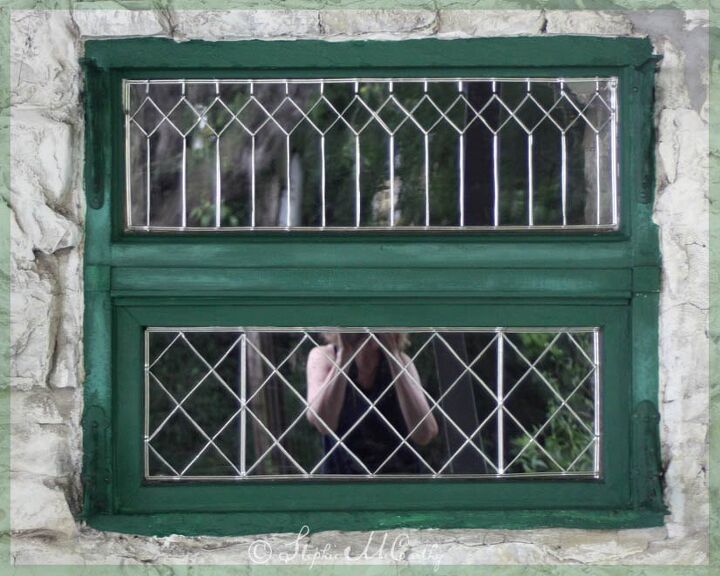
We are cheering up a sad window three ways. This is Part One! We made this leaded glass effect with no glass cutting or soldering. We used a special metal tape. See the full length video.
Watch the longer video to enter our contest for free stained glass tape!
To make this project, you will need a pattern and determine if you will put the lead on the inside or outside of your house. If you can't reach a window, you can do this project on separate glass in a frame and mount it inside a window. (We'll show you how in a future project  ).
).
Pebeo's 'Vitrail' Tape (vitrail is French for stained glass) is capable of much more elaborate designs than our simple window — and we initially thought we would try a bevelled-glass effect with a clear paint. We ended up loving the simplicity and leaving our project at the stage shown above. Plain lead and glass. Beautiful!
We were clumsy with the tape for the first ten minutes, but the results were so rewarding we soon picked up speed.
This was the poor, sad window before we found three ways to make it more cheerful! This post is how we accomplished the lead glass effect, Part One.
If you've been following our stone porch restoration, you may recognize the sad window on the back wall with crusty air conditioner that took almost two hours to remove.
Measure Carefully, then Make a Pattern
It took longer to make our patterns than it did to apply the tape! We put paper on the window, allowing for caulk around the edge, then took that paper to our desk for measuring and designing on the computer. You can also make designs on good graph paper. We've put a link to a transparent graph paper in the supplies section.
The tape is made to be cut in half for 1/4" and 1/8" strips (approximately). We used both widths in our design.
Cut the tape with scissors. It will curl a lot as you cut. We cut very carefully and slowly.
Straighten the tape before measuring and cutting lengths needed. We used a ruler to measure our design pieces.
The tape backing was difficult to remove. We pricked it with the blade of a craft knife to get it started. After measuring a strip, remove the backing and place it on your design.
Place the lead strip on the glass, repositioning as necessary, then burnish with the tool provided until the tape sticks. You can remove the tape if necessary too. Be sure the surface is super clean so that the tape will stick well. We scrubbed the vintage glass top pane with toothpaste before this project!
You will not need to cut miters unless you wish, because the tape looks good where it overlaps and intersects. The lead flattens and blends as you burnish pieces together. For this reason, it is also good to continue your tape so that it goes under a border.
It was such a lot of fun removing the pattern and looking through the window for the first time. We added a border afterward, leaving room for a bead of caulk next to the frame.
Parts Two and Three are Next, Don't Miss Them!
We're cheering this sad window TWO MORE WAYS and can't wait for you to see the results. The brackets may give you a clue. Follow us here on Hometalk so you don't miss the follow ups, AND, for more photos of this project and additional information, click here.
Enjoyed the project?
Resources for this project:











Frequently asked questions
Have a question about this project?
I'm a renter. I'd LOVE to do this with my back door and sidelight, but...is it removable?
Word of caution.If this is true lead shouldn't you wear gloves?
I cannot find I cannot find the link for the video on YouTube