


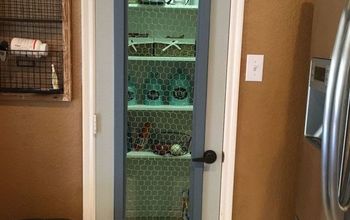
Old Oak Gun Cabinet to Gray Pantry

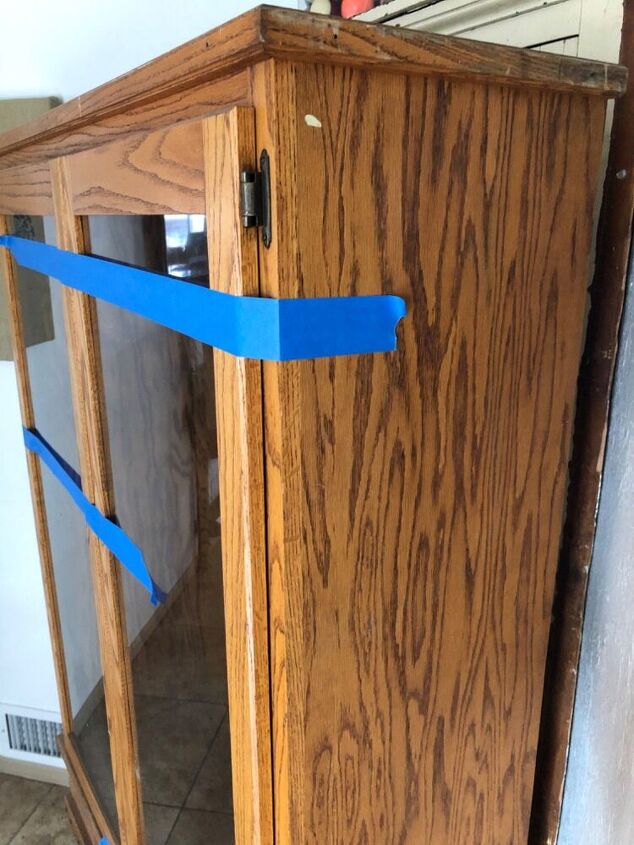
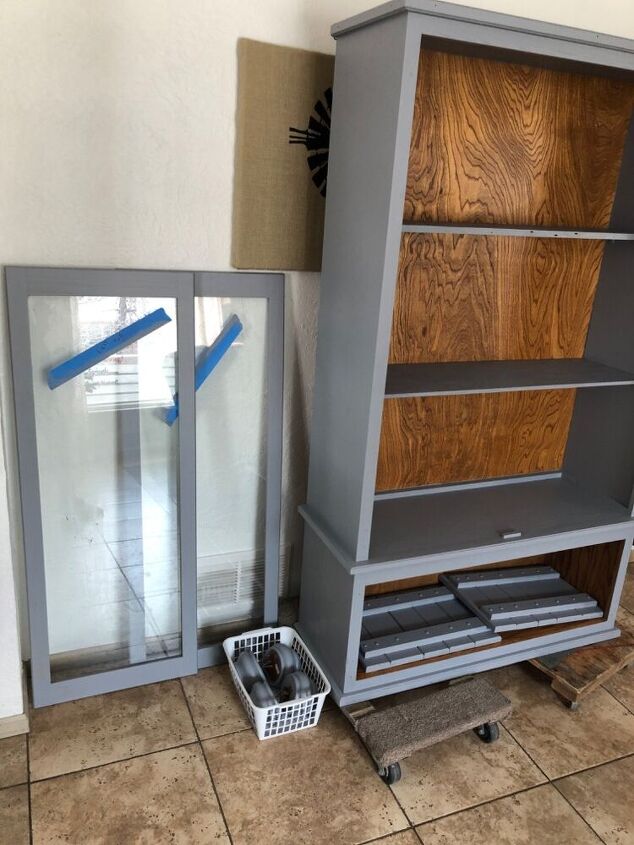
We had been lugging around my husband’s family heirloom gun cabinet for years. It was yellow oak big and bulky and personally I would not put guns in there to display with that with the glass opening. So I decided to give it a new life as a pantry
Needs a new life.
Best gloss frost spray!

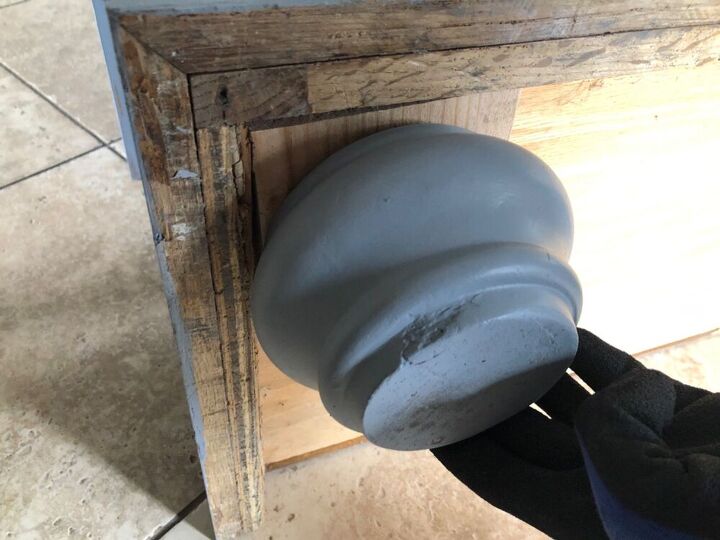
I removed the scalloped ledge that held the guns in place
Some of the wood behind came with it, it didn’t matter because I planned on putting shelves in it
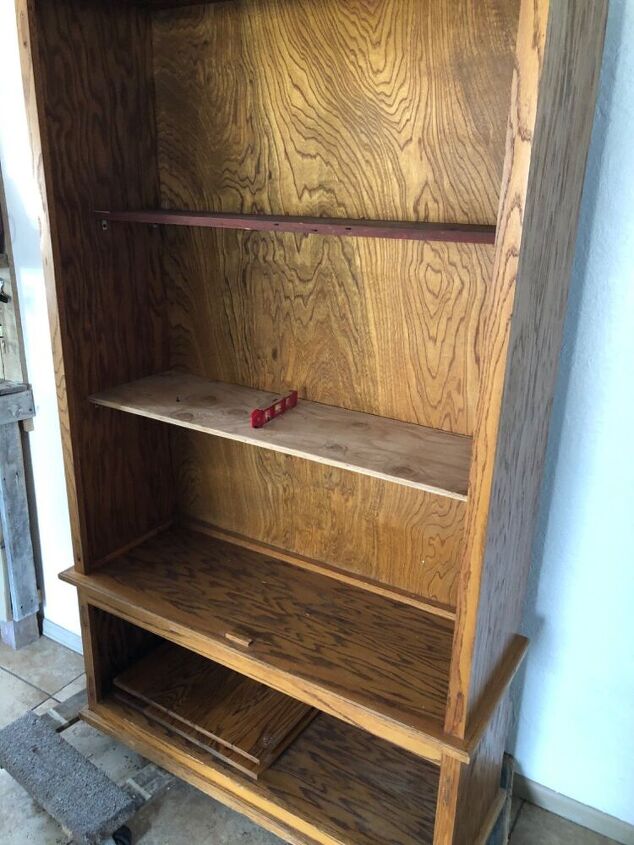
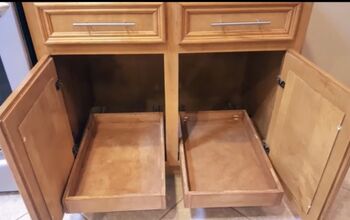
I got to scraps of wood cut them to fit inside my cabinet
I got two scraps of wood cut them to fit inside my cabinet, I used L brackets and installed both the shelves in there since I knew they were going to be painted I didn’t worry that they were scrapes.
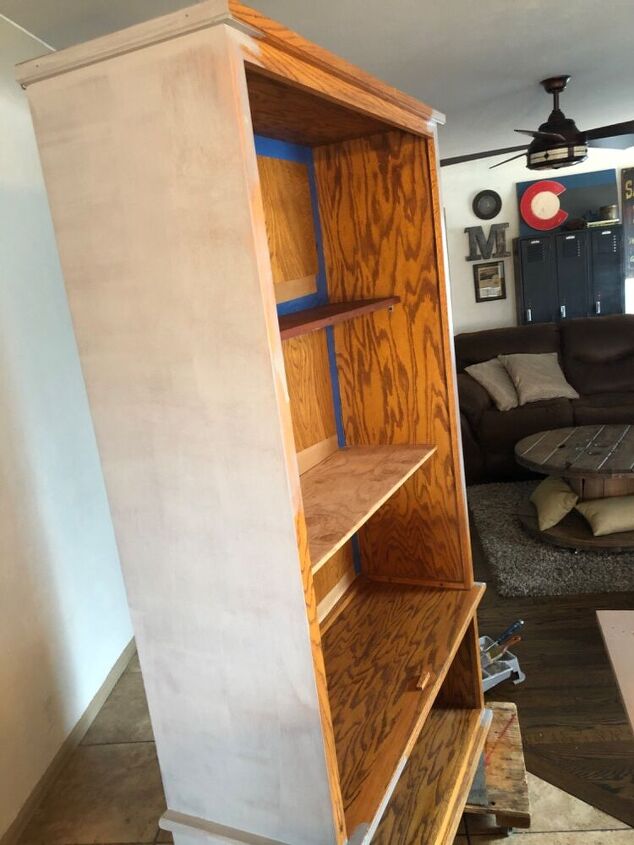
I decided to leave the back of the cabinet the light oak
I decided to leave the back of the cabinet the light oak And paint the rest of it gray so I taped off back of cabinet.
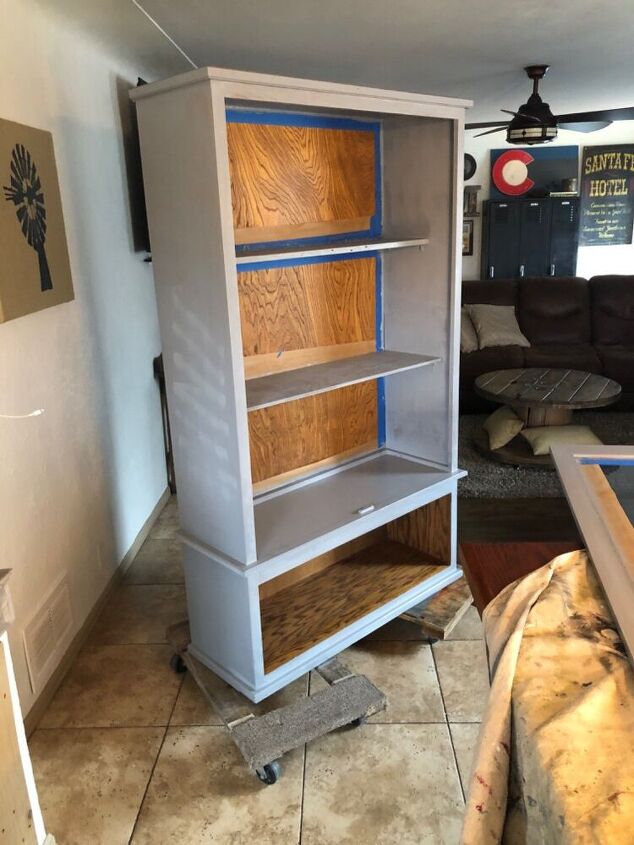
After two coats of my homemade gray paint
After two coats of my homemade gray paint I added a coat of clear urethane. Now I just need to do something about the glass. I didn’t to frost them with a stencil to add character.
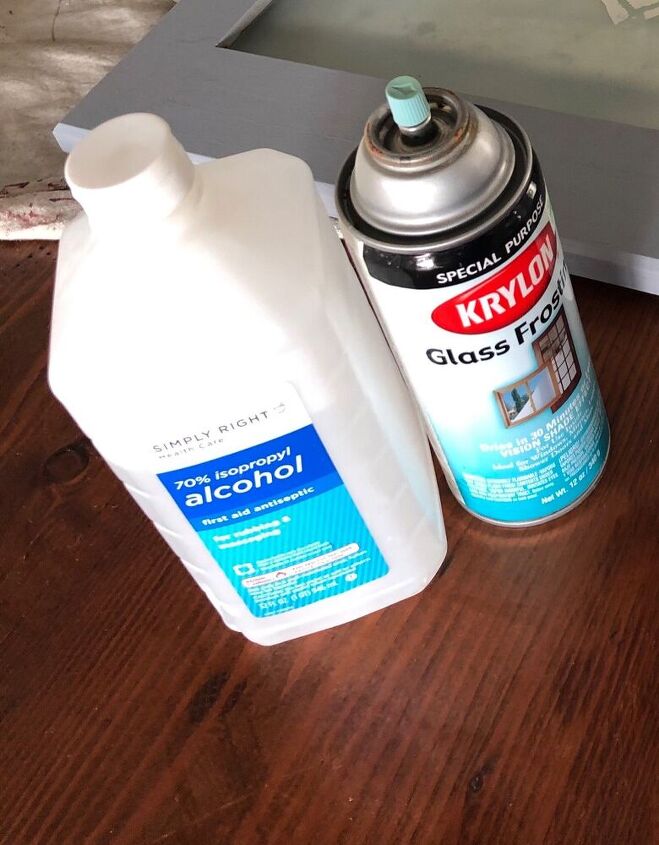
I first clean the window with alcohol to make sure there was no residue on it
I first clean the window with alcohol to make sure there was no residue on it and will get coverage off frosting spray.

I cut off the corners of my stencil
I placed the stencil on the door and sprayed the glass frosting over it. Make sure you hold the stencil and place with fingers otherwise it will wanna move on you from the air. You don’t want to tape it in place because it will not get the frosting under that tape.
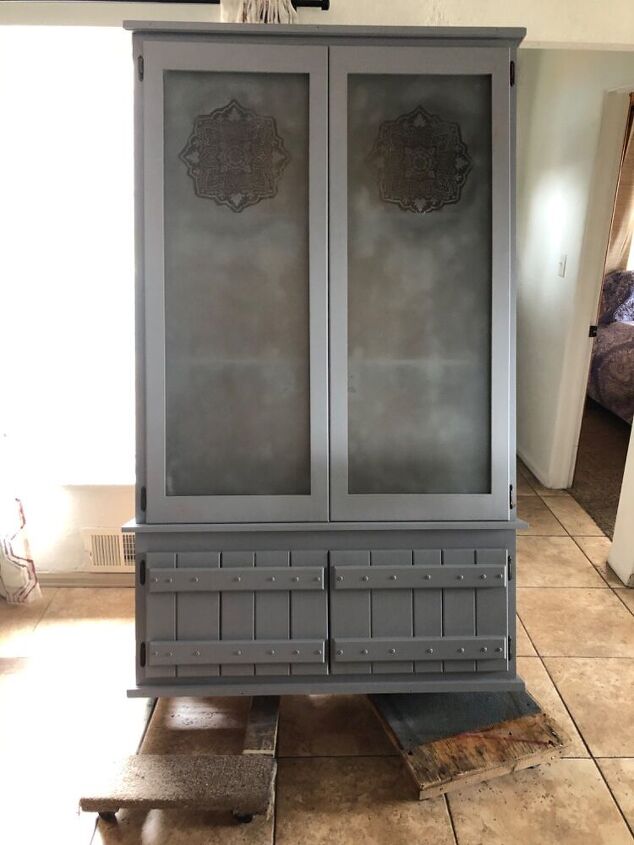
Once I completed the frosting in the stencil
Once I completed the frosting in the stencil, I replace the doors and put them back on now I needed to attach the feet.
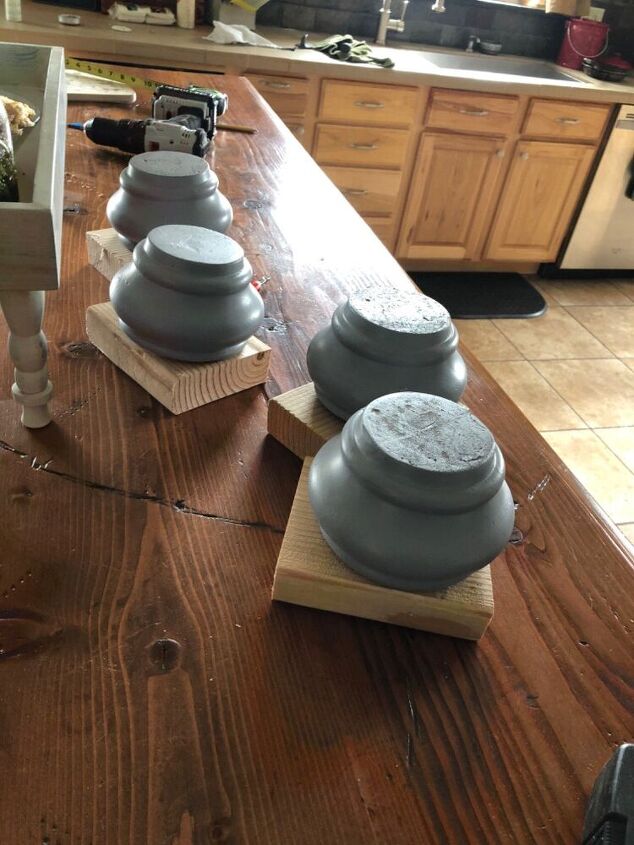
Adding feet
I had already painted the feet to match the rest of the cabinet I just needed to create blocks out of 2 x 4 to put in each corner of the hollow bottom to attach the feet to.
The feet simply screwed into the blocks
- The feet simply screwed into the blocks. Use four screws and screwed them into the base for strength.
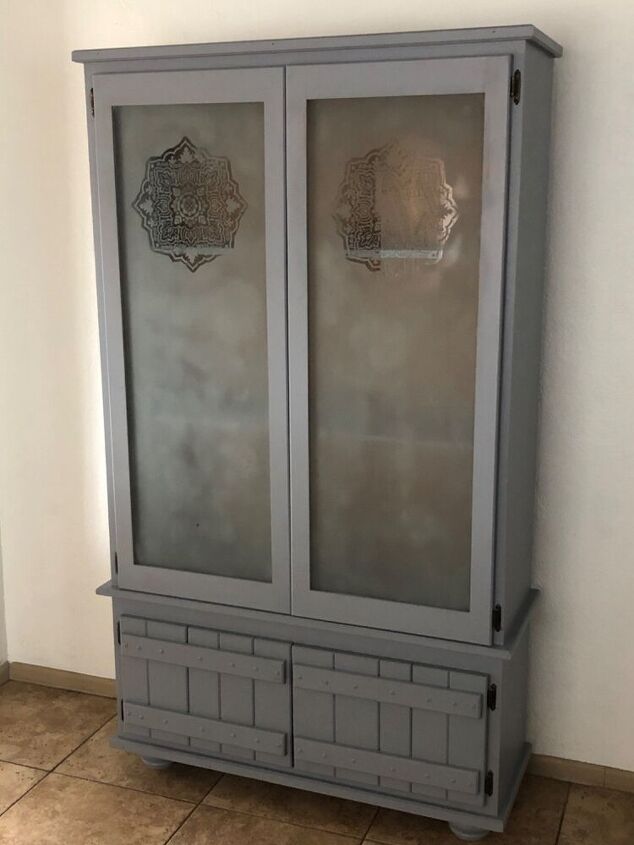
Once completed I fell in love with it.
This seriously was one of my better repurposed projects. I was ready to trash the cabinet but now it’s a little paint a little frosting glass and legs it’s beautiful. So much so my daughter stole it and took it home. I hope you like it this is super easy love your comments.
Resources for this project:
See all materials


Comments
Join the conversation
-
Love the grey, fantastic. You really gave it a new lease of life, love the stencil, but just for me the frosted bit, looks streaky.. I'm sorry... I actually like it without the "hardware" handles, everything is still easy to open. Fab idea
-
I did something similar and added shelves inside for more storage. If you're thinking about safety too, I found that adding home safes to the bottom section helped keep important things secure while still using the rest of the cabinet as a pantry. I just anchored them in and painted around so everything matched.


Frequently asked questions
Have a question about this project?
How did you make gray paint?
I also was wondering about the handles...how you open the doors?
Also my son and I think it looks like a "face"...you known, like if it was on the movie Beauty and the Beast, I know is funny...other than that it looks really good just...handles! lol
I see it's been a while since you've posted, but I just wanted to ask—how has the finish on the cabinet held up over time? I'm thinking of doing something similar and wondering if the paint or sealer used made a big difference in durability. Also curious if you added any extra shelves or storage hacks since then.