How To Make a DIY Outdoor String Light Pole Stand

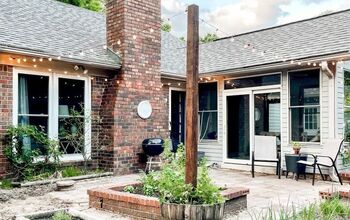
Transform your backyard into a cozy and inviting space with your own DIY outdoor string light pole stand.
This simple project can be completed in a weekend, providing you with the perfect setup for hanging outdoor lights.
This post was transcribed by a member of the Hometalk editorial team from the original HometalkTV episode.
Tools and Materials:
- 4 large planters
- 2x2 fir boards or 1-inch metal conduit
- 50-pound bag of concrete
- Water
- Drill and paddle mixer (or a mixing tool)
- Scrap boards
- Clamps
- White rock or potting soil
- Hooks for hanging lights
- String lights (shatterproof plastic recommended)
- Zip ties
Hometalk may receive a small affiliate commission from purchases made via Amazon links in this article but at no cost to you.
Hometalk Recommends!
1. Preparing the Planters
First, head to your local hardware store and grab four large planters.
Since these planters have drainage holes at the bottom, you'll need to cover them up to prevent water from leaking out when you pour in the concrete.
2. Adding Water and Concrete
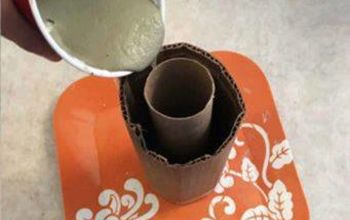
Pour about an inch of water into the bottom of each planter. This prevents the concrete from sticking to the bottom.
Now, pour a 50-pound bag of concrete into each planter. It's best to do this outside because concrete can be very dusty.
Pour a bit more water into the planters and start mixing the concrete.
You can use a drill with a paddle attachment or mix by hand if you prefer. Aim for a nice, consistent mix. If you add too much water, don't worry—it will dry up as you mix.
3. Inserting the Pole
Next, insert a 2x2 fir board or a 1-inch piece of metal conduit into the wet concrete. Use scrap boards and clamps to keep the pole level.
Ensure the planter itself is level before securing the pole to make sure everything looks even.
4. Letting the Concrete Set
Let the concrete dry overnight. You'll know it's set when the color changes and the concrete becomes firm. This will ensure your outdoor string light pole is strong and stable.
5. Leveling and Decorating
Once the concrete is dry, level the ground where you want to place your planters. You can easily move the planters by tipping them to the side and rolling them.
On top of the concrete, add white rock or potting soil and plants for decoration. This adds to your outdoor lighting ideas and makes the base look attractive.
6. Installing the Hooks and String Lights
Drill a hole through the top of the pole and insert a hook for the string lights.
Grab the string lights you chose for the project.
Attach your outdoor decorative lights to the hooks, ensuring they are secure.
Use zip ties to hold the lights in place and prevent them from coming loose in the wind.
Light up your nights!
DIY Outdoor String Light Pole Stand Tutorial
Now that your light pole stand is up and running, you can enjoy beautiful, well-lit evenings in your backyard. Whether it's for a family gathering or a quiet evening outside, these lights will enhance the atmosphere.
I hope this guide has inspired you to embark on your own project. Share your results or ask any questions in the comments below.
Enjoyed the project?
Comments
Join the conversation
-
I wish I could do this but I live in a mobile home community
 Donna Bates
on Sep 07, 2024
-
-
 Riv118432885
on Mar 07, 2025
Thank you for taking the time to share. Love it!
-











Frequently asked questions
Have a question about this project?
If you already have trees to hold the lights and wire, why do you need this pole thing?
How far apart did you put the poles to keep the lights from sagging?