Save Your Bottle Caps for These 8 Clever Ideas
Uncap your bottles and hold onto those toppers for some top ideas! Bottle caps are versatile and often overlooked as a crafting material, but they hold immense potential for imaginative projects. From home decor to jewelry and everything in between, these small metal and plastic caps can be transformed into both beautiful and functional pieces.
If you're looking for an innovative way to repurpose your bottle caps, this roundup of our favorite projects is sure to inspire you. Let's dive into these fun DIY bottle cap crafts!
DIY home decor using recycled materials
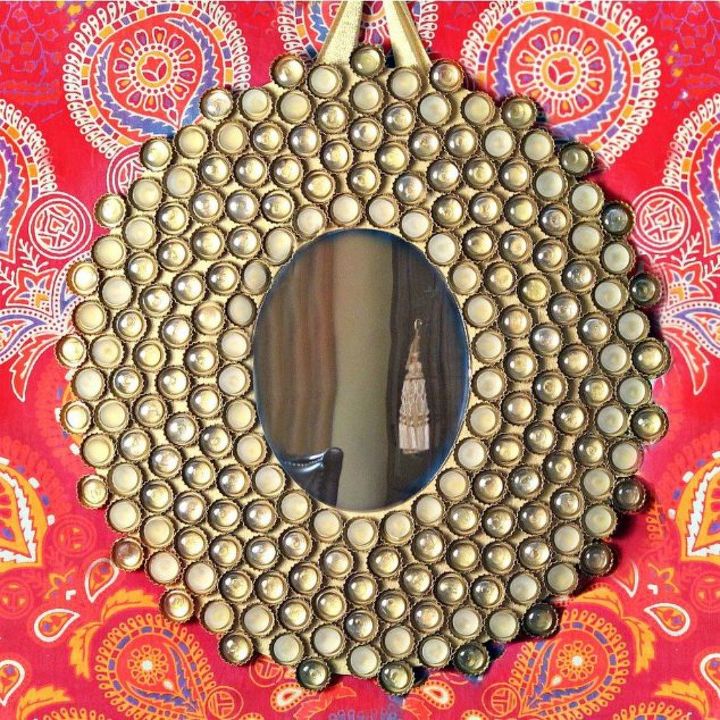
1. Bottle cap mirror frame
Create a unique and stylish boho mirror using recycled bottle caps. Fill the bottle caps with glass floral marbles in various colors for a glittering effect. Check out the tutorial video for detailed instructions on how to make this inexpensive yet chic home decor piece. Get tutorial here
Hometalk recommends!
Feeling inspired? Check out these recommended bottle caps for crafting that Amazon reviewers swear by![/hbox] Get tutorial here
2. Bottle cap reindeer
Glue googly eyes and buttons inside the upside-down bottle cap, then attach red string and branches for horns. Cute! This is a great idea for a last-minute festive craft to make with your children. You can attach these ornaments to your tree or give them away as gifts. Get tutorial here
3. Bottle cap floor
To replace the musky carpet in her office/craft room, Coraline collected bottle caps from friends and family for over a year! The caps were flattened and rebent into shape, then secured with tile mortar to create a unique floor tile design.
A star pattern was placed in the center, and the entire floor was grouted and coated with urethane for durability. Doorways were highlighted with a "doormat" pattern. The project was a success, and the room now serves as an inspiring space for future creative endeavors. Get tutorial here
4. Bottle cap mural
This impressive DIY project involved using bottle caps to create a unique design in an upstairs bathroom. The caps were filled with drywall compound to make them solid like tiles, and a rug-like pattern was created on the floor using tile mortar.
The design evolved based on available materials, and subway tiles and other elements were added to the walls. Various items like tiles, jar fillers, and beads were used to represent different elements like beer glasses and foam. The project took several weeks to complete and the result is amazing! Get tutorial here
5. DIY bottle cap gift ideas
Using bottle caps, you can create personalized gifts for anyone. For a bottle cap bracelet, punch 1" images, glue them inside the caps, cover with epoxy domes, and attach the caps together using jump rings. Add beads for extra flair. You can also make magnets, picture frames, keychains, jewelry, mirrors, charms, and more using bottle caps. Get tutorial here
6. DIY toothbrush hanger
To declutter and organize her bathroom, Amaryllis created a rope shelf for small containers and beauty products. She also made a DIY toothbrush holder by repurposing a large plastic cap.
After removing the labels, she carefully cut a notch on the side and spray-painted the caps silver for a more appealing look. It's a simple and practical solution for keeping the countertop tidy and maximizing space in a small bathroom. Get tutorial here
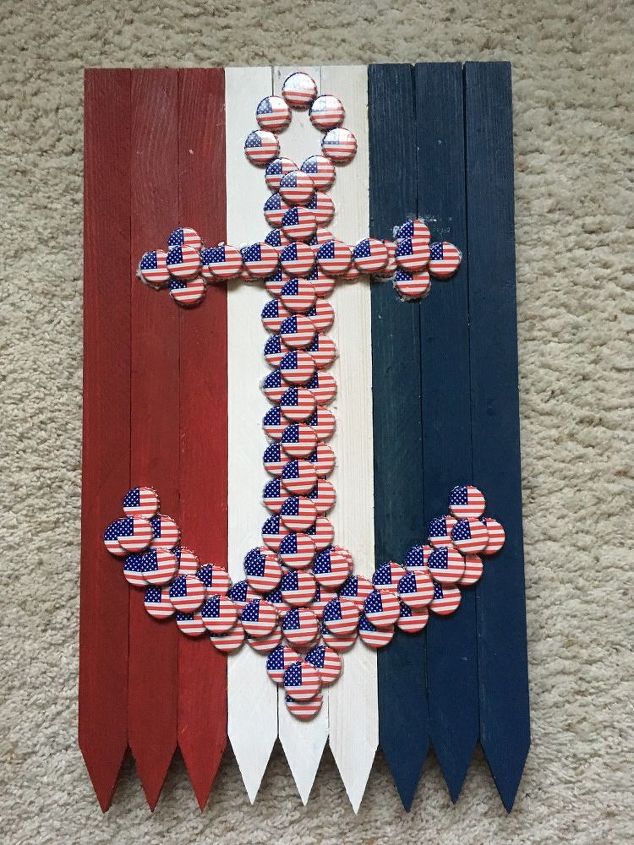
7. Bottle cap wall decor
In this DIY project, Nancy shares how to create outdoor decor out of bottle caps with a red, white, and blue theme.
Using garden stakes, craft paints, and flag-themed bottle caps, she painted and assembled the stakes, securing them together with wood glue. She attached the bottle caps using clear glue, creating a visual pattern. The finished product is a sizable and eye-catching decor piece.
You could create all kinds of different designs with this method, such as spelling out words using beer caps. Get tutorial here
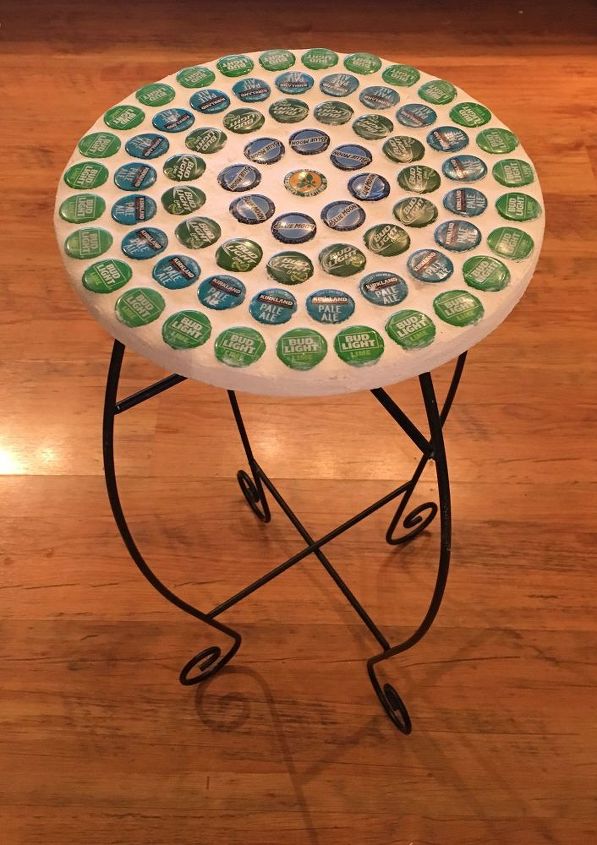
8. Beer cap table
Using saved beer caps, this DIY project involved covering a small table with a round red wooden top. The caps were separated by color and adhered to the table using tile adhesive.
After allowing it to set, grout was applied and smoothed, followed by sealing the grout. The finished table looks cohesive and super original. Get tutorial here


