90s Oak Dining Set Gets a Make-over

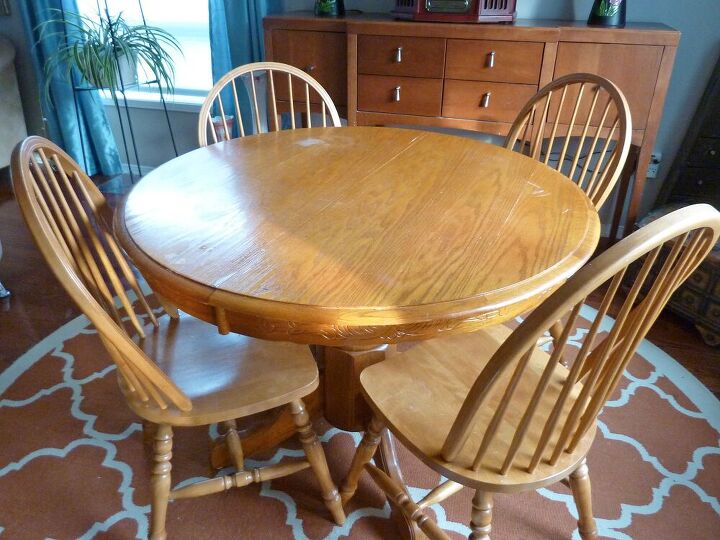
Our little dining set had taken some abuse over the years. And it was looking pretty rough with water stains and scratches, not to mention dated! It was getting to the point that I was embarrassed when guests stopped by, without giving me enough notice to iron off the water marks! So after putting it off for a very long time, I decided it was time to tackle this project. Let's learn how to refinish a dining table together.
Hometalk Recommends!
Because this is the only dining set we have, I decided to work on it in stages. While my daughter was away one weekend, I worked on the table. Because I couldn’t lift it out to the garage by myself while it was assembled, I removed the top from the base. This was very easy, there were just eight screws that needed to be removed.
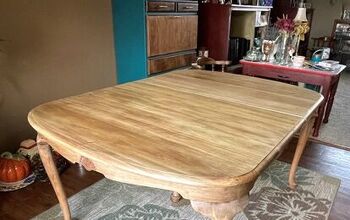
Then I brought both pieces out to the garage for sanding. I worked on the top first. I sanded it with an orbital sander and 80 grit paper. But as I got further along in the sanding process, it became clear there was a layer of veneer on this table!! At this point I considered hauling it to the curb – but after a little break (a glass of wine) I decided to carry on.
Because the veneer was still firmly attached, there was no way I was going through the effort of removing it! So I continued sanding, as gently as possible, and then applied wood filler to the little grooves and rough spots on the veneer, using a putty knife. Then sanded it again with a 220 grit paper to smooth it all back out.
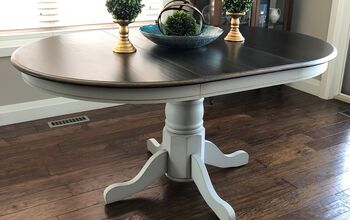
Then I stained the top using dark walnut gel stain, applied with a cloth. I would have loved to stain it to match our vintage side-board, but I’ve bought so many stains trying to match that colour and haven’t found one yet!
I gave the table base a very light sanding and painted it white. I also painted the lip on the table top the same colour. I’ve never used this shade of white before and it’s my new fav!!! Not as stark as some of the whites I’ve used in the past. It’s Fusion Raw Silk. (I’m going to use the left-over paint for my coffee table!)
Then I re-assembled the table and sealed it.
I used three coats of clear satin finish on the table top, applied with a brush. I did a very light sanding, using a sanding block, between coats. It only took about two extra minutes to do this step and it resulted in a beautiful smooth finish. I removed the dry chalky reside with a dusting mitt I got at the dollar store.
I sealed the base with two coats of matte wipe-on poly, applied with a damp cloth. I did a third coat on the ‘feet’, just so they had extra protection from being bumped with the chair legs. Then the table was complete!!
The next step was to work on two of the chairs. This way we would still have two usable chairs while I worked through this project.
I sanded the chairs with my orbital sander. I paid extra attention to getting the glossy coating off the seats and the outer ring of the back-rests (where people tend to grab it). The rest of the chairs I just gave a light sanding.
My original plan was to use a paint sprayer on the chairs. But I found the results were bumpy and it was creating a big mess on the surrounding garage floor (even though I used barriers). And it was sucking up the paint like crazy! Perhaps it was because I’m not experienced with a sprayer, or maybe my sprayer is not a good one. I don’t know! A lot of people swear by them. Either way, I stopped after the legs of the first chair were done and finished painting them the old-fashioned way, with a brush! I did two coats per chair.
Then I did two coats of the wipe-on poly on the entire chair and a third coat on the high traffic areas (seat, outer rim of backrest and front legs).
A couple weeks later I got around to doing the two remaining chairs – using the exact same process. I found it easier on my back to flip the chair upside down on my counter top while painting the legs.
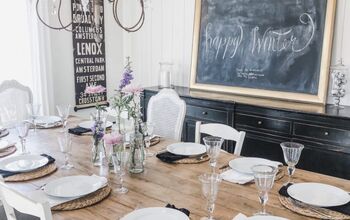
And this is our re-styled dining set! I’m so glad this project is behind me and that I no longer feel embarrassed when company stops by. 😊
Enjoyed the project?
Resources for this project:
See all materialsComments
Join the conversation
-
 Pah101490355
on Sep 05, 2025
Just beautiful! I love you left the top where the beautiful wood grain would show.
-
 Valerie Burge
on Sep 05, 2025
Thank you! :) I love the combination of natural wood and paint.
-
-
-
 Karen Todd
on Sep 05, 2025
What size round rug is under your set? Which is beautiful by the way!
-












Frequently asked questions
Have a question about this project?
Is the finish on the table hard enough to set a glass down without leaving a ring?
Your lamps are very interesting , stained glass ? Great job !
My set is on this idea but the top has decorative tiles on the top with just a little wood around them. Does anyone know how to restain the wood on this without scratching up the tiles when sanding??? Thanks in advance.