How To Stencil A Faux Tile Backsplash

by
Cutting Edge Stencils
(IC: professional)
5 Materials
A kitchen can look unfinished without a backsplash. Pretty patterned tile can be super expensive so we want you to consider using a tile pattern to achieve the same effect.
We'd like you to welcome back Greg, one of the Cutting Edge Stencils owners and stenciling expert. Greg has been hosting weekly stencil tutorials on our Facebook page. Go ahead and like our page so you don't miss out on these interesting videos. This week he chose to show our stencil fans how to paint a faux tile backsplash using the Fabiola Tile pattern.
Greg Swisher is one of the Cutting Edge Stencils owners and stenciling expert. Greg has been hosting weekly stencil tutorials on our Facebook page. This week he chose to show our stencil fans how to paint a faux tile backsplash using the Fabiola Tile pattern.
For those who love tutorials, you will love this instructional video.
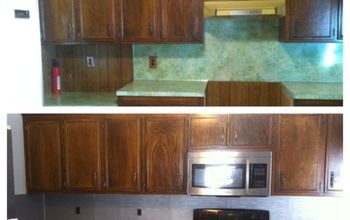
Let's walk through the steps for completing this project. Greg started with a freshly painted white wall in Benjamin Moore's Cloud White (flat). Here is his space before the makeover.
To create an interesting backsplash, he decided to use our faux tile pattern.
Greg was ready to start stenciling once he had his Portuguese tile inspired stencil in his hand. He used repositionable spray adhesive to help hold the stencil in place on the wall. Then he used the clip-on stencil level to ensure the pattern was even on the wall. We love this handy tool when completing a wall project.
He used a two inch dense foam roller to paint the pattern in a black hue. Greg made sure he rolled off any excess paint on a piece of paper towel. Too much paint will cause the design to bleed.
Here he is painting the tile pattern using the roller.
Greg used a stencil brush to paint the harder to reach spots like along the counter. He dipped the brush into the paint and then brushed off excess paint on the paper towel.
Once the entire design was painted, he carefully removed the Fabiola Tile Stencil from the wall to reveal the design. Seeing the painted pattern is always the fun part!
Since the backsplash was not complete, Greg lined up the stencil above the previously painted pattern. Our stencil designs make overlapping the previously painted part easy. Once that is lined up and your stencil level shows your design is straight, you can continue to paint the design.
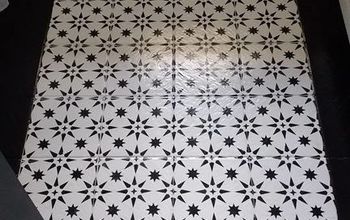
When the wall was complete, Greg added some stylish touches to his newly stenciled space. He then stepped back to admire the Fabiola Tile pattern. Are you ready to see his stenciled faux tile backsplash? We are about to flood you with some beautiful eye-candy!
We love the stylish flair that this Spanish inspired tile pattern gives this kitchen space.
Enjoyed the project?
Resources for this project:
See all materials
Any price and availability information displayed on [relevant Amazon Site(s), as applicable] at the time of purchase will apply to the purchase of this product.
Hometalk may collect a small share of sales from the links on this page.More info
Published February 23rd, 2017 1:43 PM
Comments
Join the conversation
2 of 117 comments
-
 Jill Dermer
on Feb 17, 2019
Love, love, love this project!
-
-














Frequently asked questions
Have a question about this project?
After he stenciled the first tile, how long did he wait to do the one directly beside it? Surely it cannot be done right away or laying the stencil over the fresh one would ruin the paint job.
Would washable or scrubbable paint in a semi-gloss water based finish be suitable to use instead of flat white and polyurethane? Also, what type of paint did you use for the black please.
Love this design , it's fabulous . My question is the grey lines that mimic grout ... is there a stencil for that? if not how was the accomplished ? Thank you