Desk Do Over

So, I picked this piece up from the Habitat Restore to give a facelift for an art show. The projects are to be auctioned off to benefit our local Habitat for Humanity! I walked the whole store a few times, but this piece spoke to me. I love it when that happens. 😊
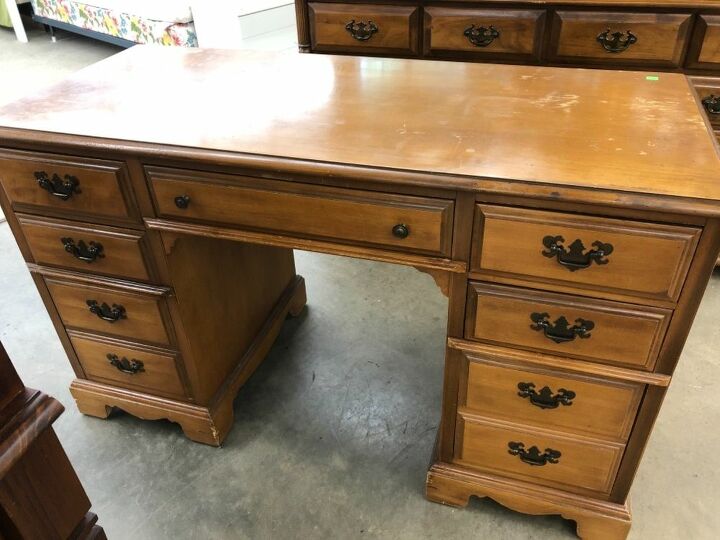
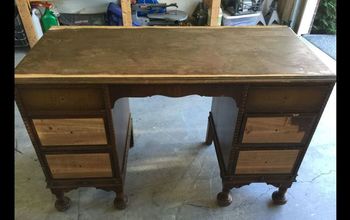
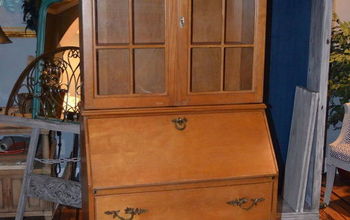
Here she is...sitting in the restore, hoping that somebody can see the potential. I could totally see it!! A little updating and a whole new life...
After wiping down with a damp rag, the sanding begins! I love using an orbital sander when I plan on staining anything. I start with a 120 grit, wipe down, and finish with a 220 grit for a smooth finish.
Since I also wanted to stain the top...I followed the same sanding routine for it. Look how pretty!
After sanding, wipe off any residual dust, and stain away! I chose early American for this piece. Personally, I just apply with a paper towel! Just don’t forget to wipe off any excess stain in about 15 minutes.
I followed the same steps for staining the top...look at that!! Now I have a surprise coming up, so keep reading!!
For this piece, I had a friend recommend “Jack Pine,” which is a Benjamin Moore paint color. Once I saw it...I was onboard.
Two coats required, and totally worth it. That surprise I mentioned is coming up....
Not the surprise just yet...BUT the hardware needed a little love as well. Rose gold to the rescue!! After two light coats of spray paint, I sealed the pulls with a matte spray finish.
Here is the surprise!! I ordered this Prima design transfer to use on this piece! The original plan was to apply the entire transfer to the top, but alas, it was too big. After a little planning, the decision to cut the transfer and still use it was made.
Well, if we had to cut that world map apart...maybe, just maybe, some could be applied to the drawers?! This was my first time using a transfer, and it was easier than you can imagine. Decide where it is going, CAREFULLY peel back off, and apply. Burnish it with the enclosed stick and gently remove plastic film. Some light sanding to make it blend in...and then you can apply a top coat. I decided to go with Dixie Bell GatorHide.
Did I mention it is a forward facing desk? So, a finished “back.”
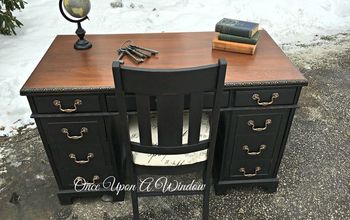
All done!! Next piece with a transfer, I will get a video of that being applied. What do you think?! I love it. Hope it fetches a pretty penny in the auction.
Enjoyed the project?
Resources for this project:
See all materialsComments
Join the conversation
-
-
 Lynnette Soltwedel
on Jun 25, 2020
No bubbles...it is globes. 🤷♀️
-
-
-
 MakeStuff
on Jun 25, 2020
I didn't care for the transfers, but I am glad you restored the desk to a nice condition. My parents have that style of furniture and too often I see people on TV paint the most beautiful furniture white or hack it up. Desks and dressers made from real wood, thick, solid wood are rare nowadays and such wood should be honored with a nice stain and kept classy.
You were creative, but it's a nice desk anyone would be proud to own. Last time we checked, one of the pieces we have was worth around $1200 and that was about 20 years ago. Unfortunately my father is using the furniture and he treats everything like a damn work bench. One day I will try to find a stain close to the original reddish brown color and refinish them myself and remove all the scratches and dings from his neglect.
-










Frequently asked questions
Have a question about this project?
On my side of the fence.....the paint looks real good, but the transferring of the map decal is not showin' up well, or is it my eye sight?????????????
JD Powers what site did you get your printouts and what type of paper and ink did you have to use.
Love it so much. My question is the time it took to make it, including drying time. I really love.