Split Foyer Staircase Gets a Makeover

by
Chic Geek House
(IC: blogger)
14 Materials
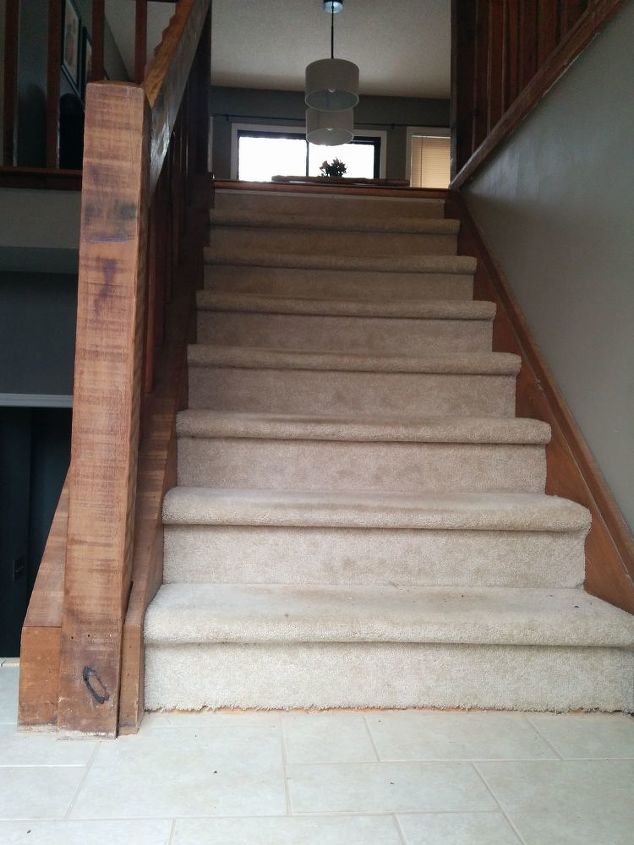
I have a classic 80's home setup. Many homes in my area have it; the split foyer staircase. Having ripped out old carpeting all throughout the upper part of the house, only the staircase was still covered in the antique ivory carpeting anymore. The rough cedar stringers, banisters, and spindles were looking worn and splintering all over, so I decided to give this area a makeover.
This is the original carpeting. We'd ripped up the tile on the entryway foyer the previous year. It had been this old almond/butter color the 80's were so fond of. We'd replaced it with very neutral off-white ceramic and styled it in the same pattern as the tiling on the lower foyer, which this staircase also lead down into.
You can see the new tilework here. We then replaced the front door with a strong metal structure that also had windows to allow for more natural light in the entryway. I had no idea at this time how much of a headache this rough cedar was going to be for me on this project.
I had no idea what was under the carpet, but I was prepared to have to replace every last tread. This is the first shot of me finding out what we were going to have on our hands, and I was so relieved to find builder's pine with rounded bull nose edges! This I could work with straight away. Yay! Less work.
All the carpet is now up. All the bajillion carpet staples are now pulled, and the entire thing has been shop vac'd and wiped down with a damp cloth.
There were a million holes left in the wood from all the staples and nails used to tack down the carpet. So I decided to use wood filler to go in and fill everything up. I may have been over-zealous with my use of the filler, but I was determined to fill all the holes!
My little Mouse sander wasn't going to cut it for getting all that filler sanded down, so I rented a power sander from the big box store and went to town. Those broncos kick! I had no idea how much power they had until I turned it on. Definitely got an upper body workout that day!
The power sander left the builder's pine a little more beat up than it already was, but once I stained it (walnut brown) and put several coats of poly on top of it, I thought it looked quite rustic and nice. Sorta hand-hewn.
Carpet had originally covered this small area between the stairs and the doorway. The carpet tack strips had been glued straight to the concrete foundation in this area too. So to get them out, we had to chunk quite a few places in the concrete. Luckily, the mortar for this tile filled that in. The previous owner of the house had left a box of tile in the garage from when they tiled this downstairs foyer, so that was convenient for filling this space in to match the existing stuff. This is me dry laying the tile in the space. I had just enough.
The top landing into the dining area had a bull nose we just couldn't figure out how to transition well for since we'd put in laminate planks the year before. In order to make this area transition well, I had to buy a laminate nose plank online from the big box store in a color close to my floor. Then, my hubs used a jig saw to cut off the bull nose flush with the riser. I went in with a diamond head dremel afterwards and cut out construction nails we encountered while doing this. After that, the nose fit flush over the riser's edge, making a nice transition.
I decided to go with a wide panel bead board for the risers. I just wanted them to have a little fun detail to them. Each riser was of a slightly different dimension, so I had to cut each piece of bead board to custom fit. Then, I spread a line of wood glue on, and secured it to the builder's riser with a brad nailer. The bead board was pre-primed white, so that was convenient for later. Here are the stairs all taped up and ready for painting.
Working paint into rough cedar is probably the most annoying project I've ever done. A loaded brush gets you about 6" of painted surface, and you find yourself taking 10 minutes to work the paint into every nook and cranny of a tiny patch... but man, it looks so much better when you're done.
Everything is painted! Woo!
We put a small strip of mosaic here to transition onto the lower steps down from the entryway foyer. I grouted this mostly by hand since the float just seemed to be smearing it everywhere.
A front view of the finished steps. So glad it's done!
Enjoyed the project?
Resources for this project:
See all materials
Any price and availability information displayed on [relevant Amazon Site(s), as applicable] at the time of purchase will apply to the purchase of this product.
Hometalk may collect a small share of sales from the links on this page.More info

Want more details about this and other DIY projects? Check out my blog post!
Published May 12th, 2015 10:55 AM
Comments
Join the conversation
4 of 150 comments
-
-
 April
on Apr 08, 2019
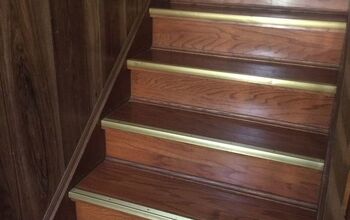
I have the same stairs - right now if have these awful metal strips with laminate over them, I though about taking it all off and just have the pine treads but I worried about the noise factor- does is sound like your walking on a bear floor - echo? thank you for your input - april (picture attached)
- See 1 previous
-
 Chic Geek House
on Apr 08, 2019
Depends on what else is in the room. If you already have a hard surface on your stairs, I don't think the sound would be much different than it already is if you were to trade out laminate for bare pine.
-













Frequently asked questions
Have a question about this project?
Any ideas on how to make stars not slippery? ( w/o using carpet or carpet tiles)