


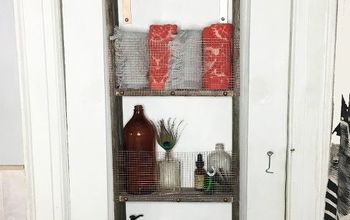
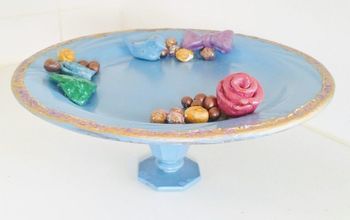
Get Trendy Anthropolgie Storage Using a Cake Pan

I saw a shelf at Anthropologie recently that was made to look as if it was formed from an old cake pan and figured it was a good project I could make myself. I love keeping up with the Anthro trends, but this one wasn't in my budget. So here's what I decided to do!
I got a cake pan and a bit of wood and some fun drawer pulls and made this great looking circle shelf in no time! You can customize your shelf with various drawer pulls or paint finishes to match any room or aesthetic! This cake pan shelf will work in just about any room and makes for a great character piece.
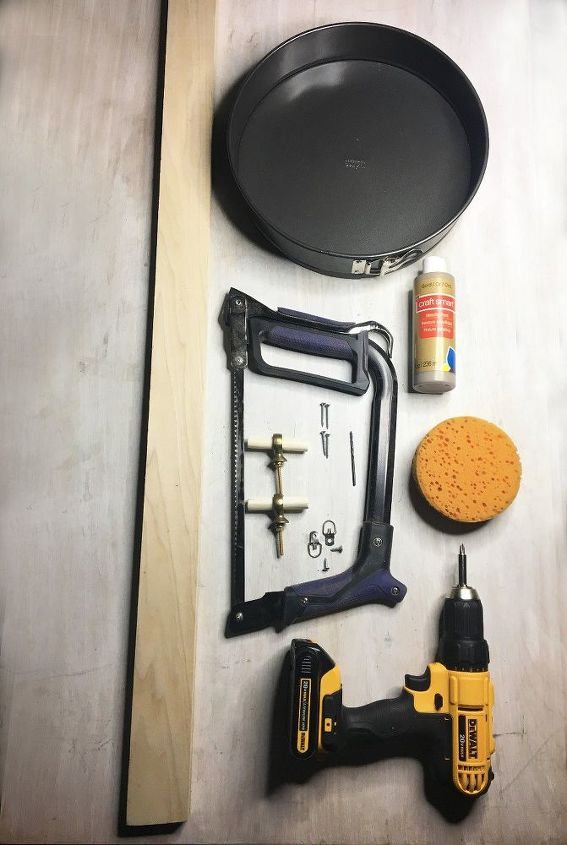
SUPPLIES:
-1x3x4 lumber
-Hacksaw
-2 Drawer Pulls
-4 1" Wood Screws
-12+" Springform Cake Pan
-Sponge
-Gold Craft Paint (optional)
-Drill
-Picture Hangers
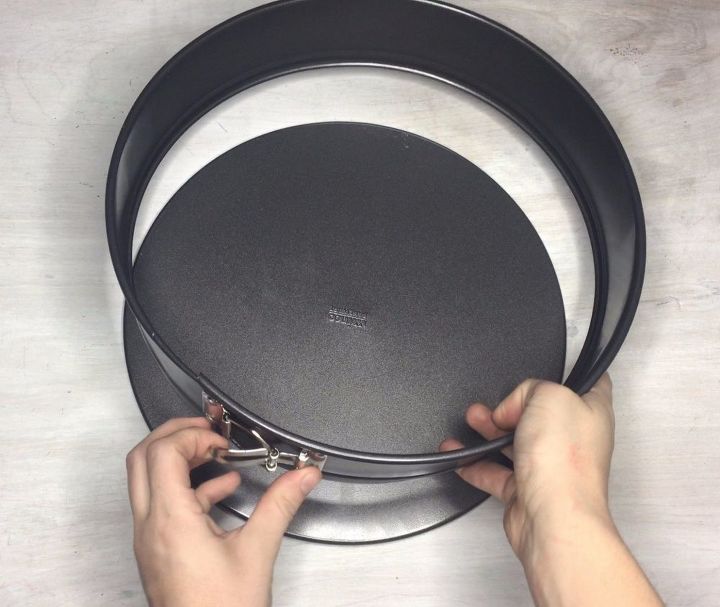
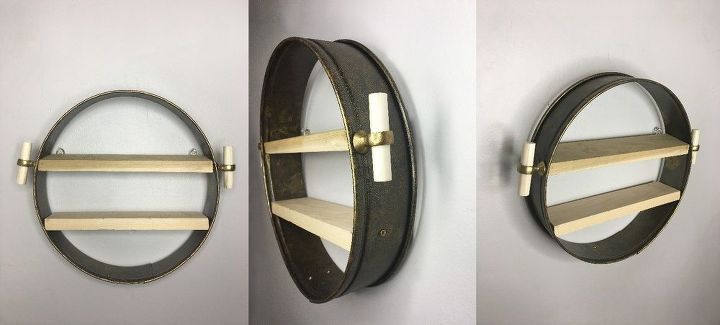
STEP 1: Remove the bottom of the springform pan and leave the clasp open so the pan is at it's widest point.
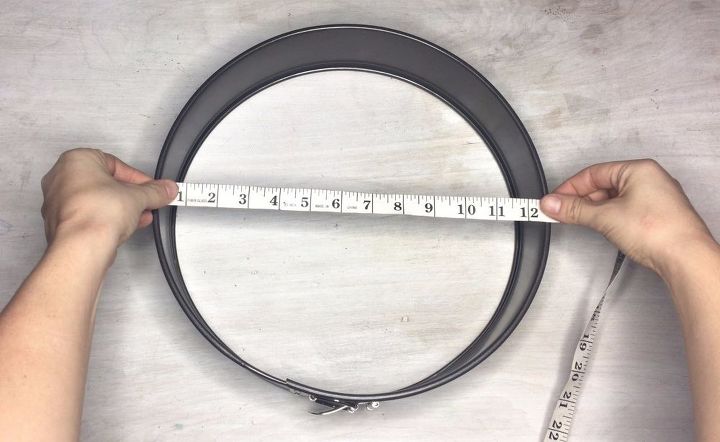
STEP 2: Measure the diameter of your cake pan in 2 different spots where you would like your shelves to rest.
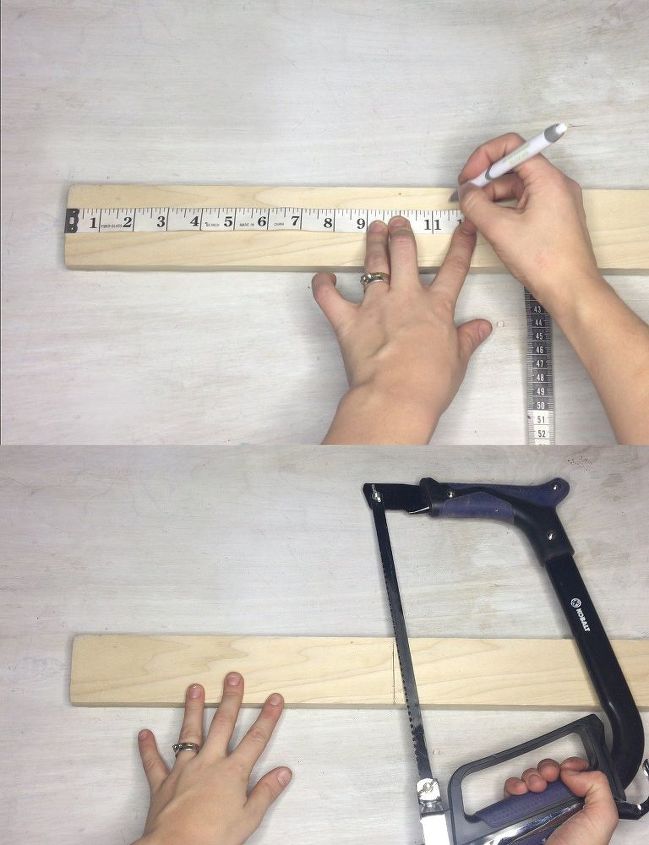
STEP 3: Take your measurements from step 2 and draw a line across the lumber at each distance.
Use your hacksaw to cut the pieces away from the wood.
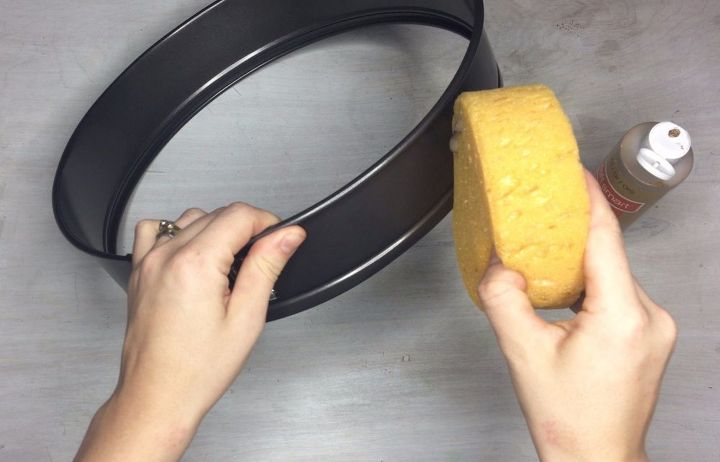
STEP 4: (optional) Place a blot of your paint on a sponge and dab it onto the ring of the cake pan and set aside to dry.
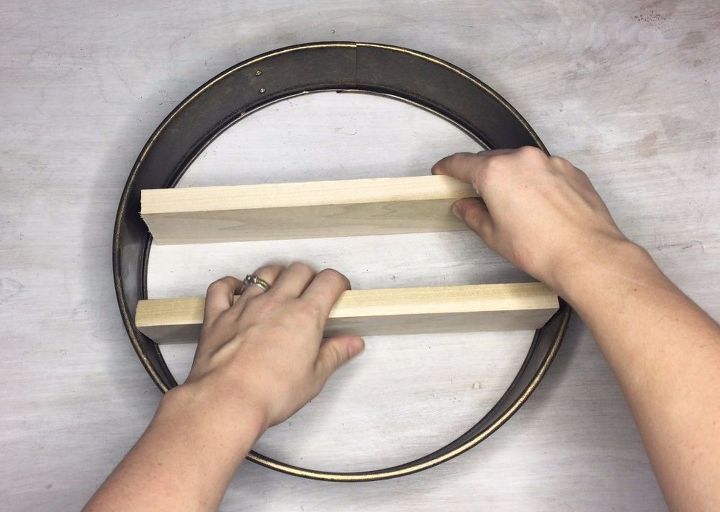
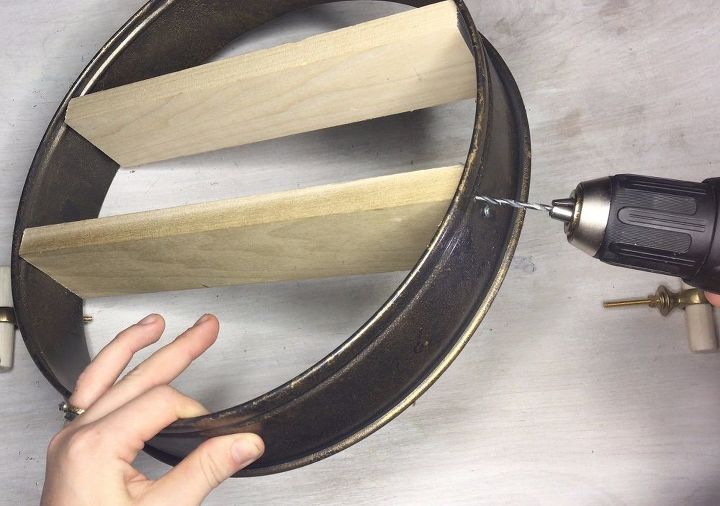
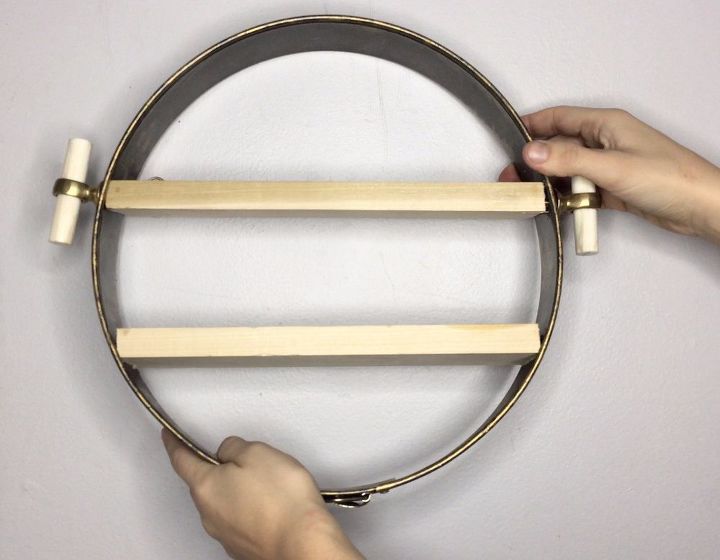
STEP 5: Place your wood pieces into the ring of the cake pan and make sure they are resting level.
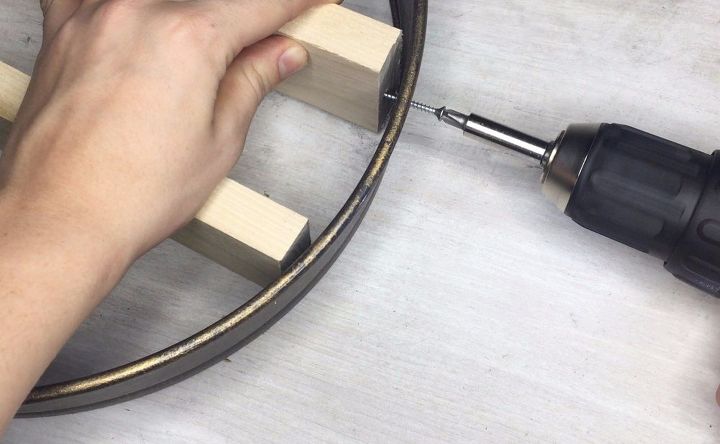
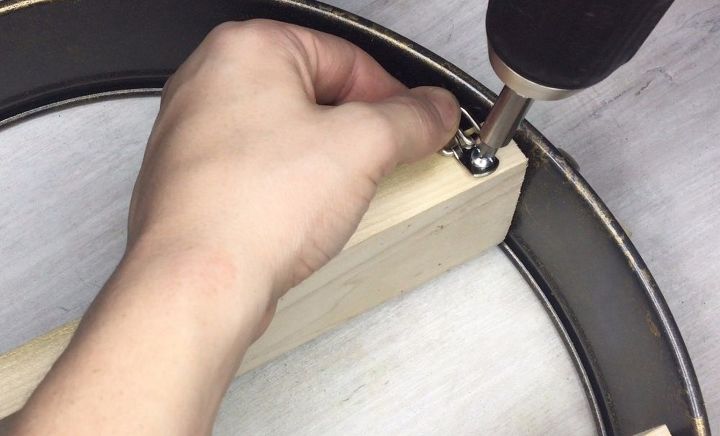
STEP 6: Take a drill and drill a pilot hole through the outside of the cake pan into the side of the shelves on each side.
STEP 7: Grab your wood screws and screw through the outside of the cake pan into the shelves to secure them into place.
STEP 8: Drill another pilot hole the size of the thread of your drawer pulls into either side of one of the shelves.
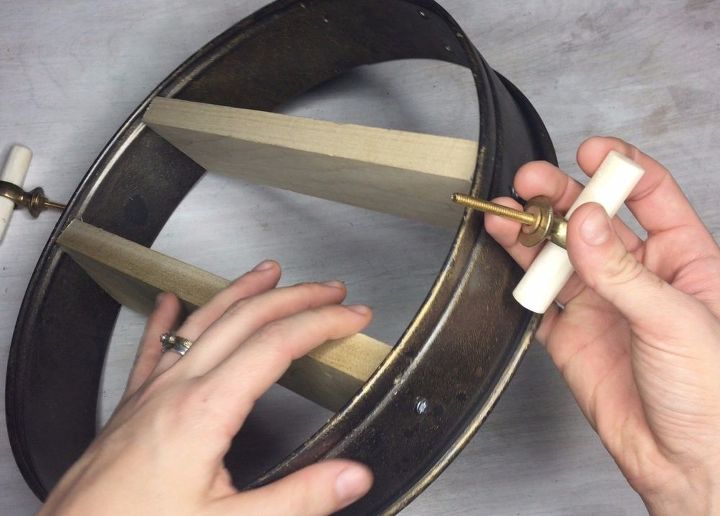
STEP 9: Screw your drawer pulls into the holes you just drilled until they are tightly in place.
STEP 10: Turn your shelf over so the back is facing up and screw picture hangers into the back.
STEP 11: Hang your shelf where you wish.
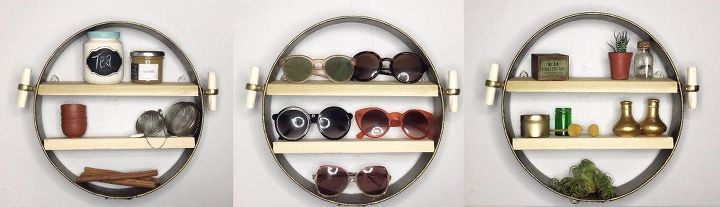
STEP 12: Fill up your shelves with whatever you wish!
As you can see this works great in the kitchen, as bathroom storage, or even as a nice place to store your sunny's
A very similar cake pan shelf was almost $150 at Anthropologie and I made this one for a small fraction of the price and it looks great to boot!
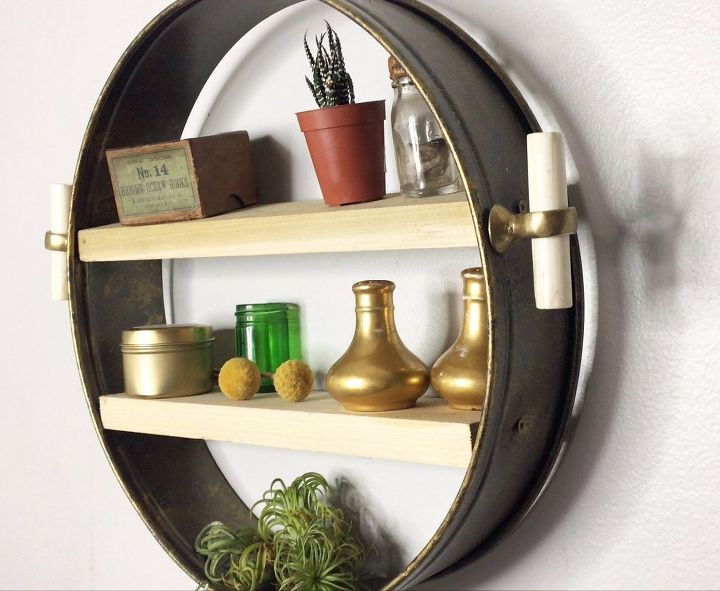
I love all the character that the handles added. Though you don't need them, they are a fun way to add some character to the piece.
Resources for this project:
See all materials


Comments
Join the conversation
-
I have several different sized old barrel hoops that I saved when the wood disintegrated. Those can be used also. :)
-
This is absolute genius! I saw that exact Anthropologie shelf a few months ago and drooled over it but the price tag made me walk away. Your version looks so professional. I love budget-friendly dupes because it leaves room to splurge elsewhere, I used my savings from a similar DIY project to treat myself after checking https://scentiment.pissedconsumer.com/review.html for a luxury fragrance I’d been eyeing. Definitely going to scour the thrift store for cake pans this weekend.


Frequently asked questions
Have a question about this project?
I love this idea and want to make a few. I wondered, though, at what point you closed the the latch on the pan? Also, did you glue the latch down or screw it down so that it would not spring open once the shelves were in place?
I have 3 of those pans garage sale finds! Great idea! I use them for making my own stepping stones.
How did you screw the drawer pulls on to the ring? The screws for the pulls you use, which I ordered, get screwed in from the inside