Another Faux Brick Wall ... With Real Grout!!

by
Elizabeth Fencl
(IC: homeowner)
7 Materials
$100
4 Hours
Medium
Hi Everyone, I hope all is well with you!
Don't you just love brick walls? I love to walk into a restaurant and see an old brick wall or maybe even as a backdrop for a lovely vintage dresser that has been painted with an gorgeous color. I feel like every time I watch a show on TV lately, there is another awesome brick wall. Well, I decided to redo the wall at the top of my stairs in my home and make a faux brick wall.
I will say, this project was quite easy, after I finally settled on a plan....
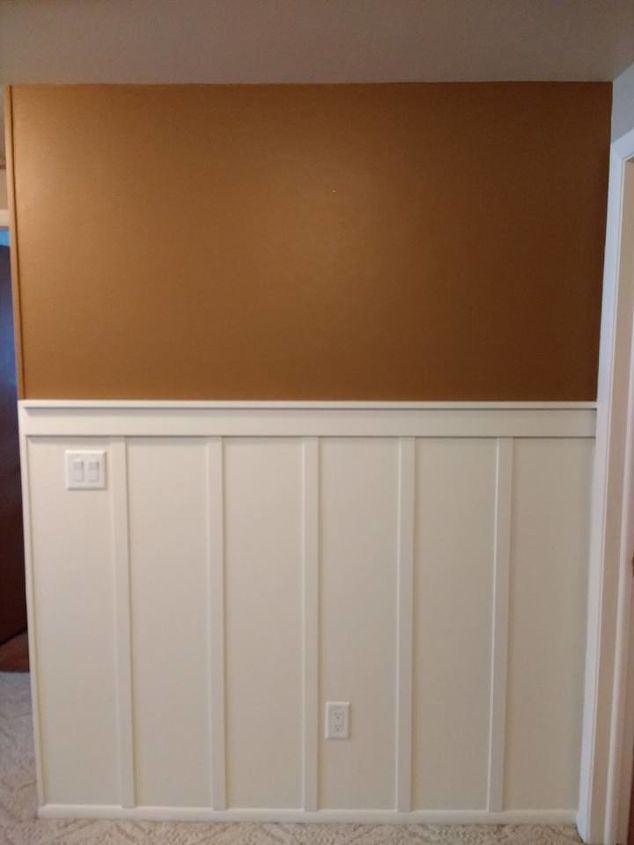
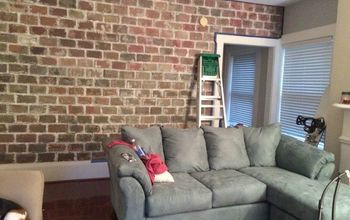
Now some of you may look at my before picture and think it looks just fine and dandy. I did this board and batten wall five years ago because I had done my downstairs bathroom (check out my post here: http://www.hometalk.com/diy/decorate/walls/bo...) and I liked it so much, I decided to do this wall. Well, I am sick of it and it is time for a change.
I purchased two 4x8 sheets of this faux brick paneling from Menards at $28.97 per sheet. After removing the board and batten (15 minute project), my husband and I attached the brick paneling to wall using my Ryobi Air Strike Cordless Nailer (best tool ever).
I thought perhaps I could hang these panels myself, but these suckers were heavy!! Nice to have an extra set of hands (and a nice hubby  ) for the installation, but I am sure with blocks to hold in place, you could do it yourself.
 ) for the installation, but I am sure with blocks to hold in place, you could do it yourself.
 If you go to my Facebook page: Creating Rustic Charm, you will be able to watch the live videos of my process and how I applied joint compound and grout to give the brick a realistic look: https://www.facebook.com/pg/creatingrusticharm/videos/?ref=page_internal
Please be kind, these were my first DIY video's and I'm not gonna lie, it was a wee bit nerve wracking not knowing what I was doing, major rookie. Give me a drill, paint brush or nail gun any day, but techie I am not.
I used a Japan Scraper to apply the grout and the Joint Compound to the wall. These are flexible, awesome tools for applying texture to a project. I bought my scrapers at a Professional Faux Finishing class that I took about 15 years ago. You can order these online at this site: http://www.paintanddesignstore.com/japan-scraper-set/
This is the after photo ...and then....you know how you get something in your head on how you want it to look when you are done...well.....
I scraped it ALL off!!! THREE TIMES!! I was going for the old world looking brick with lots of texture and it just looked fake. I...just...didn't...like...it!
Every time I would walk past this wall, I would look at it and it just bugged me. NOPE, didn't like it! So for a fourth time, I started all over again.
I remembered a post on Hometalk where a gal named Angie Harvey Hughes did a mountain peak method with chalk paint and I loved her end result. So I decided what the heck, I might as well try this method. You can check out her post here: http://www.hometalk.com/diy/decorate/walls/fa...>
I made the same recipe of chalk paint that was in Angie's post: 1 cup Latex paint, 1 1/2 Tablespoons cool water and 2 1/2 Tablespoons of Plaster of Paris. I mixed this all together and brushed my peaks and then painted the other bricks in a dry brushing method so that more color would show through. I even painted my grout! Yup, didn't like the color of that either.
Sorry, I should have taken a better shot of my mountain peaks but you can kind of make them out.
This method literally only took me approximately 4 hours, if that! The total cost was around $100.00. If I had skipped the Joint compound and grout, it would have only cost me around $60.00 (I had all the items to make my own chalk paint on hand). Live and Learn.
Here is my completed wall!! I can't even guess how many hours I put into this wall when it should have only taken me 4 - 5 hours from start to finish. Again, I had a certain look in my head that I was trying to achieve and I just wasn't accomplishing it, but I finally did.
I am so happy with the final result with this wall, it is exactly what I wanted!!
Thanks for reading my post, friends!! Happy DIYing!
Enjoyed the project?
Resources for this project:
See all materials
Any price and availability information displayed on [relevant Amazon Site(s), as applicable] at the time of purchase will apply to the purchase of this product.
Hometalk may collect a small share of sales from the links on this page.More info
Published February 27th, 2018 11:44 PM
Comments
Join the conversation
3 of 79 comments
-
-
 Tammy
on May 29, 2019
I simply love this! Great job! I have a rental property we are in and in the kitchen is a horrible idk what color dirt cream lol I love the brick however it’s not looks so hot! Any idea on how to turn that into a gorgeous wall of brick I’m sure I could paint it but that just seems to easy lol
-
 Stephie McCarthy
on Jan 17, 2020
I've seen panels from Amazon and HomeDepot that are embossed to look like brick. If they were attached with small nails that could be filled later, a temporary brick wall would be do-able. I recently did a post about how we painted some concrete panels to look like real brick. -- Stephie McCarthy
-
-










Frequently asked questions
Have a question about this project?
I absolutely love this!! I have been wanting to do a brick wall in my kitchen for years. But thought I would have to use real brick. Can you tell me what you did on the left edge? Mine is open also and I wonder how it would look if it’s not real brick.
Absolutely love your wall! Would love to do in my kitchen. Could you respond to the question about the exposed edge. What did you do for that side of the wall?
Do you have to seal the wall? Will the chalk paint mixture rub off when dry or wet? I’m thinking of doing something like this for a backsplash.