How to Make a Lantern: A DIY Home Decor Piece for Every Season

If you love DIY home decor crafts, you're going to love this easy project! I’m going to walk you through how to make a lantern that you can display in your home for any season.
Using basic materials like old picture frames and wood, you’ll be amazed at how simple it is to create your very own homemade lantern.
This post was transcribed by a member of the Hometalk editorial team from the original HometalkTV episode.
Tools and Materials:
- 4 small picture frames
- White paint (or any color of your choice)
- Wood glue
- Hot glue gun
- Wood pieces
- Wood stir sticks
- Rope
- A small piece of copper pipe
- Scissors
Hometalk may receive a small affiliate commission from purchases made via Amazon links in this article but at no cost to you.
1. Prepare the Frames
First, remove the glass and any backing from your picture frames.
We only need the frames themselves for this project.
After stripping them down, you’ll want to paint the frames.
I used white paint, but I left a little black peeking through for a more textured look.
Let the frames dry completely before moving on to the next step.
2. Glue Wood Pieces Together
While your frames are drying, take the thin wood pieces you’ve gathered for the base.
They might be a little too thin, so glue two pieces together using wood glue to give them more strength.
Paint these to match the frames and set them aside to dry before moving on.
3. Paint the Wood Stir Sticks
Next, grab the wood stir sticks. These will serve as the slats for your lantern. Paint them with the same color you used on the frames.
Let them dry before assembling them into the lantern.
4. Attach the Frames
Once everything is dry, it’s time to start putting the lantern together.
Use your hot glue gun to attach the four picture frames to one of the wood pieces (which will act as the base of the lantern).
Glue the frames so that they form a box shape.
Make sure everything is securely in place before continuing.
5. Add the Stir Sticks
With the main structure of your lantern complete, it’s time to add the stir sticks.
These will go horizontally and vertically across the sides of the frames.
Measure and snip the sticks to fit.
Then glue them in place.
6. Create the Handle
For the handle, take your rope and copper pipe.
Thread the rope through the copper pipe and secure it in place with hot glue.
Grab a wood piece and slide a bead of glue on the middle.
Place the handle on the bead of glue making sure it is secure.
Want to try another unique lantern DIY?
How to Make a Lantern: A Step-by-Step Guide
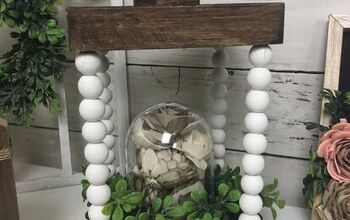
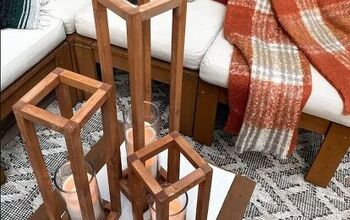
Your new picture frame lantern is ready to shine!
It’s simple to make, looks great on display, and gives your home that personal touch
Don’t hesitate to experiment with different frames or materials to make it your own.
I’d love to hear how your lantern turned out, so drop a comment below with your results or any tips you’d like to share!
Enjoyed the project?













Frequently asked questions
Have a question about this project?