Tin Can Lanterns

An uncle of mine used to make tin lanterns by hand and though these aren't as ornate as those, they are a pretty cute version on the cheap! So before you toss those empty cans in the bin, maybe take a gander at this little repurpose number! You can punch any design of your choice into an old can, place a light in it and you have a lantern! All you need is a couple cans, a drill, and a light, and you're in business!
We want to help you DIY, so some of the materials in this post are linked to sellers. Just so you know, Hometalk may collect a small share of sales from the links on this page.
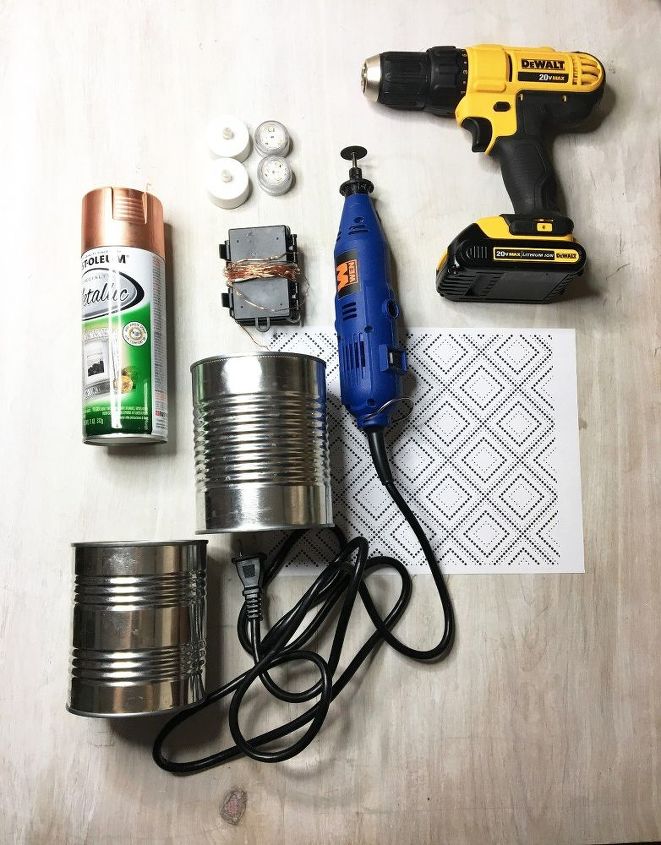
SUPPLIES:
-Tin Cans
-Rotary Tool (I've used this tool on a number of projects, and I think it's a great thing to have.)
- Spray Paint (optional)
- Lights (flameless candle, fairy lights, LED lights)
- Drill
- Thick Metal Wire (optional-not pictured above)
- Wire Cutters (not pictured above)
It might be a good idea to have a basic home tool kit handy also.
STEP 1: Clean your tins
Remove the labels and sticky residue from your tin cans.
STEP 2: Create a pattern for your lantern
I am going to show you 2 different types of lanterns you can make. The first is one that bows out like a Chinese lantern. To make this one you first make slices through the can about 3/4" apart from each other with a rotary tool. Continue making these cuts all the way around, but make sure to leave a nice inch or so at the top and bottom of the can. This rotary tool comes with 100 different attachments you can use. I also used this on my PVC pipe lights, so I'm a big fan of it.
If you want, you can add a couple extra light holes by drilling through the top and bottom border of the can.
If you don't want to turn it into a Chinese lantern style, you can just do a punch design. First draw the design of your choice on your can.
If you don't want to turn it into a Chinese lantern style, you can just do a punch design. First draw the design of your choice on your can.
Then take your drill and drill through the dots of your design being sure to puncture through the can.
STEP 3: Create a handle
Grab your thick metal wire (I like this one from Amazon) and make a nice arc around the top of the can to make a handle. Make sure to add on an additional inch on either side that will be pinched around the can.
Cut the wire to length.
STEP 4: Create two holes for the wire
Drill two holes at the top of the can directly across from one another that are large enough for the wire to go through.
STEP 5: Feed one end of the wire through one of the holes.
STEP 6: Twist the wire
Use your wire cutters or pliers to curve the wire around the edge of the can so that it secures the handle in place. Pinch the wires together to ensure they are closed. I love this wire, because it's secure but it also is flexible.
STEP 7: Finish forming the shape of the lantern
Now it's time to push out the center for the Chinese lantern. Put on a pair of work gloves and with your hand inside the can, press the center cuts out so that they bow nice and evenly.
STEP 8: (Optional) If you want to add a little extra character to your lanterns you can spray paint them.
STEP 9: Once your lanterns are dry just drop a light inside and watch it shine! I love these lights because because you just click them and go. They're also waterproof and much safer than regular wax candles.
These things are cute even in day light!
Look at all those designs cast on the wall! The possibilities are endless!
DIY home decor using repurposed tin cans
Enjoyed the project?
Resources for this project:
See all materialsComments
Join the conversation
-
 Ann Baxter
on Jun 09, 2020
freezing water in the can will also help keep the cans from bending when drilling or punching holes
-
-


Frequently asked questions
Have a question about this project?
Where did you get the lights
What is the best way to get the glue from the label off a can or jar?
What gauge is the wire?