Concrete Coasters With Gold Leaf Edging

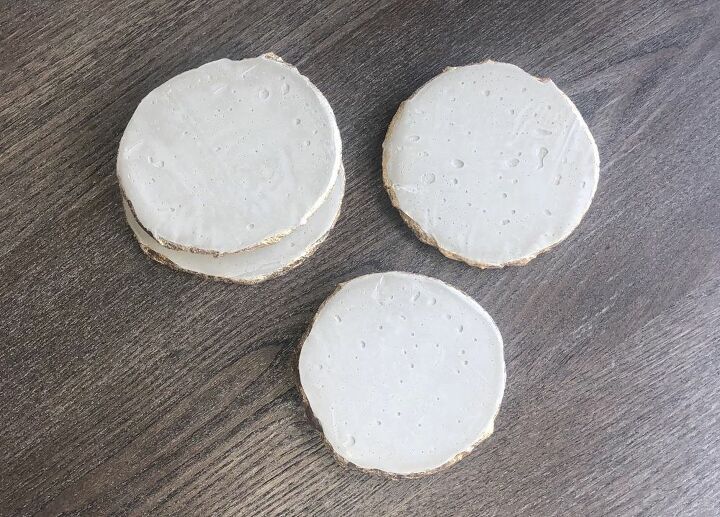
You may already know this about me...I absolutely love making coasters, and these in particular are so easy and satisfying to make. Made of concrete they are very sturdy and absorbent and the gold leaf edging gives them a beautiful geode-like look.
These are perfect for gifts or indeed to sharpen up any room’s decor.
Here are all the materials I used to make my coasters:
- Concrete
- Rubber gloves
- Mixing tub and mixing stick
- Fine sand paper/sanding block
- Glue
- Gold leaf
- Paintbrush
- Felt feet
- None-stick sheeting
For my full step-by-step tutorial and how to apply gold leaf please visit my YouTube channel, link at the bottom of my post.
First mix your concrete.
I used about 2.5 cups of concrete to just over half a cup of water. Mix very well until you reach a smooth consistency, making sure you get rid of all the little lumps.
Let the mix sit for just 2 minutes so that it stiffens slightly.
Spoon out 4 equal blobs onto your none-stick paper and flatten them out slightly by gently prodding each blob with your mixer.
Leave the blobs to sit for 5 minutes to stiffen further.
During that 5 minutes, line books, note pads or anything of equal height around the parameter of your coasters-to-be.
After the 5 minutes are up, lay more none-stick sheeting on top of your coasters and then lay a large flat item across the top. Make sure that this item is large enough so that it’s edges rest on your books/note pads so that all your coasters will be flattened to equal height. I used a place mat.
Leave to fully set over night.
The next day, remove the place mat and peel off the none stick sheeting. Then remove each coaster from the none-stick sheeting at the bottom as they may have adhered slightly during the bonding process.
As I used a plastic sheet, this left a shiny surface on the top of my coasters, so I buffed this away using my sanding block.
Next, it’s time to add the gold leaf. Apply glue to the edges of your coasters and then dab on pieces of your gold leaf. Do this all the way around on each of your coasters.
Buff off the loose leaf using your sanding paper/block to create a nice crisp edge and then use a clean brush to dust off any last bits of loose gold.
Lastly, add some felt feel to the bottom to prevent your surfaces being scratched, and you’re done!
I hope you feel inspired to give this tutorial a go.
For my full step-by-step video with voiceover, please visit my YouTube channel.
If you have any questions or comments then please leave these below and I will happily get back to you.
Please also visit my Instagram page for more crafty inspo.
Many thanks for taking the time to read my post!
Happy crafting!
Enjoyed the project?
Resources for this project:
See all materialsComments
Join the conversation
-
 Dl.5660408
on Oct 19, 2019
I really like how different they are, especially with the added bling of the gold.
-
-
 Cl.ebbing66
on Oct 20, 2019
This is a great idea. I've discovered that Moleskin works just as well, if not better than Felt Furniture Protectors. It cost next to nothing and you can cut it to fit.
- See 2 previous
-
 Mary Stevens
on Oct 26, 2019
It is usually in the foot care section of Walmart by the corn pads
-













Frequently asked questions
Have a question about this project?
I love to use coasters. I hate that most are not absorbent so when you take a drink, the moisture drips on me! Will these be absorbent? Why do you think they make them solid all the time, and non-absorbent! Kind of defeats the purpose! I would love to make these if they do absorb the drips!