Napkins and Mod Podge and Pumpkins, Oh My!

If you are one of those people that is saying “Keep your pumpkin spice away from my margarita!” you aren’t ready for this project yet, so keep scrolling my friends. So, this isn’t a new tutorial by any means but giving a tutorial is kind of like the telephone game. By the time you tell it in your own way, it is different than the original. So, just because there is an existing tutorial out there, go ahead and do your own tutorial with your own spin. I was reminded of how much I love decoupaged pumpkins when I saw 2 Bees in a Pod’s tutorial over on Pinterest. You must stop over and see her gorgeous pictures. I will add her link. https://2beesinapod.com/2018/09/07/chinoiserie-pumpkins-diy-blue-and-white-pumpkins-with-decoupage-napkins/
I am using her choice of napkins as one of my choices as well. At least, I think my blue one is the same as hers.
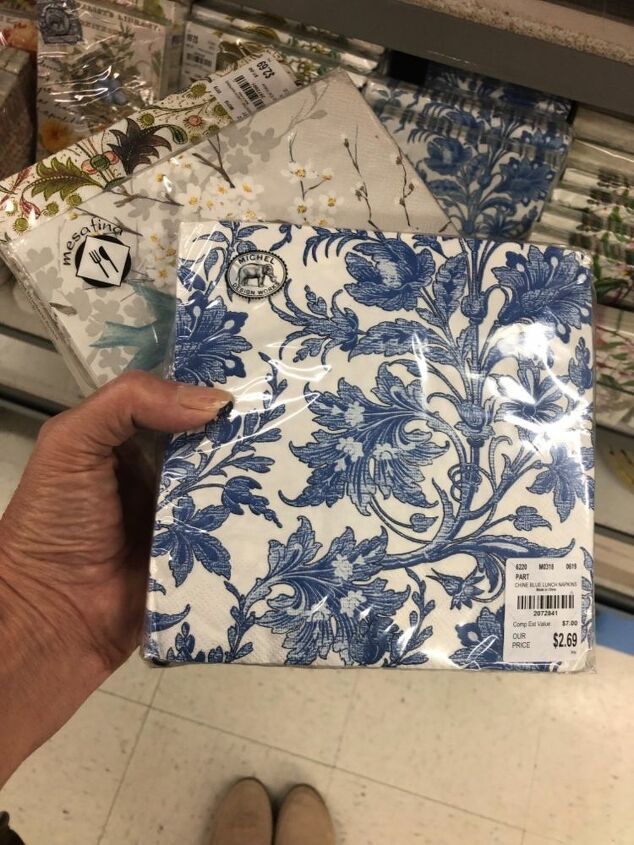
I found Tuesday Morning to have the best variety and choice of napkins. I think they are gearing up for the holidays because there were 2 endcaps loaded with napkin choices.
Next, I went to the Dollar Tree and picked up the pumpkins. I also swung by Michaels and bought some Mod Podge.
First pop the faux stems off, they are just held in place with a toothpick. The top picture shows 1 coat of white paint and the bottom shows 1 coat of gesso and white paint mixed together. It went much faster when I mixed gesso with the paint. I found using a bamboo skewer to hold the pumpkin very helpful.
The napkins come three ply so you will peel the two white layers away. The top decorative ply is the one that you will use.
The napkin is super easy to separate and then you are left with one very thin tissue paper-like piece.
I lay the decorative napkin over the top centered, just to make sure it will go around the pumpkin. If it doesn’t go all the way around, cut a circle and do the bottom of the pumpkin first then when you add the top piece, it won’t be so noticeable.
I remove the napkin and begin applying the Mod Podge to the top half of the pumpkin.
I would then press the napkin into the Mod Podge, smoothing out the wrinkles.
Lifting the unattached napkin, I would add Mod Podge to the bottom half of the pumpkin.
Again you press the napkin into the Mod Podge. There will be overlapping gathers, just because of the shape but it will still look fine.
At this point, I found that the damp napkin in Mod Podge combined with the Mod Podge on my fingers was doing more damage than good in handling my pumpkins. So I decided that I would let them dry on a sheet of wax paper over night.
Once dry, I could handle them freely without damaging the design to put on the final top coat of Mod Podge. I began with the bottom half and applied the Mod Podge half way down and then allowed it to dry before inverting it and doing the top half.
I searched my yard for some interesting stem replacements. I think my favorite one is that twisty one. It gives the finished pumpkin so much character. Here are the finished pumpkins that began with the napkins in front. I’m soooo pleased!
I hope you try some decoupaged pumpkins and post pictures, I would love to see them!
Enjoyed the project?
Resources for this project:
See all materialsComments
Join the conversation
-
 Bev52369644
on Aug 27, 2021
Very inspired! What type of white paint do I use?
-
 Stacy Davis
on Aug 27, 2021
Any type of white acrylic works. I used a sample pot of Valspar at Lowe’s. Hope you enjoy making this!
-
-
-
 Baj119754622
on Oct 12, 2024
I GOT SO EXCITED WHEN I SAW THE NAPKINS WERE FROM "Tuesday Morning"; WENT ONLINE TO SEE WHERE I COULD FIND A STORE.....THERE AREN'T ANY, ANYMORE. 😪
MUST BE AN OLDER POST
-
 Stacy Davis
on Oct 13, 2024
Girl! I got you! I went to HomeGoods, TJ Maxx and I’m getting ready to check World Market. All had similar choices. I’m going to do a new updated tutorial using napkins from Home Goods and TJ Maxx. Stay tuned. 😊 HomeGoods napkins are what I am attaching a picture of. I hope this helps!

-
-












Frequently asked questions
Have a question about this project?
Did you know you can buy mod podge at the Dollar Tree
These are so nice. Is it possible to waterproof them to set th am outside on a porch?
These are very cute, but I am loving the velvet pumpkin in the middle. Did you make it, too? If so, do you have a tutorial for it? Thanks!