How to Make a Cozy Reversible DIY Pillow Headboard

Looking for a quick and easy way to cozy up your bedroom decor? This DIY pillow headboard project is just what you need!


Whether you're a seasoned crafter or a DIY newbie, you'll love how simple and budget-friendly this project is.


This post was transcribed by a member of the Hometalk editorial team from the original HometalkTV episode.

Best fabric scissors!

Cut any fabric smoothly and easily with these bestseller fabric scissors that Amazon reviewers swear by!

Tools and Materials:

Hometalk may receive a small affiliate commission from purchases made via Amazon links in this article but at no cost to you.

Thrifted sheet upcycle

1. Gather Your Materials

The first step in creating your DIY pillow headboard is to gather all the materials you'll need. Head to your local thrift store to find some inexpensive flat sheets in colors or patterns that complement your bedroom decor.


You'll also need foam padding to give your headboard some structure, as well as fabric ties or ribbons to secure it to your bed frame.

Sew your thrifted sheets together

2. Sew Your Sheets Together

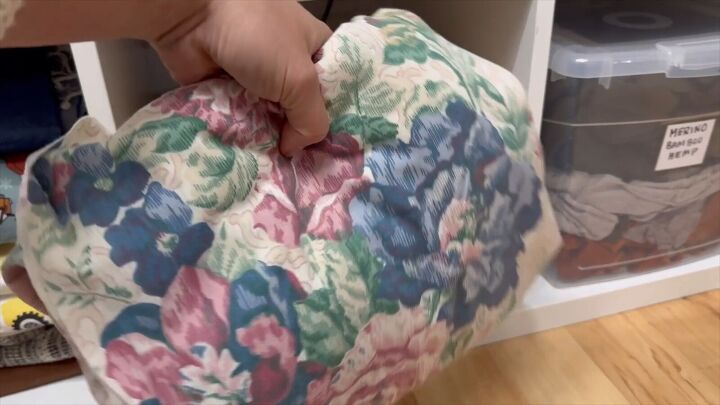
Once you have your materials, it's time to start sewing! Lay out your two thrifted flat sheets and trim them to the desired size for your headboard.

Homemade foam headboard instructions

Then, use a sewing machine or needle and thread to stitch the two sheets together along the edges, leaving a 2 to 3-foot opening at the bottom. This will allow you to insert the foam padding later on.

Budget-friendly pillow headboard

Once done, iron out your headboard cover.

Insert foam padding for comfort and support

3. Insert the Foam Padding

Next, fold a piece of foam padding to fit inside the opening you left in the sheets.

DIY pillow headboard ideas

The foam will provide support and comfort.

Budget-friendly headboard cover

Once the foam is inserted, fold the sheets over the foam to create the pillow-like shape of your headboard.

Secure fabric ties with a hot glue gun

4. Secure the Ties

Attach your DIY foam headboard to your bed frame using ribbon or fabric ties.

Quick and easy bedroom update

Use a hot glue gun to secure the fabric ties to either side of the headboard.

Easy DIY headboard pillow project

Then, tie both ends of the ties in cute bows to add a decorative touch to your headboard.


Ready to try another fun DIY project?

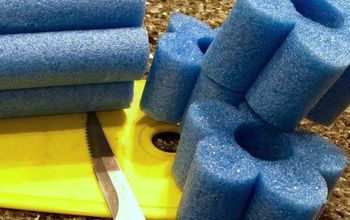
Discover how to make a headboard with pool noodles for a fun and budget-friendly idea.

Fabric headboard DIY

DIY Pillow Headboard Tutorial

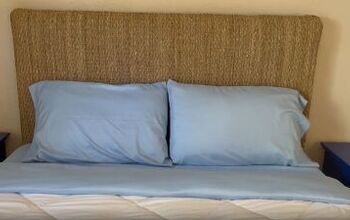
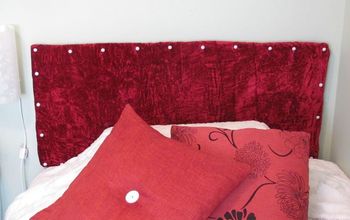
Once your headboard backrest pillow is complete, place it over your existing headboard.

Bedroom decor projects

The best part? It's reversible, so you can switch up the look whenever you want!

Reversible headboard ideas

Experiment with different colors and patterns to find the perfect style for your space.

Customized pillow headboard

So why wait? Grab your materials and get started on this simple yet impactful project today!

Frequently asked questions
Have a question about this project?
  3 questions
  • Susan Hughes Susan Hughes on Apr 25, 2024
    Are you meant to still be able to see the slatted headboard? I thought it was a cover?
  • Shi7079970 Shi7079970 on May 23, 2024
    Can you do this if you don't have a headboard
  • Daw84758464 Daw84758464 on May 25, 2024
    How can it be reversible if you glue the ties to the headboard?!
Comments
Join the conversation
2 of 14 comments
  • Lal92049631 Lal92049631 on Aug 14, 2024
    First, The only reason I opened this article was due to the title “Lay a Flat Sheet Next To Your Bed”. The title is misleading! What does it have to do with the project? Second, why would you “hot glue” the ties to the cover instead of, before sewing the sheets together, figure out where the ties need to go and “inside” (right sides together) place and pin the ties extending into the seam allowance, then when sewing the sheets together the ties are sewn in as well (for extra hold, back over the tie and sew forward again). From experience, hot glue on fabric, especially tying, untying, not to mention washing, the hot glue will not hold. At the very least, use fabric adhesive (washable) if sewing the ties in is beyond your skill level Last, this project does not inspire me. I want to see my headboard that matches the rest of my bedroom furniture. I am a quilter and to add color and to display my quilt, I folded it over the top of my headboard. You could also use an afghan, pretty throw or anything you have on hand, and so desiring (depending on the size of your headboard) either accent or cover it up completely. Just my opinion only.
    comment photo
  • Lal92049631 Lal92049631 on Aug 14, 2024
    In response to a comment above, her instructions do not, nor would I, attach the foam padding to the cover. In doing so, it would make washing the cover more labor intensive. Her instructions have you sew the opening partially shut and, after turning right side out, inserting the foam before placing on your headboard. I would, instead, fold both sheets (if you are going to use it as reversible) up 12 to 20 inches with wrong sides together before sewing sheets together to create pockets for the foam to “sit” in on the side showing as the headboard. My thoughts on sewing the sheets together makes it more of a “pillowcase” to slide over the top of the headboard (making the ties unnecessary). Her instructions are making the cover something you would fold over (with the foam to the side you want displayed) the headboard after inserting the foam and then tying the back to the front. Either process works. You do what works for you!
Next