Ornate Mirror Makeover

by
Heike Burleigh
(IC: homeowner)
5 Materials
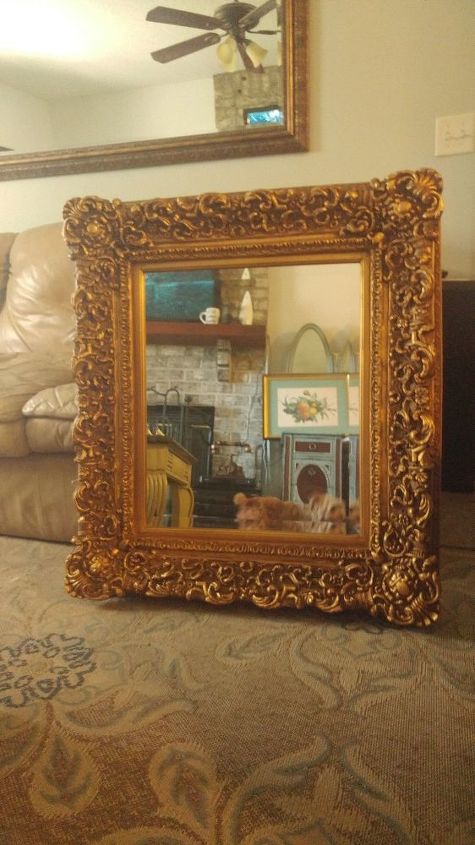
Recently I acquired this huge, chunky, really dated gold mirror. Be honest, would you want that to hang this in your house? Oh yes, I know. Gold is making a comeback (so they say), but I don't believe it's going to be a 'in your face' 'here I am' kind of gold. I think it's going to be more subtle. So obviously, this beast needed a makeover!
So here is the before picture. Let's just get going here. I know chalk paint requires no prep work, right? Well yes, but you still need to scrub that baby down. You don't want to paint over 70+ years of dirt.
We've grabbed everything we found, from wire brush to vegetable brush, to a rag over a screwdriver...... You get the picture..... And we gave it a good scrub-down.
The next step was creating the base coat, so we've painted the entire frame with Heirloom Traditions Paint (HTP) in Black Bean.
Be prepared to use every brush in your arsenal for this step. You see in the picture that we've used a chip brush. We've also used a chalk paint brush & several smaller artist brushes. This thing is so detailed & had so many high & lows, and you want to make sure that you cover every little bit of gold!
So this is after 2 nice & thick coats HTP Black Bean. Make sure to stipple your paint on, creating lots of texture & eliminating brush strokes.
Now we've added an extra step here that will save you some headache. Chalk paint can be wet distressed, so whatever you use over this paint could possibly distress the black paint, making the gold appear. And we didn't want this to happen. Which means we went ahead and sealed the paint before moving on. We've used HTP topcoat in flat for that. Just one coat for protection!
Right now it's looking pretty gothic, isn't it?
Now right here it gets to be fun & creative. We've drybrushed HTP Repose over the entire area.
Man, it's looking so much better already, but it just didn't have that WOW factor yet we we're looking for.
So we've picked up the Metallic Masters Tarnished Silver top coat & painted it all over the frame. Making sure to hit all the nooks & crannies.
This it's we're the entire finish started to POP! Oh me, oh my!!!
Now we couldn't just leave things be here. So as a final touch, we've decided to add some Rub & Buff Silver Leaf. We just lightly kissed the highs on the finish!
And voila! We had our WOW factor finish we we're looking for!!!
It's a stunning pewter finish, & believe it or not, the pictures don't do it any justice!!!
We hope you find this tutorial informative and hope you try this gorgeous finish for yourself.
We would love to offer you a 10% discount on your HTP material list, so feel free to use our coupon code YOUINMIND at checkout when ordering at www.heirloomtraditionspaint.com
You will also receive free shipping & a gift with orders over $75!
We are on Facebook as Serendipity Designs, you can give us a like at www.facebook.com/serendipitydesigns2013
We would love to see your take on this method, so please message us some pictures of your finished projects.
Enjoyed the project?
Suggested materials:
- HTP Black Bean
- HTP Repose
- HTP Metallic Masters Tarnished Silver Topcoat
- HTP topcoat matte
- Rub 'n Buff Silver Leaf
Published April 3rd, 2017 9:09 PM
Comments
Join the conversation
2 of 34 comments









Frequently asked questions
Have a question about this project?
Spray paint works awesome on these ornate frames, for your base. And as long as you make sure to hit it from every angle, you can get into those tight spots! I've used flat and gloss both and I was happy with it.
I have large black mirror but the frame is chipped, can I paste flowers to cover it?
I have the gold mirror but want to make it look “farmhouse”, not silver. What colors should I use?