Diy Anthropologie Inspired Mirror Using Redesign With Prima Products

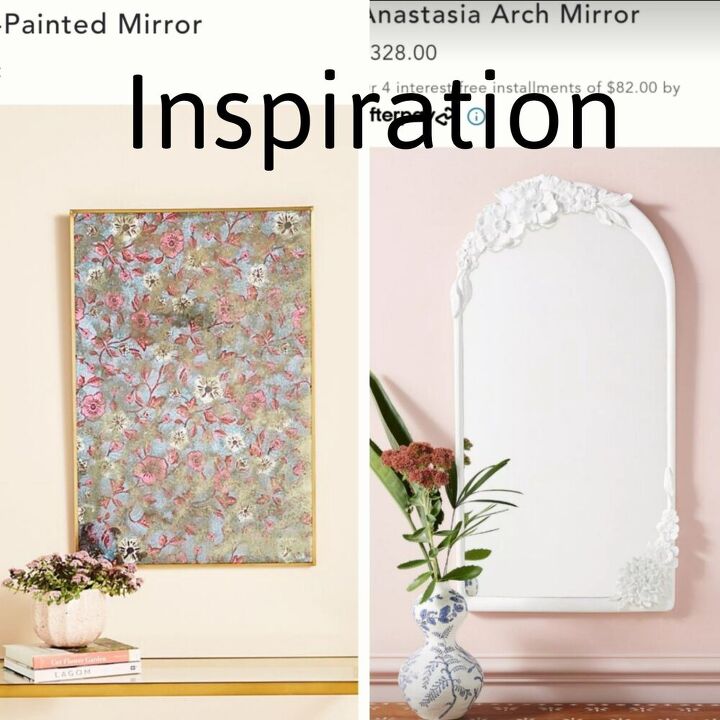
I saw a couple of mirrors on Anthropologie's website that I fell in love with! But who has almost $700 to spend on mirrors?
I decided to incorporate the two designs and make me own unique piece 😍
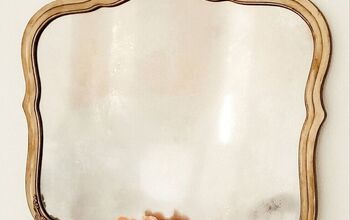
This mirror is extremely difficult to photograph, but in person, you can see all the different colors, the pattern, as well as your reflection. It's simply stunning!
I had just about everything on hand to create this piece, but I based the price off of someone having to purchase half of the items. And the time does not include dry time 😁
Gather Up Your Supplies
For this project, you'll need...
*Picture Frame - you want a large enough frame for your space, I chose an 11x14 frame. You also want the frame itself to be flat so that the paper clay appliques have surface area to adhere to.
*Krylon Looking Glass Spray Paint - chrome paint will not give you the same effect. I haven't tried any other mirror spray paint, but I'm sure they're all the same.
*Redesign With Prima Floral Court Decor Transfer - this gives you the floral pattern
*Redesign With Prima Decor Moulds- these give you the paper clay floral appliques. I used Cherry Blossoms, Winter Blooms, Wilderness Rose, and Forest Flora. Choose whichever moulds fit your style.
*Frenchic Furniture Paint in Sugar Puff and Ivory Tower
*Frenchic's Clear wax
*Frenchic's Browning Wax
*Frenchic's Gorgeous Gold Frensheen
*Waterbased Topcoat, I used Frenchic's Finishing Coat
*Wood Glue
*Paper Clay
*Corn Starch
*Numerous Detailed Paintbrushes
*Spray bottle
*Vinegar
These are the products that I used. You can certainly swap out for your favorite products or items that you already have at home
Paint
I did a 50/50ix of Frenchic's Sugar Puff and Ivory Tower to give me this beautiful creamy off white color. I then painted the frame as well as the cardboard backing
Make The Paper Clay Appliques
Using Redesign With Prima Silicone decor moulds, make your paper clay appliques.
First, lightly dust the silicone mould with corn starch. This allows the paper clay to release easily.
Then grab a chunk of paper clay, squish it in your hands to warm it up, then press it into the mould. Make sure the clay is level, you don't want extra clay around the mould.
Flip the mould over and slowly peel back so that clay pops out
Glue
Carefully pick up the applique and brush on wood glue to the back.
Lightly press it into place onto the frame.
Continue this process until you have the design you're happy with.
You can overlap appliques, just make sure that it's adhered to the surface and the other applique.
Do not wait for the paper clay to dry. Adhere them to the frame while they are still pliable.
Allow the paper clay to dry for 24 hours before painting
Glass
While the paper clay is drying, work on the glass.
Add 50/50 water/vinegar mix into a misting spray bottle.
Grab your krylon looking glass spray paint
Spray the Mirror
Liberally spritz the mirror with the vinegar mixture. It's ok if it pools in some areas.
Then spray the looking glass over top the mixture. Spray more in some areas, and only slightly mist others.
Allow to sit for 1-2 minutes and then blot away the liquid.
Allow to dry for 10 minutes and then repeat until satisfied.
Allow to dry completely for one hour
Apply Transfer to Backing
Now apply the transfer to the cardboard backing.
I used the Floral Court Decor Transfer
Measure it out and cut to fit.
Remove the backing and press it down into place. Using either the wood stick included with the transfer or the transfer tool and press down over the entire surface. Once you think you have it adhered, slowly start to lift a corner of the clear protective film. Continue lifting until the entire film is off. If at any time, the transfer isn't adhered, just place the film back down and press over it again.
These transfers are pricey, but totally worth it! Applying one or pieces of one to any project can easily being it from an average project to a WOW project. And if you sell your crafts, adding these can double, even triple your profits! And customers love the unique custom look
Continue to Apply and Burnish
For my mirror, I needed to use two sheets of the transfer. When butting up the design, you want to cut the edge of the second piece. Cut that small sliver off so the design is right at the edge. Remove the white backing and match the design up. Apply it just as you did the last piece.
Then take a clean rag and press down over the entire transfer.
Wax
Apply clear wax to the transfer.
I like to use pads meant for car wax. Works so well for any project!
Back to the Glass
To add an extra hint of age to the mirror/glass, I mixed up some black and Turquoise paint with water. These mixtures were 60% water, 40% paint.
Dip the brush into the mixture and fling it so that the paint comes off in tiny droplets. If there's too many drops, dab it away.
Gold Touch
Now that the Appliques are hardened, paint over them with the base color of the frame and allow to dry for 20 minutes.
Mix together the Gorgeous Gold Frensheen with the waterbased sealer. You want a pancake batter consistency (about 1tbs of Frensheen and 2tbs of sealer). Brush the gold metallic glaze over the appliques. Allow to dry completely
Wax Details
Apply clear wax to the frame.
Remember to always apply clear wax or sealer before using any colored wax. This acts as a barrier so that the colored wax doesn't soak into the paint and make it difficult to blend.
Apply some browning wax to the appliques and remove any excess using a rag or paper towel.
You can also apply Browning Wax to the corners of the transfer to age it some.
Assemble
Put the frame back together and enjoy 😍
You can find this piece, all of the Frenchic and Redesign with Prima products and so much more in our Etsy shop
The entire piece gives a slight reflection. I applied the looking glass heavier along the edges and corners so you can really see your reflection well in those areas
You can follow us and see our projects first on our Facebook page
Look at those flowers! 😍😍
This is the kind of project that you can totally make your own! Get creative and have fun!
Thanks for reading!
I hope you enjoyed this tutorial and are inspired to create a piece that fits your style! 😁
Enjoyed the project?
Comments
Join the conversation
-
 Linda Moore
on Oct 22, 2022
Just beautiful!!!!
-
-
 Dl.5660408
on Dec 31, 2023
Thanks Terry, I’ll try that
-












Frequently asked questions
Have a question about this project?
Couldn't you decoupage floral tissue paper to the painted backing or floral wallpaper attached to the backing for the same effect ?
What is the purpose of the vinegar mix?
WOW! Really cool!