Epoxy River Breakfast-Tray

Who doesn't like breakfast in bed?
We like to spend our Saturday mornings lying leisurely in bed, talking about the past week evens while drinking coffee and feasting on a delicious meal.
Our favorite weekend’s recreation activity demands a certain type of tray. It should be sturdy enough and have plenty of space to carry full breakfast for two. After failing to find the perfect tray in numerous stores, we decided to build one on our own. 
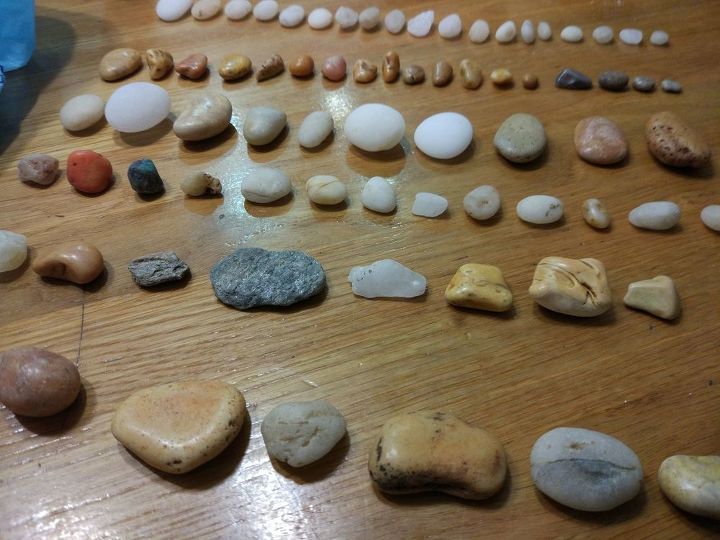
We had a collection of marble-stones and small rocks that we collected from several Greek islands during our honeymoon. Those seemed perfect for our project.
We started by sorting them out and choosing the ones that would fit into our river table.
We purchased a slice of East Indian Rosewood (also known as Sheesham Wood).
All types of Rosewoods are strong and heavy. They come in many different hues, each in it's on unique way.
We cut it in the middle and trimmed the edges.
We measured the contained box of the table and bought 1 gallon of a 1:1 ratio Epoxy.
Most of the common Epoxies come in a 1:2 ratio, but we wanted to try something else.
From our experience, the 1:2 ratios cure slower but is easier to mix and cost effective.
We build a mixing head from a wire to be used with our drill, and we used it to stir and mix the two components together.
We built a mold, out of white acrylic sheet and placed it on a sliced wood. That wood used to be our workshop table.
We had to make sure the mold is completely sealed. Normally we use duct tape, but in this project we used black wallpaper because it can to cover more surface.
We poured a thin layer (about 1~1.5״) of Epoxy. The thin layer is to set the woods as we desire, and afterward to make the rocks looks as if they’re floating.
Since the wood is lighter than the Epoxy, we had to keep if from rising up. We used our hand weights for that. We covered them in Nylon wrap.
When the Epoxy partly cured, we placed the marbles and stones into our "river". Then, we filled it to the top with the second layer.
We waited 24 hours for the Epoxy to cure completely. We had to use a hammer and a wedge to demold it.
The wallpaper gave it a nice water-looking touch at the bottom. However there were parts where it made the Epoxy difficult to cure. Overall we do not recommend using the wallpaper instead of a duct tape. Sure, it was easier to install, but much more difficult to sand and de-mold.
We sanded the Epoxy to make it smoother and level. When you sand Epoxy it loses it's transparency and becomes opaque.
To make it shine again we poured another thin layer of Epoxy on it (with a brush and our index finger in a glove)
Meanwhile, we built the legs of the table.
We used square Steel beams and welded it into a "C" shape.
We like the metallic look & feel and the way it matches the Epoxy and marbles, however it can easily be replaced with a strong wood.
Selfie time in the workshop!
Before assembling the table-top to the legs, this is an important step, like anything in the handmade work we re-measured everything because things might change.
When we were pleased we spray painted the legs black for a nice finish and to protect the steel from corrosion.
The finished product!
Breakfast in bed anyone?










Frequently asked questions
Have a question about this project?
What did you use the Silicone for ?.....I reread your post and didn't see anything about the Silicone ....
Would you make a version of this to sell? Ever since my husband passed away 8 years ago, I haven’t been able to work in our shop. My health has taken a very downward turn and I had to sell all of our tools to help cover medical costs, but I would love a lap version of this. Please let me know if that is something you would be interested in. Thank you so much for sharing such a beautiful piece of love in your life. We can all see how much joy the tray and the process has brought to you already ❤️
Hello. Where did you get your bedspread from? I really like all the purple color in it.