How to Organize Your Makeup With a DIY Bathroom Cosmetic Organizer

Are your bathroom counters cluttered with skincare bottles and makeup products? Let’s tackle this issue with a simple and budget-friendly DIY project.
Today, we’ll be creating a beautiful bathroom cosmetic organizer using affordable items from Dollar Tree. This organizer will help you store your products neatly while adding a decorative touch to your bathroom.
Ready to get started?
This post was transcribed by a member of the Hometalk editorial team from the original HometalkTV episode.
Tools and Materials:
Hometalk may receive a small affiliate commission from purchases made via Amazon links in this article but at no cost to you.
1. Prepare the Candlesticks
Begin by removing any labels or tags from your candlesticks.
Smear E6000 glue on the end of one candlestick.
On a second candlestick spread hot glue on one side.
Next, stick the two candlesticks together to create a column.
Repeat this step with two more candlesticks.
Balance a heavy object on top of each column while they dry.
Make sure to give the glue plenty of time to dry before moving on to the next step.
2. Paint the Columns
Once the glue is dry, it’s time to apply black acrylic craft paint to your candlestick columns.
Use a sponge paintbrush and make sure to coat each candlestick fully. This may require several layers of paint, so let the paint dry between coats for full coverage.
3. Attach the First Mirror
Once the candlestick columns are fully painted and dried, use E6000 glue and your hot glue gun to attach the bottom of a column to the center of one of the hexagon mirrors.
This will serve as the base of your organizer.
4. Stack the Second Mirror
Next, apply glue to the top of the candlestick column and center another mirror on top of it.
Set the stack aside and allow it time to dry completely.
5. Complete the Top Tier
For the final tier, take your second candlestick column and attach it to the back of the third mirror by applying glue to the center.
Once dry, stack the third mirror on top of the other two to complete your tiered design.
After everything has dried, clean up any excess glue using an X-Acto knife and clean the mirrors with glass cleaner.
Need additional budget-friendly bathroom organizers?
Stylish Bathroom Cosmetic Organizer Tutorial
Your bathroom cosmetic organizer is now ready to use!
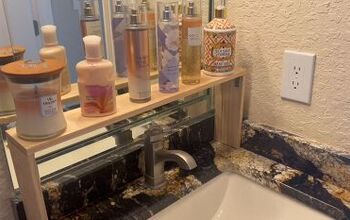
Place it on your bathroom counter, and organize your skincare or makeup products on each tier.
Using only Dollar Tree materials, you can easily make a tiered storage display that keeps your bathroom neat and organized.
If you loved this project, don't forget to share your own creations in the comments below! Let me know how your version turned out or if you added your own unique spin.
Enjoyed the project?

Comments
Join the conversation
-
-
 Debbie Westgate- Guyot-Sliwa
on Oct 31, 2025
I personally hate seeing products out in the open. I'm lucky to have a bathroom with a ton of drawer space! Only pretty items on my counters!
-







Frequently asked questions
Have a question about this project?