


PVC Pipe Yard Monster

Halloween is one of my favorite holidays! I love all of the fun decorations, but the big ones can cost ridiculous amounts of money!
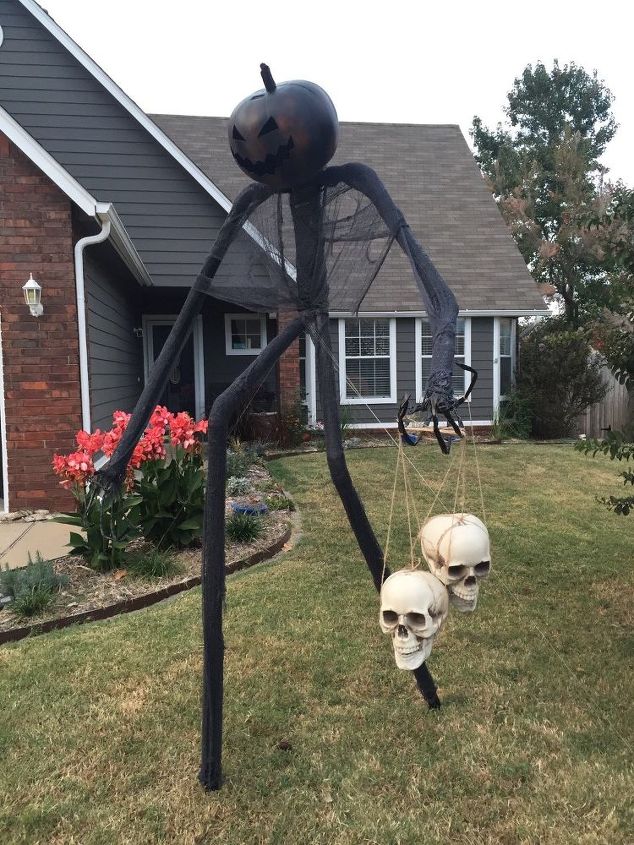
Here’s how we made our own 8 ft yard monster for around $35! After you make the ‘skeleton’, you can customize it with any outdoor-suitable decorations you want.

Supplies:
-three 10 ft PVC pipes (1 1/2” PVC conduit- we found ours in the electrical section of Home Depot. They are grey with one wider end.)
- PVC connector pieces (two 3-way Ts, six 45°, one 22 1/2°, one 90°)
- bale wire, wire hangers, or something similar
- black duct tape
- saw to cut the pipes
- two T-posts or similar to stick in the ground and inside the legs
- decorating supplies
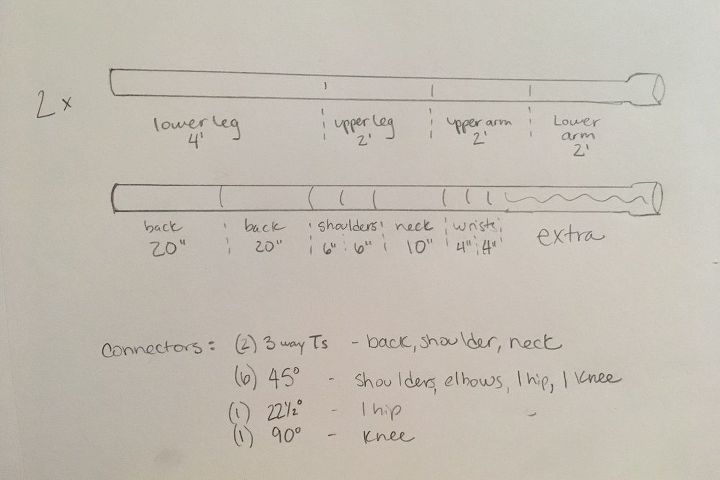
Two of the 10 ft pipes should be cut as follows: one 4 ft section, and three 2 ft sections. *The large end of the pipe should be used for one of the 2 ft sections!*
For the third pipe: two 20” sections, two 6”, one 10”, two 4”. The large end of this pipe will be extra/leftover.
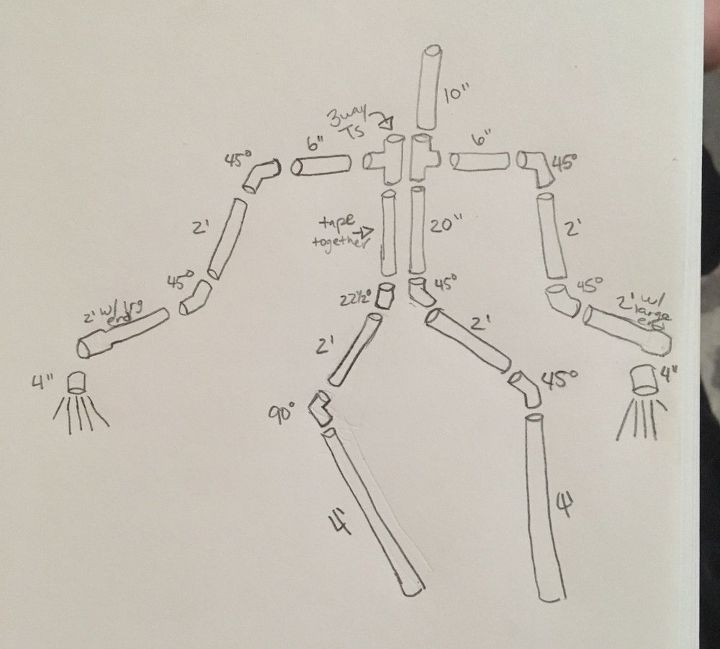
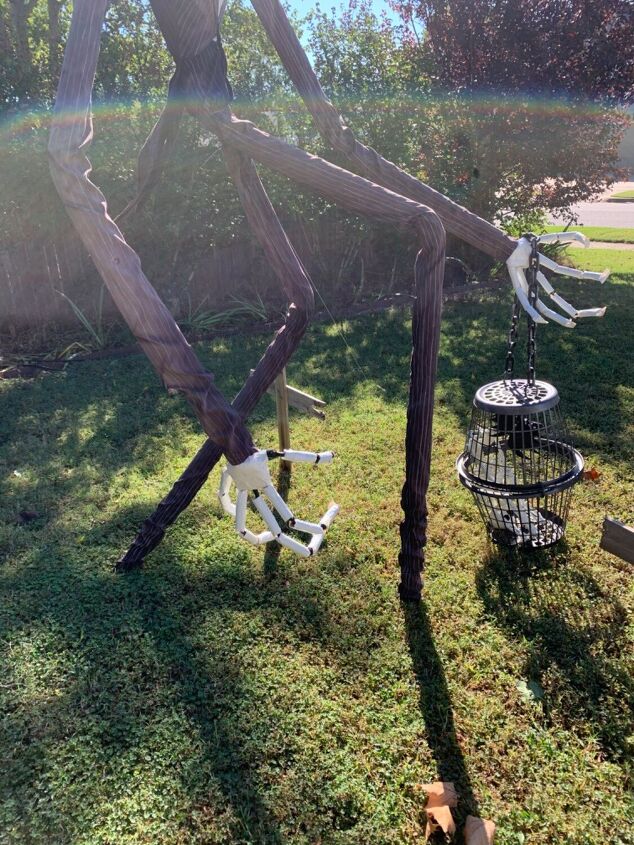
Once you have everything cut, this is how it will be put together. Twist the joints as needed to position them so they look natural.Tape the two back pieces together with the duct tape.
*We only put one piece in for the neck, even though there are two holes. The head we used covered the entire neck, so we were not worried about it. It does not really matter which side you put the neck in. You could also cut another piece from the leftover pipe and put two pieces in and tape them together like the back if you want.*
Rather than painting the pipes and joints, we actually covered everything in duct tape, but that part is up to you.
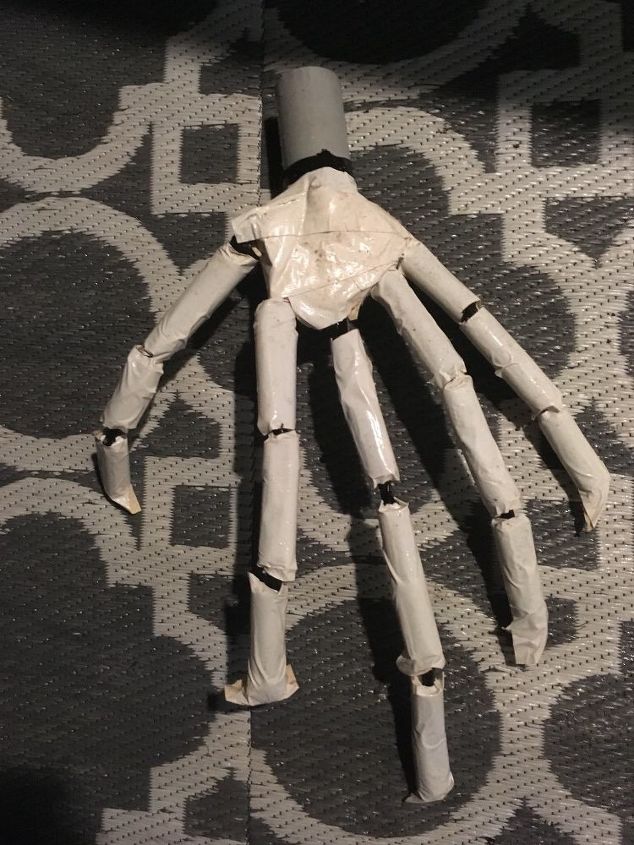
To make the hands, we drilled five holes along one side of each wrist piece. We then fed the bale wire through the holes and bent it into finger shapes. We wrapped duct tape around each finger and used it to connect the fingers and make a palm.
*Last year, we made our monster into Jack Skellington, so the hands have white tape on top, but this should give you an idea of what they should look like.
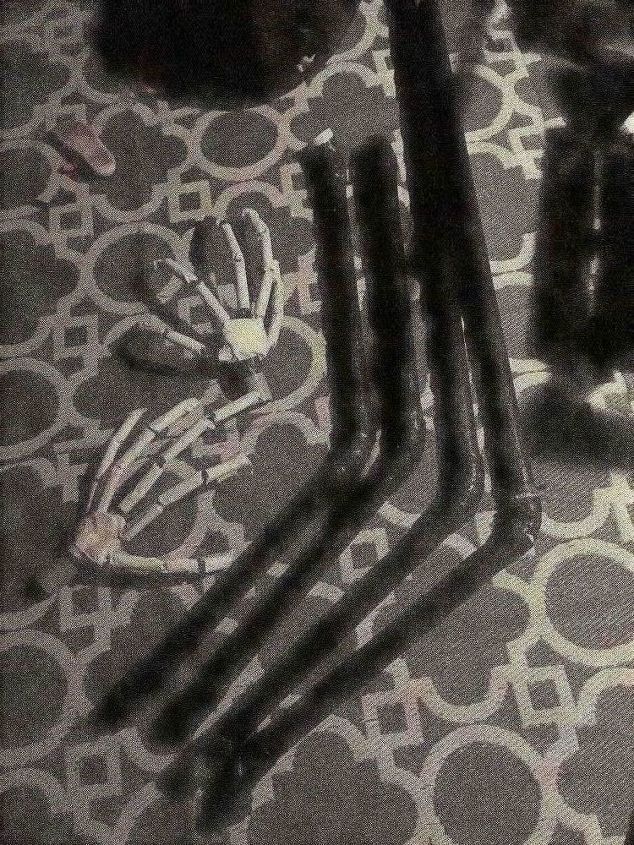
Here are most of the skeleton pieces, ready to be put together.
When you go to set him up, we found it is easiest to put the legs and torso together, put the T-posts up each leg, and push the posts into the ground before adding the arms and head.
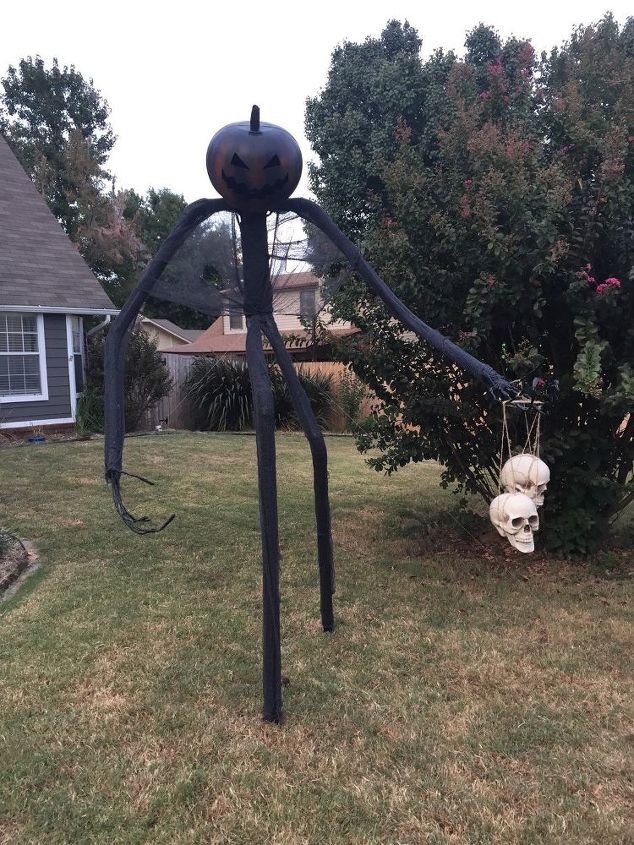
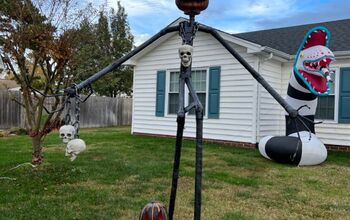
Now, you can decorate as you see fit!
This was the year we made our monster man, and I wrapped him in black gauze (bought at Dollar Tree). His head was made from a large plastic pumpkin pail, turned around and upside down, then I cut a scary face out and sprayed some black spray paint on it to darken it up a little. We also screwed a chunk of a branch into the top to make it look like a pumpkin stem. I fed some twine around two plastic skulls and hung them from his fingers.
*After decorating, we added some fishing line and stakes to help hold him up.*
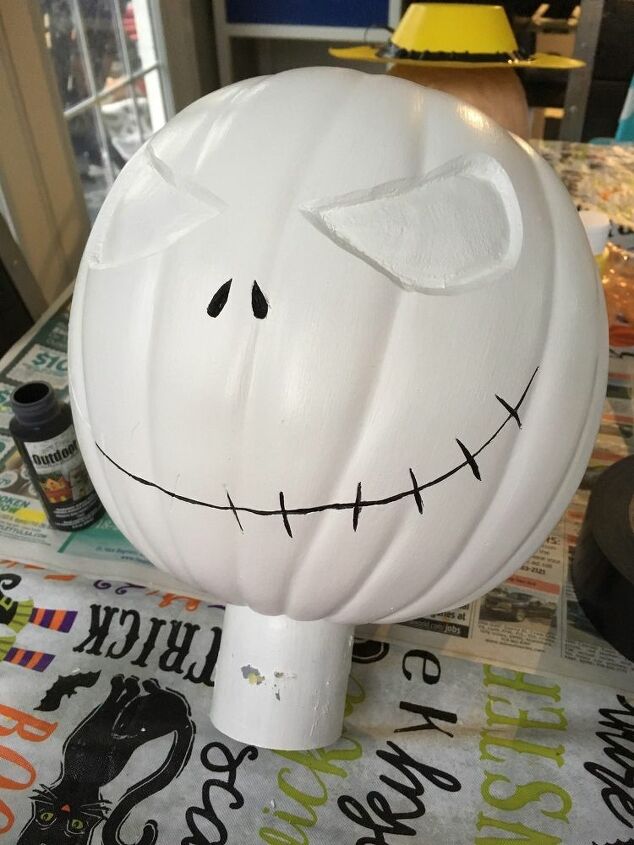
Last year, I made him into Jack Skellington from Nightmare Before Christmas. I sewed a fun suit for him and carved a new head for him from a foam pumpkin. After carving, I painted it with exterior paint.
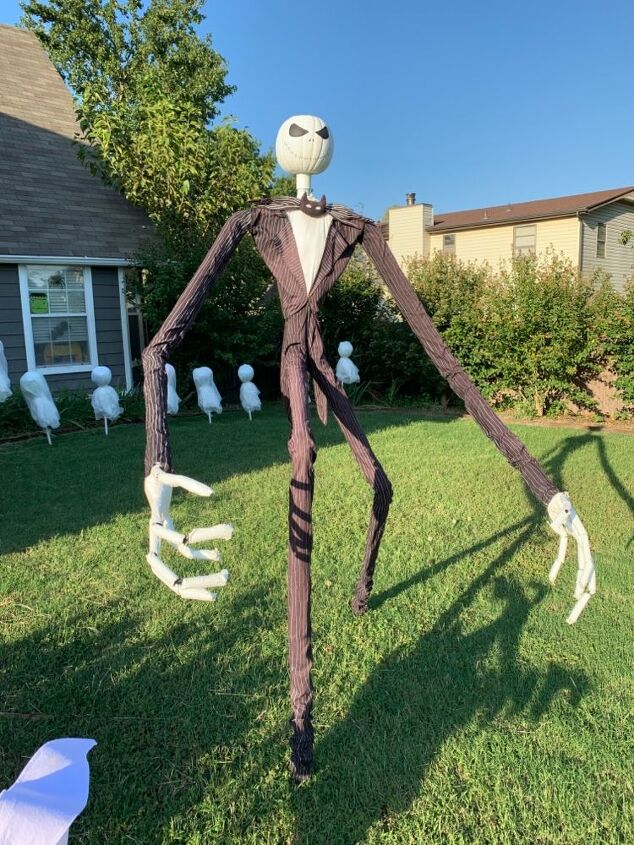
Have fun with it! Ours will be Jack again this year, but maybe next year we are thinking about making him into a scarecrow or other monster!
UPDATE: I have added a side view of his legs to help those having trouble with the setup. You can make EITHER side the front leg, as long as the 22.5° hip with 90° knee is the back leg. The hip joints should be angled outward slightly, NOT straight forward.
DIY Halloween Decor
Resources for this project:
See all materials


Comments
Join the conversation
-
This is how mine came out!
-
I am getting him up and attaching line and he seems sturdy, but then collapses at the knee joints. I don't want to use glue as I want to take him apart, but saw some folks were screwing through the joints which I can try. Any other suggestions for this? I have taped and the tape just busts through and I have retried twice with the 3rd time going to be my final.
2 things of note: It was closer to $120 for the project, which I was too invested to turn back at the point I realized this. And the 22.5/90 combo does not work, as I also noted other saying above. If you could add photos of putting him together with your angles (placement of legs) that would be great!
I super love this project and he looked great when I got him up. The shopping list and cut diagrams were so helpful!


Frequently asked questions
Have a question about this project?
I thought i posted a comment but i don't see it now :(. How did you get the t posts into the ground? Appreciate your time!
How did you start putting it together? Whenever i start it always falls apart. And are the joints glued in ? Or not
I've been wanting to do this since I saw this last year but we are in the middle of the city with a tiny urban yard (10'x10'). Do you think it would work if we cut the proportions in half?