How to Make Floating Tensegrity Table

HI! Tooday i will show you how i made a Floating Tensegrity Table. It's Floating Coffee Table or you can use it as bedside table. This post will go step by step of the process i undertook to build this mind bending project. Hope you will like it!
"Tensegrity, tensional integrity or floating compression is a structural principle based on a system of isolated components under compression inside a network of continuous tension, and arranged in such a way that the compressed members (usually bars or struts) do not touch each other while the prestressed tensioned members (usually cables or tendons) delineate the system spatially."
Hometalk Recommends!
final
For this project i used:
- Round wood cutting Board/ Diameter 300 mm - 2 pieces.
- Pine Board 18*30*2000mm - 1 piece.
- Steel Wire Rope, Vinyl Coated 2mm.
- Expansion with Round Hook (6 x 30 mm) 10 pieces.
- Paper clips
- Glue for wood
I drew a table in the size of 1:1. It is very convenient to measure the details and make accurate measurements
I used a protractor to set precise angles. I sawed with a Japanese saw. It makes a very precise and accurate cut. then I applied the part to my drawing and made the next cut
To connect the parts, I cut out half the depth of the pine Board, and then glued them together with wood glue. Pressed with clamps and left the glue to dry for several hours.
When the glue dried, I made a marking and drilled holes for mounting on Dowel Pins. I used 8 mm Dowel Pins. I also added wood glue and left it to dry for a few hours.
When the glue dried, I cut the dowel pins with a Japanese saw. I mixed sawdust and wood glue. I got wood filler. I filled all the cracks with it, waited for the wood filler to dry, and then sanded it with a grinding tool.
To connect the table legs and table top, I drilled holes for dowel pins. Then I added wood glue and glued the table top and table leg together. Left the glue to dry for several hours.
I sanded the table top with sandpaper. I covered it with Watco Danish Oil linseed oil
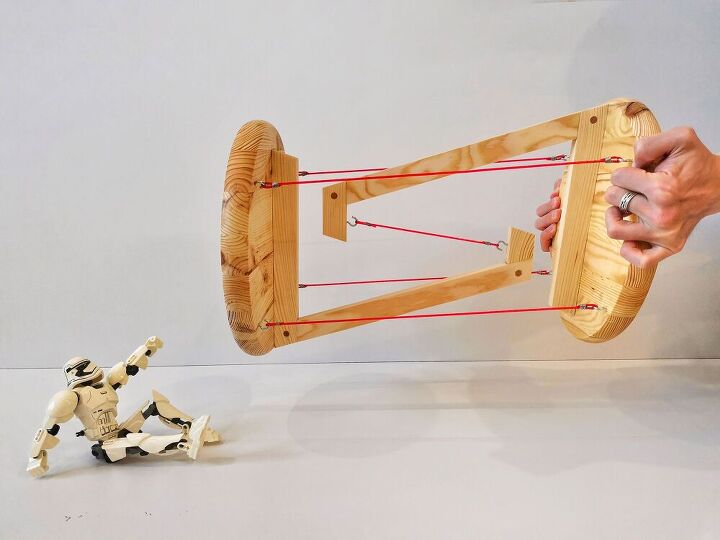
To connect 2 parts of my table together, I used a steel cable. I have a red cable, but you can take a transparent cable. Then the effect of levitation will be stronger. I used paper clips to connect the cable. To do this, I straightened them, and then wrapped them around the cable.
It remains to mark the holes for attaching the steel cable. I will use Expansion with Round Hook.
the table can support a weight of 5 kg. Maybe more, but I didn't dare to check :)
The final result! This is a fantastic table I got! I hope you liked it. you can find more information in my video. If you have any questions, ask them in the comments. I will be happy to answer them!
Enjoyed the project?
Resources for this project:
See all materialsComments
Join the conversation
-
-
 Colleen McAllister
on Jun 01, 2022
Great table, and I love your Stormtrooper helper!
-










Frequently asked questions
Have a question about this project?
what's the purpose of the FLOAT ?
This is an really cool and scientific table project. I like it a lot. I wonder if you could possibly build one that can hang? I know it maybe alot to ask. I so broke right now I can't buy wood to make any thing at this point. Covid 19 has really messed up my budget. I mean I'm broke most of the time being on ssd's. With food going up as well as utilities food the virus. I'm lucky to even put gas in my car. Is any one else having these issues to? I dont want any one to feel as if I'm praying for do I want any one to put really personal info out. Just wanted to know if any one else is feeling super painfully strapped like me.
ANY WAY I DO SO LOVE THIS PROJECT. THANK YOU FOR SHARING.
Really kewl table! Did you know that you can use lead crimps to close cables? They are used on sailboats and I used them to make a schoolhouse light into a pendant with a cable.