No-Sew Hula Hoop Canopy With Pom Poms

by
Julien K., Hometalk Team
(IC: paid contributor)
8 Materials
$30
1 Hour
Easy
I've always had a thing for tents, tee pees, forts and hideaways. And there is something so magical about a beautiful canopy that drapes over a bed. This version is extremely easy to make using a hula hoop and some sheer curtain panels. I added playful pom pom trim to mine for a special touch. Give it a try and have sweet dreams under your beautiful canopy!
We want to help you DIY, so some of the materials in this post are linked to sellers. Just so you know, Hometalk may collect a small share of sales from the links on this page.
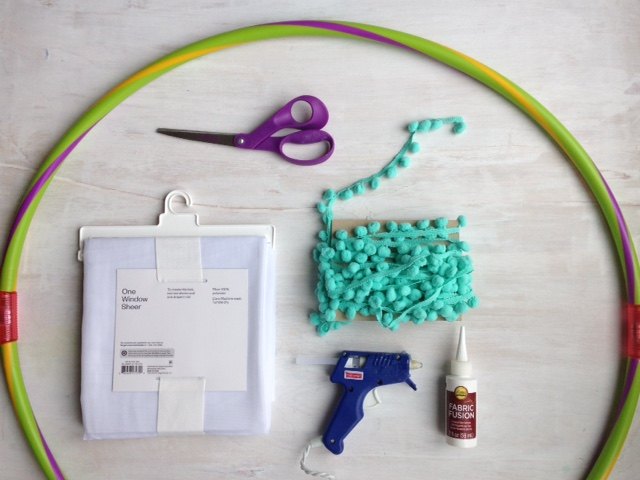
Materials I used for this project:
- Hula Hoop (Amazon)
- Sheer Curatin Panels (68" Long) (Amazon)
- Pom Pom Trim (Amazon)
- Rustoleum Spray Paint (Amazon)
- Plastic Packing Tape (Amazon)
- Hot Glue Gun (Amazon)
- Ceiling Hook (Amazon)
- String (Amazon)
- Fabric adhesive (Amazon)
Step 1: Cut your Hula Hoop.
If your hula hoop doesn't disconnect, slice through it in one section only to create an opening.
hr][/hr]
Step 2: Paint your hula hoop.
You will see the hula hoop through the sheer panels, so be sure to paint it if you don't want to see those bright and flashy colors popping through.
Step 3: Glue on Trim.
Ensure you purchase enough pom pom trim for your curtain panels. They will be applied to one edge only, so you'll need two separate strands the same length of the panel. Using fabric glue, carefully apply it the the edge of the first panel. Then, apply is the the edge of the other panel.
Step 4: Thread panels onto the hoop.
Thread the first panel with the trim applied on first, ensuring the trim leads when you put it on the hoop. Next, thread the two panels without the trim onto the hoop. Last, thread the final panel onto the hoop with the trim facing the outside.
Step 5: Tape your Hoop.
Using heavy-duty packing tape, close the opening of your hoop. Tape it back together so it is closed securely and none of your curtain panels can slide off.
Step 6: Cut your String.
Using string or ribbon, cut 4 equal length pieces at least 15" long.
Step 7: Tie your string on.
Tie each piece of string securely onto all four areas of the hoop, ensuring they are evenly placed between the curtain panels. These strings will be used to hang your canopy from the ceiling, so overall balance is key.
Step 8: Meet in the middle.
Take the long pieces of all four strings and meet in the center of the hoop. Tie a knot to connect all four strings together to ensure the canopy hangs evenly and well-balanced.
Step 9: Install Ceiling Hook.
Insert a ceiling hook of some kind where you'd like your canopy to hang from. Be sure to check the weight restrictions!
Step 10: Tie canopy to the ceiling hook.
Once you'd tied the canopy string to the ceiling hook, evenly space out the curtain and create an "opening" between the two panels with the trim on the ends. Now, you have your own special retreat to enjoy! Doesn't it just pretty up my daughter's room?
Enjoyed the project?
Resources for this project:

LivebyCare 1pcs Pinkycolor Sheer Window Curtain Panel Hook Top Voil Window Treatment Drapery Drape Room Divider Partition Curtains Decorative for Study Room Coffee House Shop

Fashion 2" Inch Portable Tape Gun Dispenser Packing Packaging Sealing Cutter Red
Any price and availability information displayed on [relevant Amazon Site(s), as applicable] at the time of purchase will apply to the purchase of this product.
Hometalk may collect a small share of sales from the links on this page.More info
Published February 25th, 2017 11:00 PM
Comments
Join the conversation
2 of 168 comments
-
-
 Patricia Lamott Allen.
on Jul 24, 2019
I love this look
-










Frequently asked questions
Have a question about this project?
How do you wash it?
I know this was asked in one of the above questions but I didn’t see an answer, so I’m going to double check with you .😉 Is there any chance that you made those pretty flowers on the wall and if so, will you share the DIY with us or give us a link to who did create them or where to buy them?
thanks! 😉
How many panels were
used?