How To Turn An MDF Table Into A Work Of Art Using Paint, Moulds & Clay

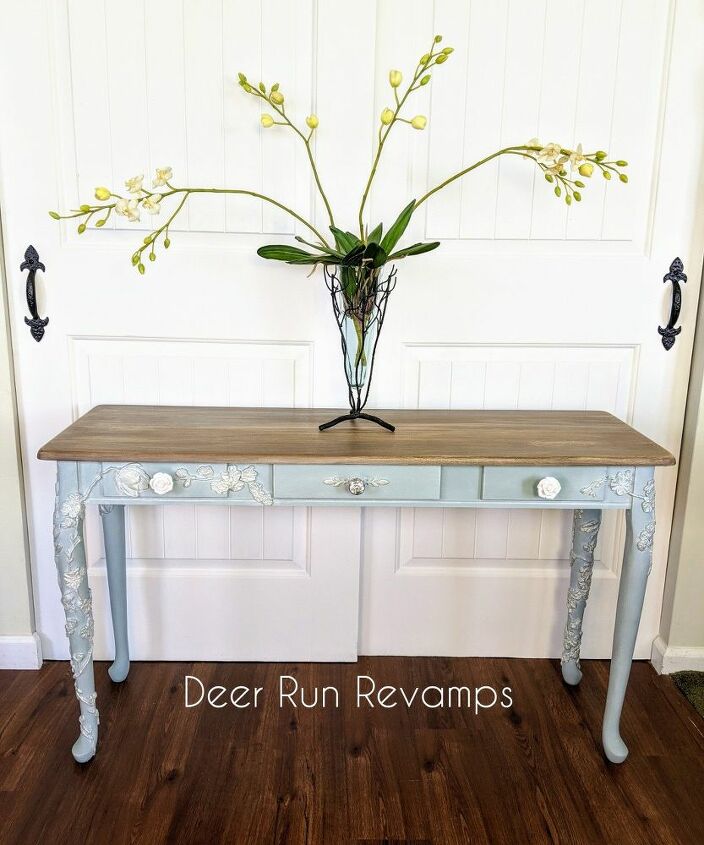
I was given this hall table/sofa table quite some time ago. It was plain, made up of mostly MDF, and it just wasn't speaking to me. After scrolling through one of my many furniture groups, I was inspired! I saw this gorgeous vanity where the artist applied appliques going partially up the legs. I wanted to play off of that! Make it look as tho vines and flowers were growing up the piece.
This is how I turned an entryway table into a one of a kind work of art ❤️
I completely forgot to take a before photo, but Pinterest came to my rescue! The pictured unfinished piece is almost exactly what mine looked like before I got my hands on it 😉
As with all of my other tutorials, this one will start no different.
PREP
Please prep your pieces, regardless of what the paint can says. Spending a few minutes on the prep will ensure that your hard work will last for as long as the piece does.
Make any necessary repairs such as sanding out scratches, fill any deep scratches with wood filler, and remove the hardware. If you're planning on keeping any of the wood visible, sand and stain those areas first.
I filled the previous holes from the hardware since I wanted knobs instead of the pulls. I filled them with Bondo and sanded smooth. Then drilled a single hole for the knobs.
This piece is funny. Only the middle drawer is a real drawer. The other 2 are just the drawer fronts screwed on 🤷 I contemplated removing them and filling the holes, but I like the look of the "3 drawers".
Clean your piece well with a degreasing cleaner. Totally AWESOME from the dollar store is a great one, krud kutter is another, or my personal favorite, Frenchic Furniture Paint's Sugar Soap. After you've scrubbed the piece, wipe it down with water to remove any residue. Once it's dry, using 220 grit sandpaper, scuff sand or "key" the surface. Then dust off.
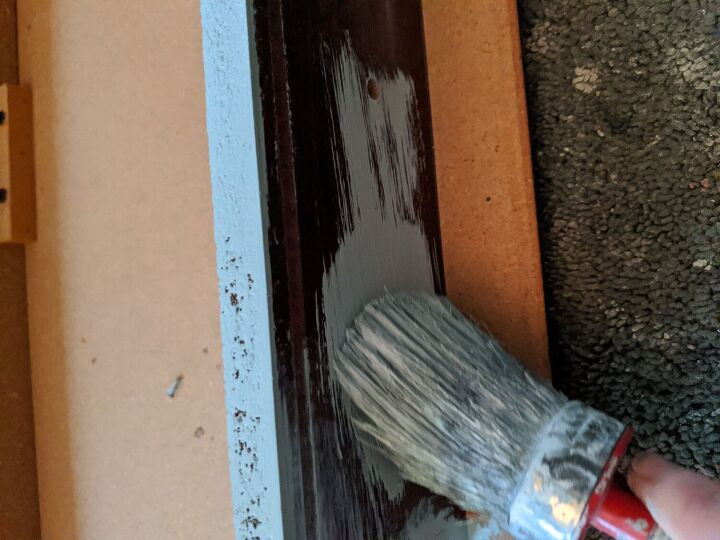
Now it's time to paint. I used my one of my favorite colors, Frenchic Furniture Paint's Mother Duck 😍 It reminds me of a Tiffany Blue color. It feels like spring and perfect for the vision that I had. I applied 2 coats, allowing to dry for 1 hour in between coats.
Now the fun part...making the clay molds.
I am a retailer for Redesign With Prima, so I have just about every Decor Mould they make in my personal stash. But, you really only need 2 or 3 of your favorite floral moulds to do this look.
I used Cherry Blossoms, Winter Blooms, Forest Flora, and Leafy Blossoms.
Grab some paper clay, corn starch, wood glue and 2 small paintbrushes.
Brush the silicone mould with corn starch. You don't want excess corn starch in the mould, just lightly brush it and be sure to get the corners as well.
Warm up a clump of paper clay in your hands by kneading it. Then press the clay into the mould. Remove any excess clay and make sure it is flush with the silicone mould. Then flip it over, slowly peel the silicone mould up so that the paper clay begins to fall out, helping it along if needed. Once the paper clay applique is out, put wood glue on its backside. Be sure to get the edges well. Then softly press it into place onto the piece of furniture. Brush away any excess glue that has oozed out.
I did a video on a previous piece showing how I do my paper clay appliques. Here is that video as well as photos of this project
I filled the front leg, back leg and both sides with paper clay appliques and just a trickle in the front. I wanted it to look as through the flowers were growing up the piece.
Once the clay was dry (about 12-24 hours), I painted them in Mother Duck. Then I sealed the entire painted body with clear wax, and then with white wax, focusing on the paper clay appliques, wiping away the excess white wax
Then I lightly brushed over the appliques with general finishes pearl glaze.
The top was created using Retique It Liquid Wood. I first quickly sanded the top using 220 grit sandpaper to "key" the surface. Wiped it down, and then applied a layer of light Retique It Liquid Wood
Allow to dry for 45 minutes and apply a second coat. Once that is dry, apply your second color. I used bleached Retique It Liquid Wood. While it was still wet, I ran the graining tool through in long even strokes
Allow that to dry for up to 2 hours, and then apply the stain.
I have a process for this aged multicolor look. I first apply Varathane's premium fast dry stain in Briarsmoke, wiping back any excess. Then I apply Retique It's Java gel stain over that, wiping back any excess. Allow that to dry for 45 minutes and then go over the piece with Frenchic's Browning Wax. Since one stain is oil and the other is water, this removes some of the previous stain revealing all of the colors and giving it a layered aged look
I then added some new hardware, lined the single drawer with some pretty paper, then sat back and enjoyed my work 😍
You can follow my journey on Facebook and see all of my furniture transformations (linked below)
You can click any of the Frenchic, Redesign With Prima or Retique It items in the materials section and you'll be brought to my Etsy shop. Here you will see our full stock of Frenchic Furniture Paint and products, Redesign With Prima Decor Transfers, Moulds and waxes, as well as Retique It Liquid Wood and Stains
I hope you enjoyed this tutorial and are inspired to create your own spring floral piece
Enjoyed the project?
Resources for this project:
See all materialsComments
Join the conversation
-
 Smooches
on May 12, 2021
one of the most beautiful re-do's i've seen. saw some others on your facebook page. you are gifted...pretty rings, too


-
 Deer Run Revamps
on May 13, 2021
Thank you so much!! ♥️♥️
-
-
-












Frequently asked questions
Have a question about this project?
Wow, it is exquisite and such a beautiful color 🙀🙀🙀. Am I understanding it correctly that you glue the appliqués on before the paper clay has dried?