Blah to Beautiful Side Table

How to chalk paint and glaze a side table to look like an expensive piece of furniture.
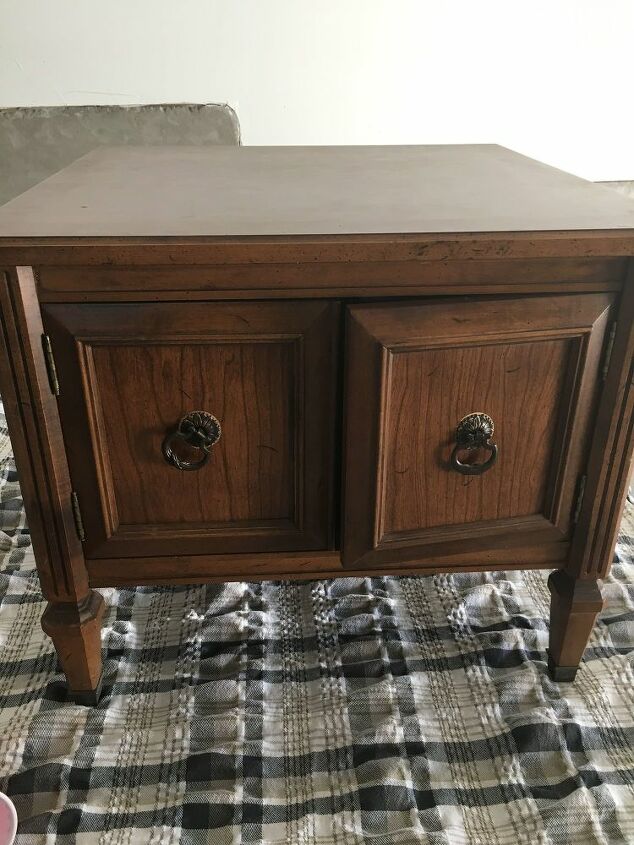
I found this table on Facebook Marketplace for $20. It was a very cute shape to start with and had a large open cabinet in the middle. It did look outdated and just needed a little face lift to jazz it up.
All I used for this project was Waverly Chalk Paint in Celery, Valspar antiquing glaze, and some sealing wax. Be sure to use a paint brush specifically for Chalk paint, it does go on a lot smoother and doesn't show the brush stokes.
Take off the doors (if there are any and hardware) and be sure the furniture is wiped clean. All I did was wipe it down to get the dust off. The great thing about chalk paint is there is no prep work to be done - no sanding, no priming - nothing! That is why I love to work with it.
Once you get your furniture clean, start applying the first coat lightly and moving your brush in long strokes to get even coverage and smooth finish.
First coat has been applied. Chalk paint dries fast - another reason why I love it. I do not have to wait for a couple hours to apply the second coat. Once you've painted the whole thing you can start immediately on the second coat where you first started.
This is the start of the second coat and you can see how smooth and even it covers.
Second coat is on and is drying (that is why it looks uneven on the top).
I didn't plan on glazing this piece until last minute. I have never glazed before and it is something that definitely takes practice! I wanted a light glaze so I actually applied mine with a Q-Tip on the beveled detail of the drawer front. Once I applied it on the edges then I took a lint free rag and immediately started wiping it off and buffing it in.
Here is how heavy I went before I started to wipe it.
Take your rag and start wiping and blending in.
The top cabinet has been glazed the bottom cabinet has not.
Once your got your glazing just how you wanted, go ahead and seal it with the wax. My wax I use is very easy to use. I just apply it with a chalk brush - but DO NOT use the same brush you used to paint. Once you use a brush for wax, you cannot use it for paint...it automatically becomes your wax sealing brush only. Once the wax is on the bristles, it will not allow you to apply paint.
Once you have sealed your furniture, then put the hardware back on and attached the doors or drawers.
Be sure to let your sealing wax cure and dry for a few hours. Once it is dry, go ahead and style!
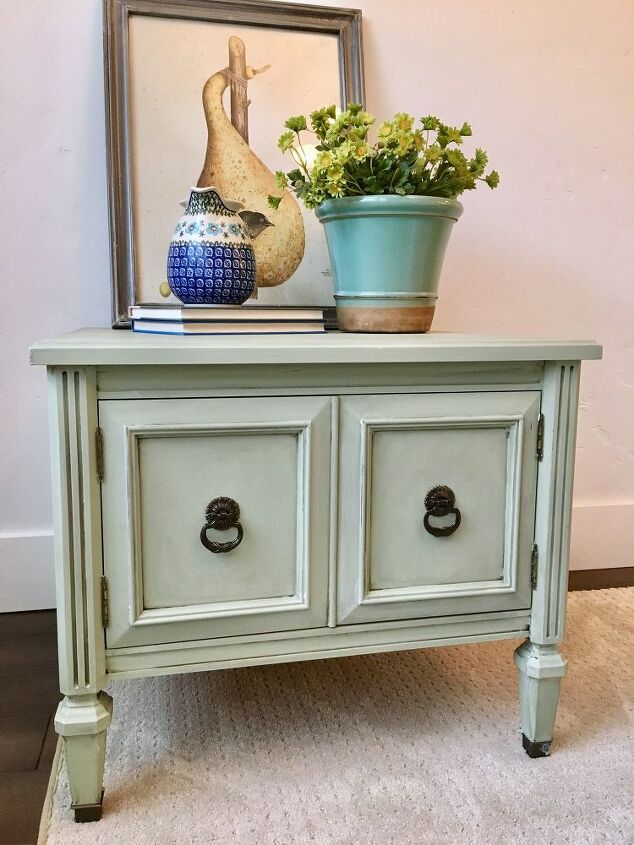
Isn't this a major improvement?!
A little close up of the glazing detail.
Enjoyed the project?
Resources for this project:
Comments
Join the conversation
-
 Kathy
on Dec 16, 2019
Great job. Love the color. Would also make a great charging station for tablets and phones with just a hole in the back and a strip Multi outlet extension cord.
-
 All Within the Home
on Dec 16, 2019
Oooooohhh!!! Great idea!! I don't usually think of those kind of things - I am not so high tech! I still have a tape deck alarm clock - haha!!
-
-
-
 Carolina's Art
on Oct 30, 2020
Looks beautiful. Amazing transformation with a little paint and glaze.
-















Frequently asked questions
Have a question about this project?
Did you apply the antiquing glaze just in the corners etc, not all over?
Would this paint hold up on kitchen cabinets?
Can the glaze be used on latex paint? Or does it just not soak in and dry ?