DIY Window Grids (Mullions)

UPDATED: I figured an easy way to make them removable. For more details, please visit http://www.therozyhome.com/blog/making-your-own-window-grids-grilles-mullions. This project is the result of a little OCD and a lot of "there still is something missing in the dining room." Luckily, the latter and the former came into perfect harmony yesterday when I had my ah ha moment. I realized that I wanted to do grids on the window. Every window on the front of the house (even the little windows) have grids. In contrast, every window on the back and side did not. At first I thought they went this route because they wanted to enjoy the view. I mean, the view is why we bought the house.
Hometalk Recommends!
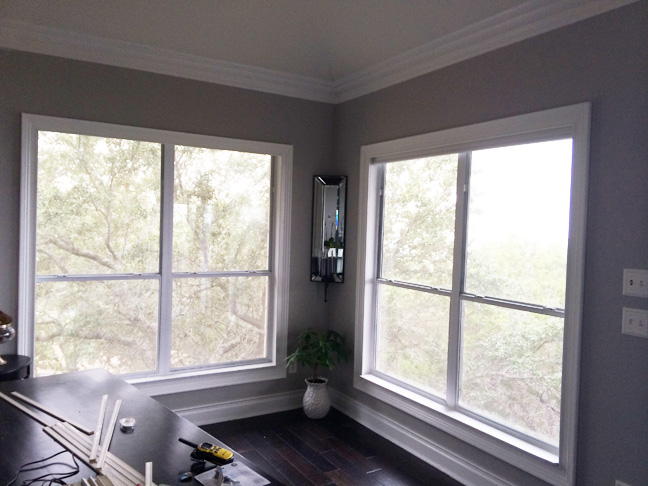
The dining room windows before.
First things first: I had to find the right materials. I opted to purchase screen trim from Home Depot (cost around $3 for 8 feet). It was the perfect depth and easy to work with. And did I mention the price?
Next, I had to decide how wide apart I wanted the vertical pieces. I decided on two vertical pieces that were spaced about 10 1/4 inches apart. Next I decided how many horizontal pieces I wanted. For that, I opted for three rows. Having figured that out, I measured the length from the top of the window to the bottom (just the glass part). I made those cuts and attached them to the window with double sided tape. This allowed me to accurately measure the length of the horizontal pieces. After figuring that out, I went and cut 48 (yes 48!) horizontal pieces and the remaining vertical pieces.
Attach the grids. This is where it comes down to personal preference. Keep in mind that no one will see these close up at my house. With that in mind, I opted for hot glue. May sound like an odd choice, but I've used it on glass before and it creates an amazingly strong bond. As long as you use it on a low setting, it will be fine. Keep in mind, though, that it will leave a little dot on the window. You would have to get really, really close up to see the dot, but there is a dot there none the less. The other option is to use a really good double-sided tape. I actually used double-sided tape when I was laying it all out and it was very hard to see outside. The reason I didn't stick with this is because I knew the cat would be able to pull them off rather easily.
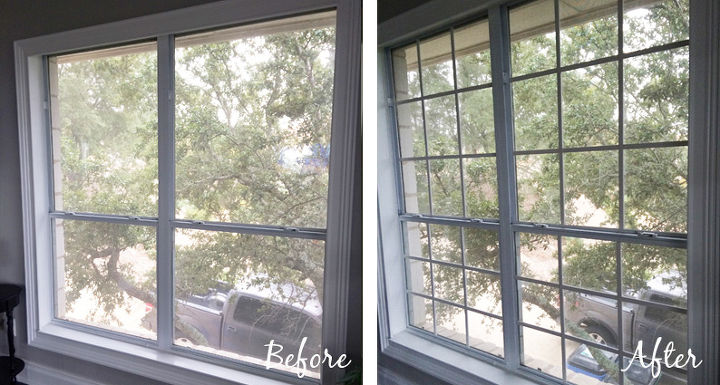
Voila! From start to finish, it took a full day. The longest part of all of that was waiting for the paint to dry. The rest of it (measuring, cutting, gluing) took about 3 hours.
Before/After
Before/After
Before/After
Affordable Home Upgrades
Enjoyed the project?
Resources for this project:
See all materials
Comments
Join the conversation
-
 Mike
on Apr 20, 2023
great tips. If you need to update mullions, frames or glazing there is an independent site that lists all the glazing companies throughout the country
-
-
 Katen
on Apr 01, 2025
Bought a brand new home years ago came with grids like yours except mine were plastic. What a mess. Broke just looking at them. Those that didn’t break fell out just because I guess. I always wanted wood and never occurred to use Velcro (new back then, David Letterman had not stuck to wall yet). Wished I’d seen this back then. This is genius to me
-

















Frequently asked questions
Have a question about this project?
I'm curious. I love the grey color on the walls. Could you tell me what the name is? thanks.
Did you mount them on the inside window then...?
Will the window still open and close?