DIY Window Pane Aged Mirror

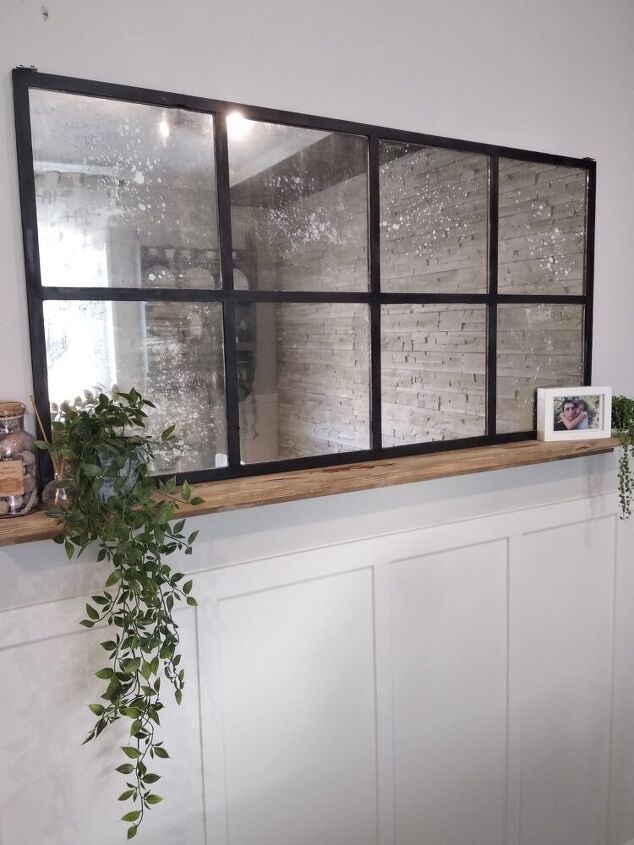
I was redoing my dining room and I had an empty wall perfect for a mirror. I 've seen a lot of tutorials on how to age a mirror, and it seemed It would be quite a project, but I was determined to do it! I had a huge old mirror laying in my basement, waiting it's moment to come. A now I finally made up my mind... It's a GO time!!
I love the look of old mirrors, they have so much character and look so unique. I know it's not everybody's cup of tea, but I wanted that look in my dining room.
Since the mirror I had was really large, I had to cut it, to get what I was imagining. So I asked a friend for help and he cut it down for me. Let me show you how it turned out and what I did.
Hometalk Recommends!
Materials
As I said, this was quite a project. A LOT of work. But, I got to admit, it was worth every minute of sweating! Though it may seem like a lot of things on the list, these materials that I used are really unexpencive and affordable. So here is what we need:
- Mirrors ( I had 8 pieces, 30x30cm )
- Paint stripper
- Spatula
- Bleach
- Paper towel
- A really STRONG glue
- An MDF board ( I had it cut to 70x130cm )
- Trim pieces for the frame ( 1x 3cm )
- Spray paint
- Wood filler
- "L" brackets ( if you decide not to hang the mirror on the wall, you won't need them )
First I layed my mirrors down to see what shape I want it to be. Decided to do a 2 x 4 look.
Before you start, make sure you do this on a very well protected surffice, with a couple of layers of paper or whatever you use to put under your mirrors. This part will be really messy.
So, you turn your mirrors facing down, and apply a thick layer of paint stripper on the back of it. Leave it on for a couple of minutes, and then take a spatula ( a plastic one would be the best ), and gently scrub down the paint.
Wipe off with a paper towel so it's nice and clean. Repeat on all of the mirrors. When all of the mirrors are ready and clean, take the bleach, put it in a spray bottle ( if it's not in it already ) and spray over the back of the mirrors, where you took off the paint. You should leave it for a minute or two and then it should start to speckle!
When you see clearly that the mirror became full of dots, you should take a paper towel and wipe off the the surffice. When you turn your mirror around, the speckled part will be completely see through, and there won' t be any reflection. But in total, when you look in the mirror, it will look like an old vintage photo. Very pretty and unique. So, the ageing part is done.
Now, to asemble the frame.
First I measured and cut all of my trim pieces, and layed them on the MDF board together with the mirrors to check if it all fits. When I was sure that everything is in place, I glued them on the board. First the trim, and then the mirrors. Use the best glue you can find!!! The mirrors are heavy and a good glue is a must!!!
I recomend that you leave it over night to dry before hanging it on the wall, to really be sure that the glue is doing it's duty!!
Mostly, all of our job is done. All we have left to do is the little things... Filling in the small gaps with woodfiller and painting the frame.
After fiiling in the gaps, I taped off everthing, and painted on a quick coat of primer. Then I spray painted the whole thing with flat black spray paint. I found it easier and quicker than painting it with a brush. Did two coats of the black and it was done and ready to be hung!
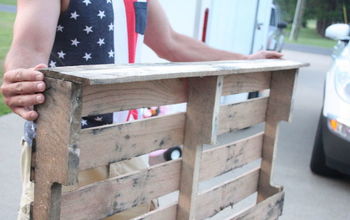
Also decided to make a simple shelf to go under the mirror... so it can be nicely decorated. I will be sharing that project as well...
We hung the mirror on the wall using little "L" brackets. We put 4 of them in each corner and screwed them in the frame, and into the wall.
And voila! It made a Huge impact in this space and it added so much warmth and character. I couldn't be happier. 😁
Enjoyed the project?
Resources for this project:
See all materialsComments
Join the conversation
-
-
 Katen
on Sep 20, 2025
Your wall makes a lovely eye grabbing composition with mirror star of the view. Glad you didn’t stop at mirror and pictured the entire wall. So much more inspirational for others who may choose this project. Me? I dunno why but I love mirrors in dinning rooms they reflect candle glow when enjoying a meal gathered around the table, even if it’s just soup and salad or sandwiches. It’s family time
-










Frequently asked questions
Have a question about this project?
Is your board and batten "faux" ?
How to clean a mirror that is damaged by moisture
Looks great, my question is what is the height of the board and batten? I have a kitchen wall waiting for the whole treatment. Thank you