Faux Wood Painting on Hollow Core Doors

I recently bought new pantry doors, and rather than leaving them white like the rest of the doors in our house, I decided to give them a little more character.
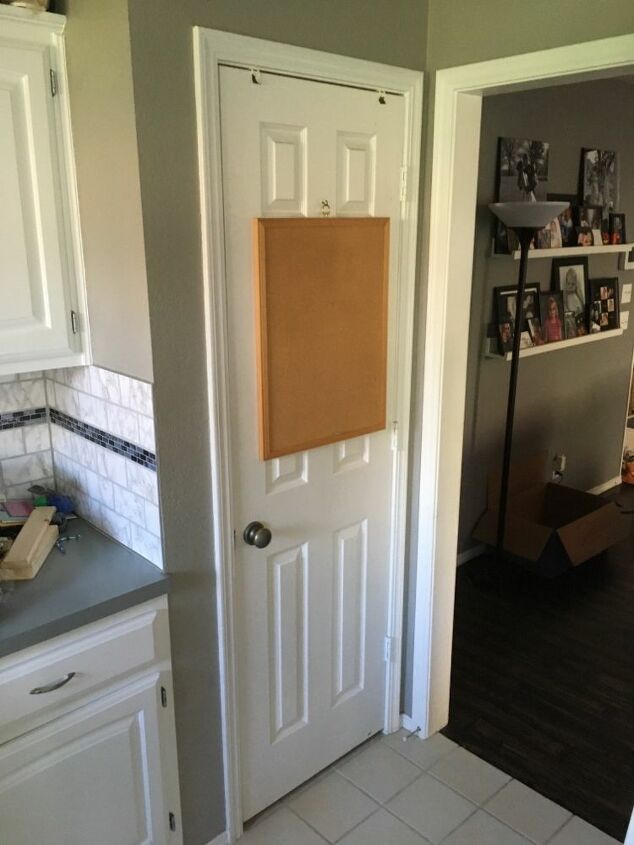
Here is our pantry door before... nothing visually wrong with it, but any time the pantry door was open (all the time, with how much my kids and husband eat. Haha!), the main doorway to the kitchen was pretty much blocked.
See?
Here's what you'll need for this project:
- Bi-fold doors (I happened to find these bi-fold doors at our local Restore for $10 that were the perfect size)
- Screwdriver
- Wood filler
- Acrylic paint (a few different shades of brown to get the wood effect, and black for the glaze at the end)
- Chip brush (I used the same one for all of the colors)
- glazing medium
- lint-free cloth
- clear coat
I already had all of the supplies, so I did not spend any money other than buying the doors, but to buy all the paint and supplies should run you around $10, with the glazing medium being the most expensive (around $7/bottle), but you will not need much of it and have plenty left for other projects! *Some glazing mediums can also be used as a top coat, so read your labels!*
I wanted these to open like French doors, so the first step was removing the bifold hinges and hardware.
...and then filling and sanding the holes. These doors have a wood grain texture to them, so here’s a trick for any time you have to fill and sand holes on textured objects:
When the wood filler (or whatever you are filling with) is still slightly soft, use the edge of a putty knife or something similar to mimic the surrounding texture.
Clean everything thoroughly and prime.
For my first layer of paint, I used Nutmeg Brown. It is a very orange-y brown, so it provides a good base for the undertones in real wood.
For this layer, and all following layers, I used a chip brush to apply a thin layer of paint, always following the direction of the faux grain. The brush marks will help add to the wood grain and make the final product more realistic.
*I left quite a bit of white showing through for added depth, because I knew I could cover it as I layered paint, but if this is your first time doing a faux wood painting, I would recommend doing a fairly solid first coat, especially in the recesses of the door to ensure no white is showing in the final steps.
The second coat was Spice Brown. This was slightly darker than the first color, with a little less orange, but still plenty of warm undertones. Again, light coats in the direction of the grain.
For my final brown coat, I used a dark brown (custom mix of leftover paint, so I don’t have a name for it), with very little warmth to it. As you can see from the photo, this coat is still somewhat streaky, with the other two colors showing through, but no white.
*I used the same chip brush for all of these coats without washing it in between. Just pop it into a baggie or some plastic wrap, and it is good to go while waiting for the paint to dry on the door before the next color. You can wash it out after this last brown layer.
Here is a progression of how the doors should look after each layer.
*Make sure you are painting the sides of the door at the same time you do each layer! I like to do the sides first, then the front for each step.
Here is where the magic comes out. Grab a glazing medium, some black paint (or really dark brown), and a lint-free cloth. Mix your glaze and paint so there is very little color to your glaze. If you have never worked with glaze, you need to know it is not an exact science and requires adjustment based on your preferences, the thickness of the paint you’re using, and a few other factors. If you do not want the grain as dark as I have mine, add more of your brown paint and less black into the mix. A little glaze goes a long way, so you don’t need to mix very much.
Apply a little of your glaze mixture onto a section of your door (using the chip brush), making sure to get it into all the crevices. Let the glaze sit for a minute or so before carefully wiping it with your lint-free cloth ***still following the grain!!!*** Doing this should leave the glaze in the grooves of the faux grain, but remove most of it from the raised areas, showing the brown paints. By doing this with glaze, you have a little more time before the paint dries, so you are able to wipe excess off.
After the glaze dries, apply a layer or two of a protective clear top coat.
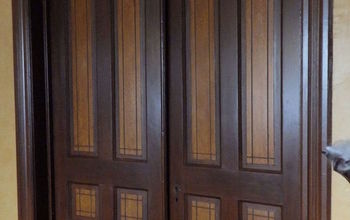
Best of all, no more blocked doorways!
Some notes based on repeated questions:
- The doors were hung just like standard doors... three hinges. We reused the old hinges on the right door, and added identical ones to the left. There is a double magnetic catch at the top.
- I BUILT THE NEW SHELVES TO FIT THE SMALLER DOORS. Please visit the link below to view the shelving tutorial.
Did my project inspire you to try your own? Let me know in the comments down below!
Enjoyed the project?
Resources for this project:
See all materialsComments
Join the conversation
-
 Anna Smith
on Jul 22, 2021
I removed my bi-fold doors and put up curtains. I have a cat and didn't want him to get his foot or leg caught in it. These doors can break a cat's leg. But what you did looks nice
-
-
 Ardale
on Jul 22, 2021
Beautiful job, looks like rich mahogany wood. So much prettier then everything being white like so many people want these days or is grey now the it color? At any rate I for one love your beautiful door. Great organization with your shelves added behind the doors. Thanks for sharing.
-










Frequently asked questions
Have a question about this project?
Did you strip or sand the doors prior to painting?? Looks like you just went straight for it!! That’s my kind of project. 😃
Where did you buy the shelving for the door that size/
Will the paint withhold the wiping down or cleaning of the doors?