272K Views
Hexagon Tile Floor Transition Entrance
by
BuildXYZ
(IC: blogger)
10 Materials
$400
1 Day
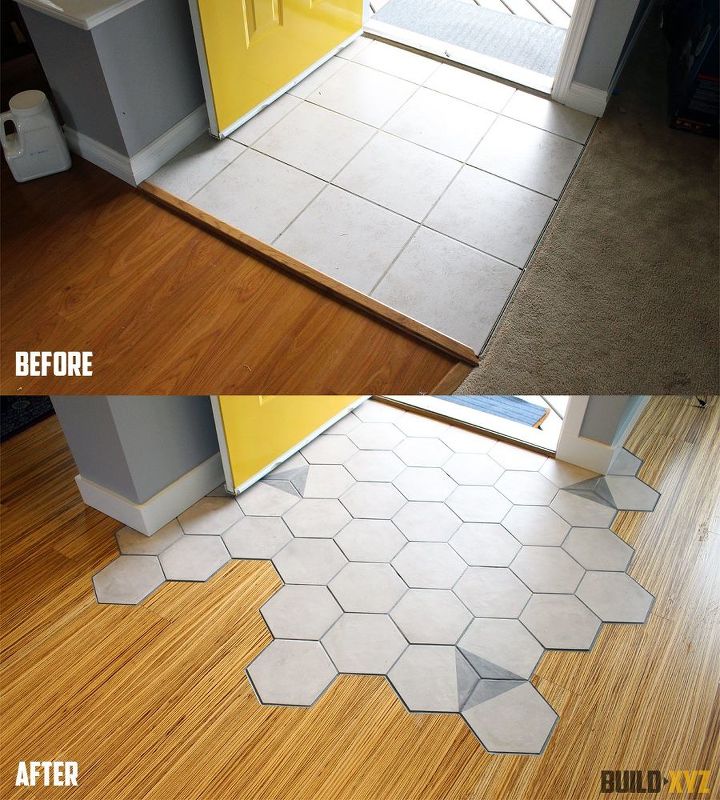
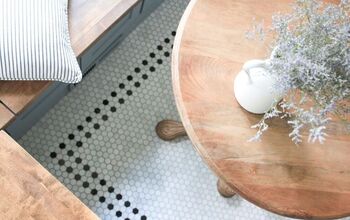
After seeing numerous photos of Hexagon Tiles organically transitioning into hardwood flooring, I had to attempt this technique. I hadn’t seen any conclusive tutorials on doing this transition so I was left to my own devices. The final product turned out really sharp and has held up perfectly since it was installed two years ago.
I will be installing a Zebrawood engineered hardwood flooring. This means it has a thin veneer of Zebrawood mounted on an MDF substrate and a little layer of cork on the bottom. It is important to have the tiles sitting approximately 1/16″ – 1/8″ higher than the hardwood floors. This is to minimize damage to the frail Zebrawood veneer.
Here is what the entrance looked like before and after. Before starting the project, I had to prepare the area by smashing up the tile and removing a 3/8″ plywood sub-floor. My finished heights were optimal when the tile and engineered hardwood were on even plane.
{
"id": "4201275",
"alt": "",
"title": "",
"video_link": "https://www.youtube.com/embed/QSwAcn-CCNg",
"youtube_video_id": "QSwAcn-CCNg"
}
{
"width": 634,
"height": 357,
"showRelated": true
}
Check out the full video more more details.
Before mixing any Thinset/Mortar, spend some time laying out the perimeter tiles till you get a design you are happy with. Make sure the tiles are square and parallel to the flooring by drawing grid lines with a drywall square or whatever you have on hand.
Lay the hexagon tile down as you would any other traditional tile, starting with the perimeter tiles and working your way back.
All tile cuts with made with a diamond blade on an angle grinder or a manual tile cutter
Cut back the flooring underlay back approximately 6 inches so there wouldn’t be to much “bounce” near the transition.
Use a spare hexagon tile to overlay and trace your cut after lying everything in-place. Remember to account for the perimeter gap in your cuts!
Depending on the cut or angle required, you may need a to use a miter saw.
Or a Table Saw and possibly a jigsaw to finish off a cut.
It is much easier to install the flooring runs starting from the hexagon tile and working your back towards a wall. Placing wedges between the cut piece and the hexagon tile. This will allow you to maintain a proper gap while tapping in the remaining flooring in that run.
If you make a mistake and need to cut the flooring in-place. A multi-tool with a metal straightedge does the trick.
Sanding a bevel with some 220 grit sand paper gives a nice, factory matching edge.
Construction adhesive was used in two spots I felt were error prone to lifting. This goes against any warranty so please do so at your own risk. I tapped in some cedar wedges to maintain the pressure while the adhesive cured.
After the the engineered hardwood has been installed. You can grout the tiles and the leave the perimeter seam. I used a matching grout/caulk solution from Mapei in Pearl Grey. Tape off the flooring side (or both sides) to you get a nice crisp line and apply caulking.
Enjoyed the project?
Resources for this project:
See all materials
Any price and availability information displayed on [relevant Amazon Site(s), as applicable] at the time of purchase will apply to the purchase of this product.
Hometalk may collect a small share of sales from the links on this page.More info
Want more details about this and other DIY projects? Check out my blog post!
Published August 29th, 2017 2:16 AM
Comments
Join the conversation
2 of 58 comments
-
 Lisa Mcwhorter
on Feb 26, 2022
Great job!!! Thanks for sharing!!
-
-
 Veronica Jones
on Feb 24, 2023
Wow, that looks amazing!
-















Frequently asked questions
Have a question about this project?
Have you thought about how the veneer will hold up to moisture in an entryway?
Hi!
How did you match the height of tiles and wooden floor?
I have solid would flooring throughout the main area of my home including my kitchen. The floor in the kitchen is trashed and I wanted to replace it with tile hexagons like you show here. How can I do this ? Do I need to rip out the wood floor or can I transition somehow from tile to wood floor?