Bottle Cap Floor Tile

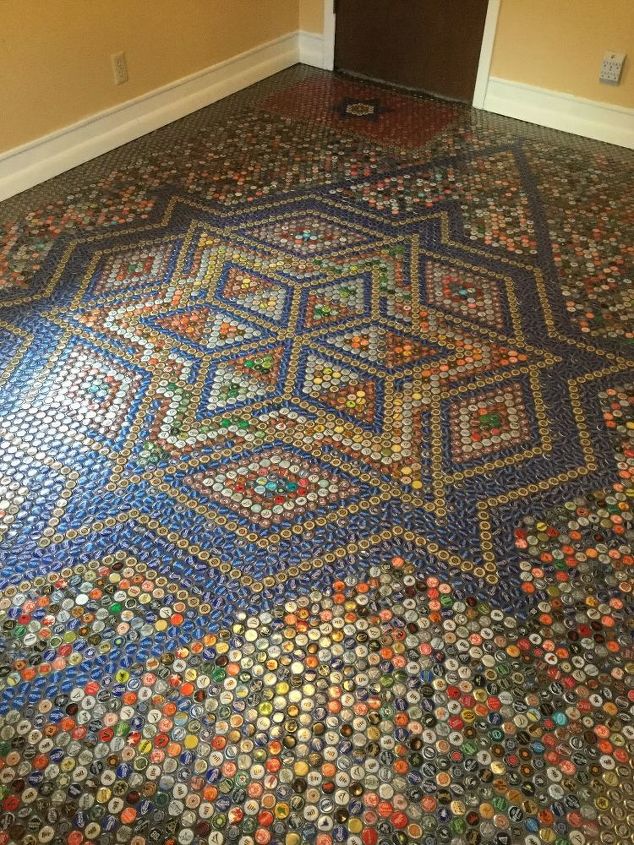
We hated the musky carpet in the office / craft room, So, rather than buy a normal floor covering, I decided to challenge myself. I began collecting beer / soda bottle caps from friends and family across country as well as circulating a picture of my project to local pubs. It took over a year to complete because I waited for people to drink the right colors. I think it turned out amazing!
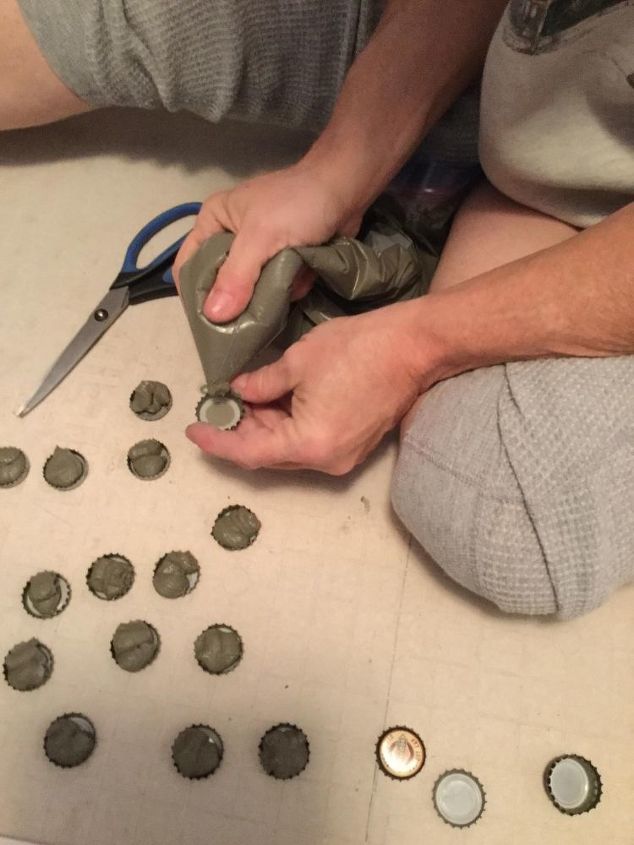
Almost all the caps we're flattened with anything I could find round enough to rebend them into shape. ( husbands sockets, hammer, etc. ) Then, each cap was piped with tile mortar to dry full allow stability for walking.
I knew I wanted some sort of star in center. After several dry fits, I took a pic and began the real work. My grand daughter helped by photo bombing my tutorial every chance she got.
The center of our floor was secured with a ledge stick and I began setting the caps permanently.
The pattern was duplicated on the other side and grew depending on how many I had of any one color.
The final product was grouted black and minimal 6 coats of commercial grade urethane applied.
The doorways were highlighted with a "door mat" pattern. Its difficult to see here, but there's a red mat with a blue and white star in front of my closet.
I'm so ready to create more in this very inspirational room. Onward to the next project!
DIY bottle cap ideas
Enjoyed the project?
Comments
Join the conversation
-
-
 Tassie Anne Biesecker
on Oct 11, 2023
Just wow!!!!!! Incredible!!!
-
















Frequently asked questions
Have a question about this project?
No ones asked…..how many bottle tops did it take to do this and how long did it take to save them up and from start to finish how long did it take? You did a beautiful job, I even love the brown doormat! Crazy but beautiful 😊
I might be reading this wrong……”Almost all the caps we're flattened with anything I could find round enough to rebend them into shape.” But I don’t know what this means. You flattened them? You rebent them into shape?
Where are the details such as adhesive used? I would love to hear an update now it is 2025, how it has held up.