DIY Vintage Inspired Hex Floor Tile Part 2

Welcome to the second part of a two part tutorial! This will cover the floor tile process from laying the tile to grout, to dehazing, and finally sealing. In the first tutorial, "DIY Vintage Inspired Hex Floor Part 1" https://www.hometalk.com/diy/tile/floor/diy-vintage-inspired-hex-tile-floor-part-1-44267820 I covered the preparation of laying the concrete board and decoupling mat, cutting tile and creating a pattern. As I mentioned in the first part, I included process pictures from work on our back entry and finished pictures from the adjacent kitchen tile. Always read your product instructions, as there are variances between manufacturers.
To mix thinset, you will use the same materials as in the Part 1 of this tutorial.
To set the tile, you will use:
5 gallon bucket
Bag/s of Polyblend thinset
QEP Universal Thinset and Grout mixing paddle
Bucket Scraper
1/4" V notch Trowel
Rubber tile trowel
Tile Spacers
And your tile!
Fill a clean 5 gallon bucket with about 1 inch of water to start mixing thinset.
Another round of thinset mixing! The steps are the same as in the first tutorial, but I included them again for convenience. Mixing the thinset is messy. Make sure to do this outdoors or in an area where you do other messy projects. You will need to add water, so it is best to be near a hose or utility sink. Make sure to double check the instructions included with your thinset, or adhesive of choice.
Pour half of the thinset bag into the bucket.
Make sure to wear a mask when mixing because the thinset dust will rise and spread as you are pouring it out. It's best to mix in smaller batches to prevent the thinset from hardening as you are working.
Fill the bucket with water until the bucket is about half full.
Using a mixing paddle attachment on your drill, mix the thinset and water.
You want the thinset to be the consistency of peanut butter. Add in a bit of water and mix continually as needed until you reach that peanut butter feel. Make sure to move the paddle all the way to thee bottom of the bucket to mix in any thinset that settled to the bottom.
Use the v notch side of the trowel to swipe the thinset. If the peaks stand, you are good.
After the trowel test, you will either keep mixing or if the desired consistency is met, you will let the mixture stand for 10 minutes. After the 10 minutes are up, you will mix with the paddle for 1 minute before use.
While the thinset sits, vacuum the area you will work on.
Note the area on the floor where the decoupling membrane is exposed. That section of tile was moved onto a piece of Ram board, as seen in step 1. Once this section of tile is in place on the thinset, another section of the loose tile below will be moved onto the Ram board. Repeat this cycle of moving tile until you are done or ready to stop.
Put on your knee pads before starting to set the tile!
Use bucket scraper trowel to scoop out thinset. Scoop it to about 1" high on the trowel.
Simply plop the thinset onto the first area to be tiled.
Use flat side of the 1/4" v trowel to spread the thinset and fill in the depressrions on the mat.
After spreading, dump another scoop then use the ridged side to smooth out the thinset. Work from one side to the next. Notice, there is about 1 foot of mat covered.
Take tile from the Ram board and place onto the thinset.
Make sure to keep the pattern in mind as take tiles away from the board.
Use the rubber tile trowel to push in tiles and make adjustments.
Nudge tiles in place that may have shifted when they laid down. Gently press down on tiles after getting placement right.
Use wood float to gently apply pressure to tiles.
My husband used some scrap wood to create this float. The size makes it easier to cover larger areas.
Use tile spacers to nudge shifted tiles as needed and keep them in place.
With such small tiles this can be a tedious step. It helps to have another set of eyes checking on shifted tiles and helping to make corrections. The goal is to have tiles equidistant from eachother. If there are any spaces with too much thinset, use a putty knife to remove. You want to make room for the grout.
Gather materials for the grout process.
Here you have the 5 gallon bucket for mixing grout, bag of grout in your selected color, drill with mixing paddle attachment, bucket scraper trowel, 2 clean buckets for plain water, and 2 sponges for wiping off grout. Type of grout you use will depend on the area you are tiling, and color will be personal preference.
Mix grout in 5 gallon bucket.
Pour about half the bag of grout into the bucket. Add enough water so that your mix is like cake batter. Let the mix sit for 10 minutes. After the 10 minutes are up, mix for 1 minute before applying grout.
Use a putty knife to scrape out any excess thinset.
While the grout sits for 10 minutes, you can do this step. If any thinset is level with the top of thile, scrape it out with the putty knife. You want to make room for the grout to sink in. If you weren't able to catch all the excess thinset earlier, here is the time to chip out what you missed!
Fill 2 clean buckets with water & add 1 sponge to each bucket of water.
1 sponge will be to remove the majority of the grout and the other will be to do a more fine wiping. This can also be done while grout sits.
Use bucket scraper trowel to dump a scoop of grout onto the tile.
Use a rubber float to evenly spread the grout. Add more grout as needed.
Spread the grout so that spaces are evenly filled. It is okay that some residual grout is left. Let the grout dry 10 to 20 minutes after applying. You will know it is dry enough when the texture feels as stiff as clay. Again, double check manufacturer directions for your specific grout.
Wring out a sponge and wipe off the majority of the excess grout.
As you are wiping, push grout into any areas that need to be filled more. Rinse and wring sponge as needed. Then use the second sponge to capture any remaining grout. Rinse, wring, and repeat as needed.
Gather materials to dehaze the tile.
This step is done to remove any remaining grout residue, in preparation for the sealer. Fill 2 buckets with water, 1 is for cleaning tile with a nylon scrubber and the other is for wiping with a sponge. In a small bucket, mix 2/3 water with 1/3 dehaze liquid. You will use a cheesecloth to apply the dehaze. Make sure to have a few clean rags on hand for final wipe down. You may choose to use a different brand of dehazer; follow instructions on bottle label indicates.
Use the scrubber to add some water to tile & spread by hand. Just enough to wet surface.
Dip cheescloth in dehaze, wring out & wipe tile, working in small sections.
Try to keep the dehaze liquid only on the tile.
Scrub brush in small circles and pay attention to edges.
Squeeze sponge so it is half full of water & wipe tile to rinse. Repeat 3 to 4 times.
Wipe with a clean cloth to get excess water off. Wait 1 to 2 hours before sealing.
We waited longer to seal because we did this between breakfast and, lunch and chores, you know life stuff!
Spray sealer, let sit 5 minutes, wipe with a clean rag and you're done!
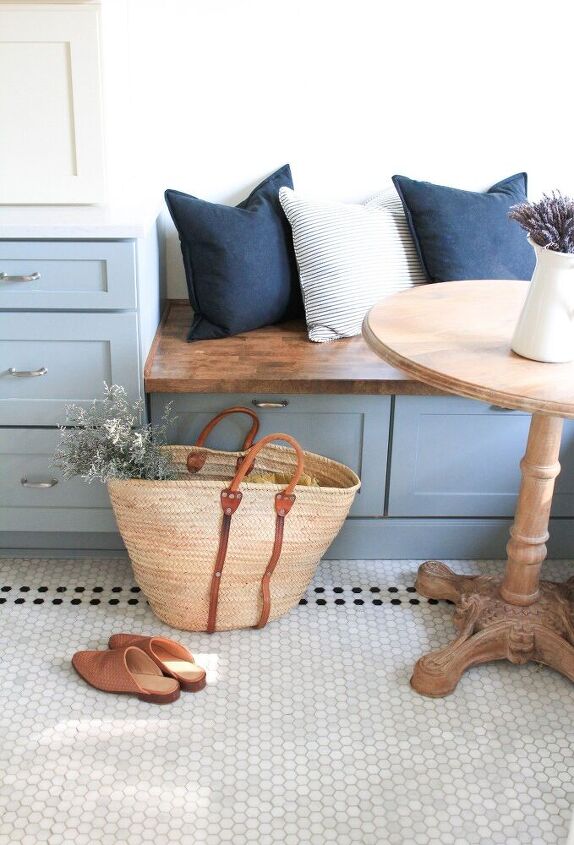
The tiling process can be tedious, especially with small tiles! By reading these posts, hopefully you can decide if DIY tile is for you. We pick and choose what we do ourselves and we contract out. Decisions are based on what we can comfortably handle, cost of using a professional trade person, and sometimes the fun factor. Is the project fun and something we want to do?
In the materials list below I did not include the tile, since that was already listed in the part 1 tutorial. I tried to list only tools specific to the processes shown in this tutorial.
Hope you enjoyed reading! Thanks for visiting.
Check me out on Instagram for more home decor and DIY!
Enjoyed the project?
Resources for this project:
See all materials
Comments
Join the conversation
-
 Dl.5660408
on Jun 05, 2023
It is soooo beautiful, and exactly what we want done to the bathroom of our 105 year old house right down to the color of your cabinets ❤️❤️❤️
-
-
 Alice Norton
on Apr 08, 2025
Looks so beautiful! Great job!
We are preparing for our house renovation. Unfortunately, none of us has experience with tiles, but we are going to try. I've already called the cle tile phone number and made an order. Also, they were nice enough to answer some of my questions. But still, I'm a bit nervous. I'm glad that I've found your post. I should say, it has inspired me. Thanks for sharing!
- See 1 previous
-
 This Dear Casa
on Apr 08, 2025
Thank you very much 😊 Have a wonderful day.
-
 This Dear Casa
on Apr 21, 2025
Hope your project goes well! I'm glad you went for it! Thanks for your kind note.
-














Frequently asked questions
Have a question about this project?
Beautiful job! What brand are the black tiles? I’m looking to use the same tiles in our home. I’ve found some beautiful hex marble tiles very similar to yours but can’t find a black hex that fits.
What color of grout did you use ? I notice that you had a link for the marble on Amazon, is this good quality marble ?