Wave Goodbye to Damp Bathroom Walls With This Clever Paint Kit

This article is sponsored by Lilypad.
If your bathroom ceiling drips after every shower, the problem might actually be your paint.
I'm giving my boring, builder-grade bathroom a much-needed upgrade, and I'm tackling that moisture problem along the way.
The bathroom is pretty uninspiring right now.

Mushroom-colored walls, no decor, and a shower curtain rod that's seen better days.
Worse still, after every hot shower, the walls and ceiling stay damp for far too long. I've even spotted patches where water literally drips down the walls.
That's where Lilypad comes in.

It's paint designed specifically for wet rooms, helping absorb moisture and keep walls dry.
Here's how I used it to transform my space.
Tools and materials:
- Lilypad primer and paint kit
- Paint rollers and brushes
- Painter's tape
- Damp cloth
- Rubber band
- Trash bag
- Cleaning cloths
- New shower curtain rod
- Shower curtain and liner
- Bath mats
- Decorative accessories

Lilypad Paint & Primer Kit: Now Only $175
Table of contents
1. Choose the Right Bathroom Paint
This is Lilypad, paint built for wet rooms.
Every kit comes with primer and paint, and I chose the color Eternal Moment in a beautiful matte finish.

We're all taught to use satin or gloss in bathrooms, but those finishes act like a plastic film.
They trap moisture instead of dealing with it, which can lead to peeling, staining, and cracking.
Did you know an eight-minute shower releases around 12 ounces of water vapor?
One can of Lilypad paint can absorb up to 13 ounces. That's this much, by the way!

With its Vaporwisp technology, Lilypad absorbs water vapor as humidity rises and slowly releases it as the room dries out, helping keep walls dry.
2. Prep the Bathroom Before Painting
Before opening a single can, I got everything ready.
I removed the outlet covers, wiped down every surface, and used one of my favorite paint-prep hacks: wrapping the toilet in a trash bag.
This keeps paint off the toilet without the hassle of having to tape around it.

I did have to tape off the rest of the walls, though.
Here's another useful painter's tape trick: run a damp cloth along the edge to activate the adhesive and get much cleaner lines.
Just make sure it dries completely before you start priming.

One more tip: stretch a rubber band across the top and bottom of your paint can.
Instead of wiping your brush against the rim, use the rubber band to remove excess paint.
It helps prevent overloading your brush and keeps the edges of the can clean.

3. Apply the Primer and Paint
We started by priming the whole bathroom, beginning with the ceiling.
We let the primer dry completely over the weekend before applying two generous coats of paint.

And here's a pro tip for your next painting project.
Before using a new roller, wrap painter's tape around it and then peel it off.
This pulls away any loose fuzz or lint that might otherwise end up in your paint finish.
I was really pleased with how well the paint and primer adhered to one another and how far each can of paint went.

Lilypad comes in several sheen options.
Matte offers the strongest moisture control, while eggshell is available for higher-traffic walls. I stuck with matte for this project.
Their essentials palette also has a variety of beautiful soft pastels.
Eternal Moment is a lovely soft blue, and I absolutely love how it turned out.

4. Remove the Tape and Add the Finishing Touches
Once the paint had dried, it was time for the best part: crisp, clean lines!

Here's one more little trick for when you're putting the room back together.
Whenever you change a wall's paint color, write the brand and color on the back of an outlet or switch cover.
That way, you'll always know exactly what you used.

With the walls finished, it was time to decorate.
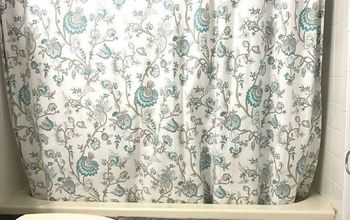
We swapped the old, rusty shower curtain rod for a new brass one, hung a fresh shower curtain and liner, and added some soft bath mats to tie everything together.

We also had an idea for the wall with the holes left behind by the old shelves.
Until we get around to that, a faux olive tree does a great job of hiding them.

A few more finishing details, and we were done!

Final Thoughts
Everything came together beautifully, but upgrading the walls with Lilypad paint was the heart of the whole project.
Lilypad is the only latex paint built to handle rooms that get wet, making it a great option for bathroom walls that drip after every shower.

If you're ready to give your bathroom a fresh look while tackling moisture problems, you can order your own Lilypad paint kit at lilypadpaint.com, with fast and free shipping.










Frequently asked questions
Have a question about this project?
Wouldn’t it be better to have a proper air vent fitted? It doesn’t look as though there is anywhere for the steam/condensation to go and there doesn’t even appear to be a window.
This isn’t a “trick” or a “hack” it’s an add. If a product is good it will sell itself. So over seeing these type of “articles”.