DIY: Making Faux Brick Walls Look Old

I love brick.
Painting faux brick walls is easy!
Brick walls, brick floors, brick ceilings. Any and all of them. Brick can really give a space a unique and textured look, whether left natural or painted.
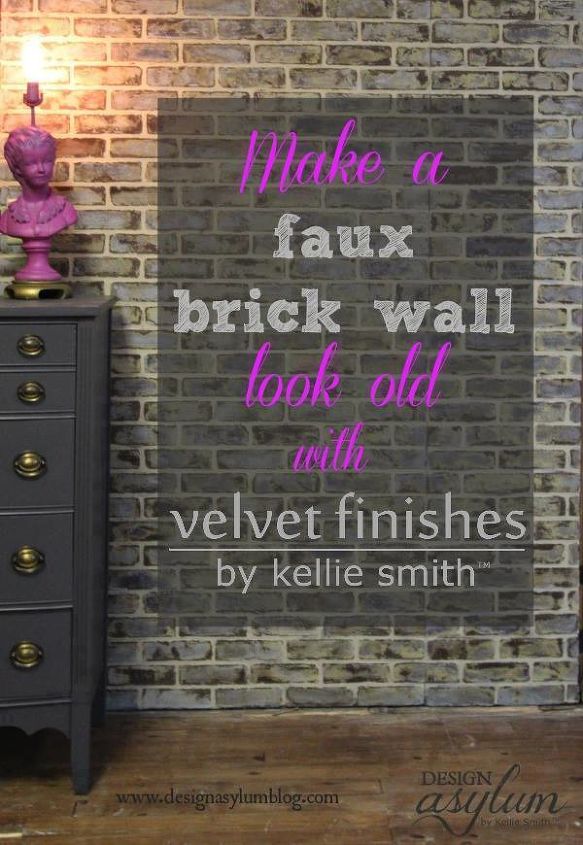
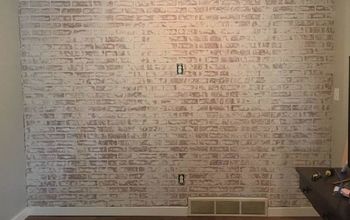
I decided to add a brick wall section in the design studio for photographing furniture and I wanted it to look old. I wanted character and layers of time.
The process was quite simple!


I purchased faux brick sheets from Lowe's. They come in 4 x 8 sheets and run around $27/sheet. Not bad. The space I wanted to have the brick is only about 6 wide so we needed 2 sheets.


STEP 1: INSTALL THE SHEETS


The Accomplice installed the first sheet and then determined how wide the second piece would have to be. It was easy to cut with a table saw. When using cut pieces, be sure you are butting the sides together that make the complete brick pattern, rather than having the pattern mismatched at a seam.
STEP 2: CUT OUT FOR ELECTRICAL OUTLETS


By using an oscillating multi tool. Cutting the brick sheet was simple as The Accomplice measured where the electrical outlets were before he hung the sheets so he knew exactly where to cut. Be sure to kill the power to any electrical boxes you are cutting through to, we don't want any injuries out there!!!
STEP 3: PAINT


We began by painting the base coat of Velvet Finishes Soulful. We used this to cover the entire wall.


Next, I covered most of the bricks with Timeless. I wasn't extra careful - remember I'm a little lazy - to not paint the 'grout lines' of the wall, but I did try to avoid that. I wanted the grout to be the beige. Since this is supposed to look old, don't worry about having perfect lines or an even coat. I used the Reviver 1A in the Velvet Finishes line for painting the bricks.


http://www.velvetfinishes.com/shop.html
STEP 3.5 STILL PAINTING


For my last color, I painted Opulent. I covered almost all of the bricks, but not quite. And again, no need for perfect coats or straight edges.


http://www.velvetfinishes.com/shop.html
STEP 4: SAND AND DISTRESS WITH ELECTRICAL SANDER


Here's where the real fun begins! The sanding is what makes this project.


I like to use the Ryobi Corner Sander for my furniture projects and it worked great for this as well. Use varying amounts of pressure - from light to really digging deep. By varying the pressure you are varying the color and allowing the layers to show.
STEP 5: AGING WITH VELVET FINISHES GEL


To tone down the color contrast, I used the VF Enhance Gel product in the dark brown, Prestigious. I applied the Gel with a lint-free rag. Again, not evenly or perfectly. Easy peasy. When Soulful is sanded it takes on a slightly yellow tone, which I love, but I wanted to tone that down for this project. The Gel added just the right touch. It deepened all the colors and created a warm, rich patina. Note that I only added the Gel to the bricks and did not gel the grout lines.


http://www.velvetfinishes.com/more-cool-stuff.html#!/enhance-gel-prestigious/p/37603232/category=9624024
STEP 6: STAND BACK AND ADMIRE YOUR WORK!
I LOVE the way this project turned out!


How do you feel about brick? Do you have any in your home?


I think it would be fun to layer with bright colors also so I'll probably find another spot in the studio and do a bolder color combo too!


Check out my brick wall Pinterest board for more inspiration.


https://www.pinterest.com/ksds/design-focus-walls-brick/
Kellie from Design Asylum Blog
Want more details about this and other DIY projects? Check out my blog post!
Go
Frequently asked questions
Have a question about this project?
3 of 6 questions
  • P.p15814293 P.p15814293 on Apr 25, 2017

    I have painted our interior many times. I'm thinking our large living room walls will get this treatment next! Thanks.

  • Joye R. Foster Joye R. Foster on Apr 30, 2017

    I never knew there were brick sheets available. Could you do all of the painting prior to installing the sheets? They look great.


  • Jill Jill on Apr 18, 2018

    Will this project work on the cheap sheet rock they use in most apts. that have the beveled look to them... the walls are not flat, in other words. I am an apt. renter right now and would love to do this project at my breakfast bar. Also, would the sheets of brick come off easy without tearing/ messing up the sheet rock painted wall (original) behind it so when I move I could take this down and wouldn't be charged for damages? On the other hand, I would ask permission first and get a written statement from mngr saying that I could do it b4 I, actually, done it.

Comments
Join the conversation
2 of 139 comments
  • Momsila Momsila on Sep 02, 2020

    A very great project indeed , will try on my wall at the porch. So beautiful. đŸ˜ƒ

  • Caryn Caryn on Nov 21, 2020

    Awesome job, i painted faux rocks years ago contrasting a wall with rocks around the fireplace. With your techniques and different colors, i hope I get the same results.


    Thank you for sharing.

Next