DIY Lamp Post: How to Illuminate Your Garden in Style

Get ready to light up your front walkway with a unique and charming DIY lamp post! If you're looking for a creative project that will add a classic touch to your home, this is it.
Today, I will share step-by-step instructions so you can create this gorgeous pathway light that will impress your guests and brighten your entrance.
This post was transcribed by a member of the Hometalk editorial team from the original HometalkTV episode.
Head to the dollar store and grab a solar light and picture frames for this awesome outdoor lighting idea for the front of your house!
1. Prepare the Picture Frames
To make this project, you will need four picture frames with their backs removed.
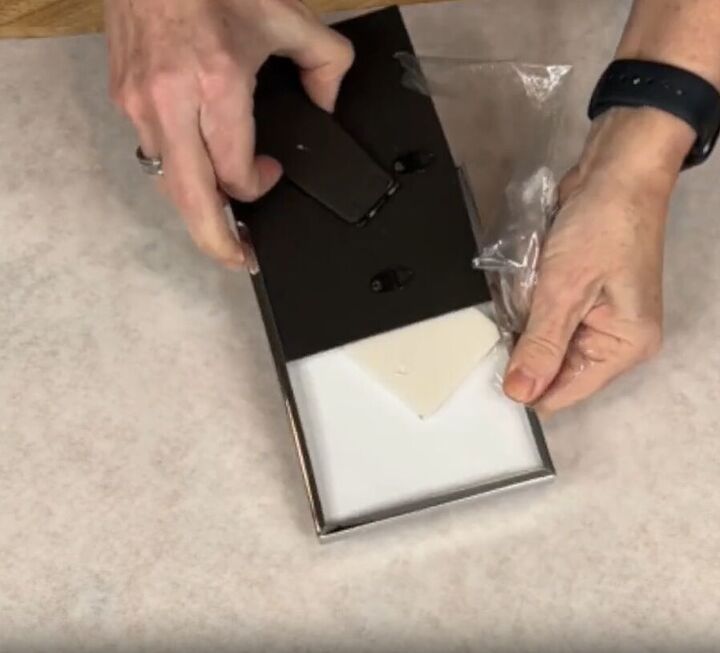
Using a hot glue gun, adhere the glass to the picture frame. Do this on all four frames. This will create the box of our faux street lamp.
2. Assemble the Picture Frames
Once all the picture frames are ready, it's time to assemble them into a square shape.
Apply superglue onto each side of the frames, and then place them against each other to create a cube. Follow the package instructions for curing time, typically 24 hours, to ensure that the frames are solidly glued together.
3. Painting the Base and Cover
While the frames are curing, it's time to add some elegance to our DIY solar lamp post by painting the base and cover. Using two square pieces of wood, apply a coat of black paint suitable for outdoor use to the top and sides of each piece. This will give our faux street lamp a polished and authentic look
4. Seal the Wood
Once the paint on the wooden squares dries, it's time to seal them so they are protected from outdoor elements. Grab some outdoor mod podge and paint the tops and sides of the frames with it. Let it dry completely to ensure a durable finish.
5. Attach the Solar Light
Now it's time to attach the solar light to the top of our faux street lamp. Apply superglue to the top edge of the cube.
Then flip it over and place the sticky side on top of one of the pieces of wood to create the base of the DIY solar garden light.
Remove the lower part of your solar light.
Add some hot glue to the bottom of the remaining piece and place the solar light in the center of the cube on top of the wood, press firmly to ensure a strong bond.
Apply more superglue to the top of the frames.
Then place the other piece of wood on top to create the cover of our lamp box. Let everything cure according to the package instructions.
*** The solar light will receive indirect sunlight and will work. It just will run for less time than it would with direct sunlight.
6. Create the Stand
To create the lamp post stand, we'll be using a pool noodle and gaffer's tape. Measure the width of the pool noodle against a roll of gaffer's tape, to get the width of the pool noodle you need to cut.
Cut the pool noodle to the measured length.
Wrap the pool noodle with gaffer's tape for added durability and visual appeal, and place a small piece of gaffer's tape on one end of the pool noodle to create a finished look.
7. Assemble the DIY outdoor light post
Flip a flower pot upside down, and insert a broom handle into the pot.
Place the pool noodle on top of the broom handle, this will be the stand that your lamp box sits on. Make sure the pool noodle is securely attached to the broom handle.
Now it's time to attach the faux street lamp. I cover the top of the pool noodle in hot glue and position the solar light lamp box on top of it and wait for it to dry and set firmly.
More DIY Projects
DIY lamp post tutorial
This pathway lighting idea is a delightful addition to any front entrance that not only enhances the aesthetic appeal of your home but also serves a practical purpose.
With its unique design and creative use of everyday items, this DIY solar lamp project is a beautiful way to guide visitors to your front door day or night.
So, what are you waiting for, get crafting and enjoy the beauty and functionality of your very own DIY lamp post! I would love to hear your thoughts in the comments!
I would love to have you stop by my blog Chas' Crazy Creationsfor the full tutorial as well as sign up for my latest creations, posts, recipes, exclusives, and more...
I would love for you to subscribe to my YouTube channel to see more of my crazy creations - https://www.youtube.com/c/chascrazycreations
DIY home decor using old picture frames
Enjoyed the project?
Resources for this project:
See all materials
Comments
Join the conversation
-
 Leslie
on May 30, 2024
Nice idea. I think I would have bought a 5th frame and used either that or the glass from the frame to cover the top of the "lamp" so that the sun would be able to charge the battery better. This would also be a great idea to top off fence posts too.
- See 1 previous
-
 Pla173387257
on Jun 24, 2025
Good idea.
-
-
 CJ
on May 30, 2024
Lucille, she used a small piece of the pool noodle on the top end of the broom handle. Such a cute idea and add lighting for safety.
-











Frequently asked questions
Have a question about this project?
how does your light recharge since the sun can't get to the solar panel on it?
Wondering how long Modge Podge will hold up in the elements
If you sealed the bottom and top pieces of wood, how would you install a new battery?