Safe Front Porch Lighting: How to Make a Pool Noodle Solar Lamp Post

The coolest way to light up your front porch is with a pool noodle!
In this DIY tutorial, I am going to show you how to create a charming and budget-friendly front porch lighting solution using a pool noodle, solar lights, broom handle, and a couple of wooden signs.
This post was transcribed by a member of the Hometalk editorial team from the original HometalkTV episode.
Hometalk Recommends!
Not only will this DIY solar lamp post add a decorative touch to your porch, but it will also serve as an important warning sign for the presence of a step.
Let's get started!
Materials:
To complete this DIY garden post project, gather the following materials:
- Solar lights
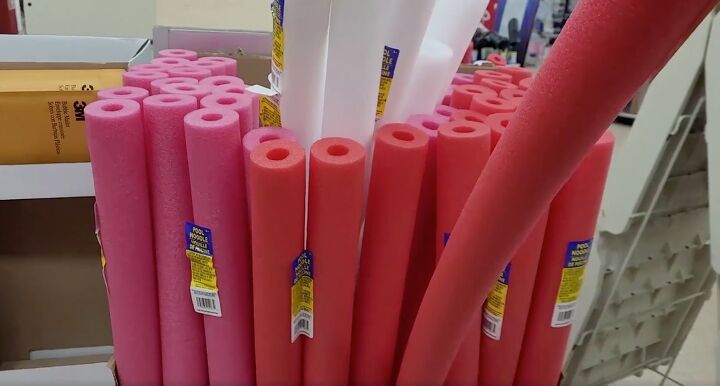
- Pool noodle
- Broom handle
- Two wooden signs
- Glue
- Black spray paint
- Script printout or vinyl letters
- Transfer tape (if using a die cutting machine)
- Sealant
- Tape
More Pool Noodle Ideas
1. Prepare the Pool Noodle and Broom Handle
I started this garden craft by removing any stickers from the pool noodle and ensuring a clean surface.
After the sticker was removed, I straightened the pool noodle slightly so that it would easily fit over the broom handle.
Decide whether to keep or remove the top of the broom handle. I ended up removing it from my DIY garden lamp post.
2. Assemble the Lamp Post
Next, I Inserted the broom handle into the pool noodle, leaving the screw end slightly exposed.
Then I grabbed the wooden signs and decided which direction I wanted them to point and measured them to get the length and width for where the text would go.
3. Apply Text to the Signs
I then printed out the desired script I wanted and using a Cricut cut it out on my vinyl. I decided to use red vinyl as it is a great "warning" color.
You could also just paint the text onto the sign if you do not have a die-cutting machine.
I used transfer tape to easily and accurately apply the letters to the clean signs.
No matter whether you choose to paint or use vinyl, make sure to seal the wood on both sides to prevent weathering.
4. Paint the Pool Noodle
I then applied multiple coats of black spray paint to the pool noodle, ensuring even coverage. Make sure you allow the paint to dry between coats.
It's important to do this step outdoors or in a well-ventilated area and wear a mask to make sure you don't inhale the paint fumes.
5. Attach the Solar Light
Once the pool noodle is fully dry, I applied glue to the bottom of the solar light and securely place it into the top of the pool noodle.
Hold it in place for a few seconds to ensure a strong bond.
6. Prepare the Ground Light Sign
I used glue to firmly attach the sign to the solar light I would place on the ground, near the step, making sure it is visible.
I temporarily secured it with tape until it dried completely.
I looped the arrow sign over the solar light, facing backward, and twisted it to the front so the word "STEP" was facing forward.
Twisting the rope helps to make sure the sign is nicely secured to the solar light.
7. Install the Pool Noodle Solar Lamp
Finally, I dug a hole outside and inserted the screw end of the broomstick into the ground securely.
I place the ground light next to the pole for enhanced visibility of the step.
More DIY Solar Light Project
To ensure the longevity of your DIY garden post, consider the following weatherproofing tips:
- Apply an additional layer of sealant to protect the materials from the elements effectively.
- Regularly inspect and clean the solar light to maintain optimal performance.
This attractive and cost-effective solar lamp post not only illuminates my front porch beautifully during the day and night but also serves as a helpful warning sign for the presence of a step.
I would love to hear your thoughts on this project and if you have ever made something similar.
Happy Crafting!
Enjoyed the project?
Resources for this project:
See all materialsComments
Join the conversation
-
-
 Mur119679526
on Sep 25, 2024
I found it really hard to follow for to all those ads distracting all the time. I'm sure it is really cool and nice, but I wish I knew more.
-
 DeeHolli
on Oct 14, 2024
To complete this DIY garden post project, gather the following materials:
- Solar lights
- Pool noodle
- Broom handle
- Two wooden signs
- Glue
- Black spray paint
- Script printout or vinyl letters
- Transfer tape (if using a die cutting machine)
- Sealant
- Tape
1. Prepare the Pool Noodle and Broom Handle
I started this garden craft by removing any stickers from the pool noodle and ensuring a clean surface.
After the sticker was removed, I straightened the pool noodle slightly so that it would easily fit over the broom handle.
Pool noodle crafts
Decide whether to keep or remove the top of the broom handle. I ended up removing it from my DIY garden lamp post.
2. Assemble the Lamp Post
Next, I Inserted the broom handle into the pool noodle, leaving the screw end slightly exposed.
Then I grabbed the wooden signs and decided which direction I wanted them to point and measured them to get the length and width for where the text would go.
3. Apply Text to the Signs
I then printed out the desired script I wanted and using a Cricut cut it out on my vinyl. I decided to use red vinyl as it is a great "warning" color.
You could also just paint the text onto the sign if you do not have a die-cutting machine.
No matter whether you choose to paint or use vinyl, make sure to seal the wood on both sides to prevent weathering.
4. Paint the Pool Noodle
I then applied multiple coats of black spray paint to the pool noodle, ensuring even coverage. Make sure you allow the paint to dry between coats.
It's important to do this step outdoors or in a well-ventilated area and wear a mask to make sure you don't inhale the paint fumes.
Attaching the solar light to the DIY garden post
5. Attach the Solar Light
Once the pool noodle is fully dry, I applied glue to the bottom of the solar light and securely place it into the top of the pool noodle.
Hold it in place for a few seconds to ensure a strong bond.
6. Prepare the Ground Light Sign
I used glue to firmly attach the sign to the solar light I would place on the ground, near the step, making sure it is visible.
I temporarily secured it with tape until it dried completely.
Adding the wooden "STEP" sign to the solar light
I looped the arrow sign over the solar light, facing backward, and twisted it to the front so the word "STEP" was facing forward.
Twisting the rope helps to make sure the sign is nicely secured to the solar light.
7. Install the Pool Noodle Solar Lamp
Finally, I dug a hole outside and inserted the screw end of the broomstick into the ground securely.
To ensure the longevity of your DIY garden post, consider the following weatherproofing tips:
- Apply an additional layer of sealant to protect the materials from the elements effectively.
- Regularly inspect and clean the solar light to maintain optimal performance.
-
-












Frequently asked questions
Have a question about this project?
Do you do book I love "HOMETALK' BUT
I AM 77 AND CANT REMEBER SOME GREAT IDEAS YOU SHOW
Where do you find a Curciut cuter?
How to make a table centerpiece with solar lights and pool noodles