Crafting Whimsical Stepping Stones With Unicorn SPiT

This post is sponsored by Eclectic Products. All opinions are my own.
I don’t consider myself an artist. I have to say, though, after this fun project with Unicorn SPiT I feel like one! Unicorn SPiT makes it so easy to create something out of nothing (like random tree slices). Let me show you how I created five fun stepping stones with Oak tree slices and Unicorn SPiT.
So what is Unicorn SPiT? According to Eclectic Products website “UNICORN SPiT SPARKLING is a paint, gel stain and glaze concentrate – all in one bottle. It creates a sparkling, 3-dimensional effect on wood, glass, metal, fabric, pottery, wicker, concrete and laminate. Ideal for creating new – or – refinishing thousands of projects.”
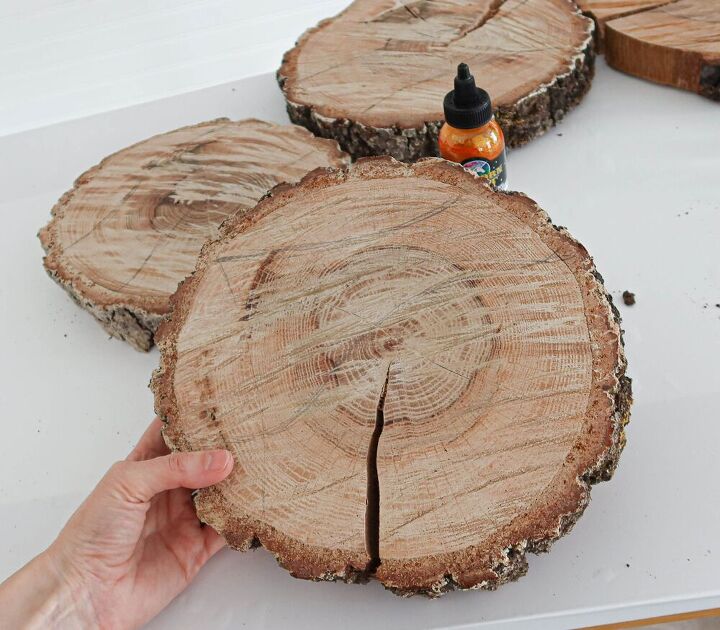
Let me show you the Oak Tree Slices I’m going to be transforming today with this fun product.
Some of them have split over the years as they’ve dried out but I don’t mind that.
Now that you’ve seen the wood, let’s add some paint to it!
Here’s a few of the materials you’ll need including a synthetic paint brush, spray water bottle, Unicorn SPiT, and craft resin.
Before you begin, make sure to “draw out” any pattern you wish to paint. I did this with a pencil.
Painting wood slices with Unicorn SPiT Sparkling
- First spray water on top of the wood slices to dampen the surface. You can always go back and add more water, so don’t over do it.
2. Next shake the Unicorn SPiT really well and squirt out a little paint on the wood.
3. Use a paint brush to paint the wood in the pattern you desire. I decided to make a “yellow brick road” pattern and create a yellow block that flowed through all five tree slices.
I outlined the yellow with the other sparkling colors. I decided to make the perimeter of the tree slices green.
It’s so bright and pretty!
4. Let the tree slices dry for at least thirty minutes once painted.
One thing I love about Unicorn SPiT is that it’s so fast drying.
5. After they dry, use a craft resin to seal the wood. I used Famowood craft resin.
First pour equal parts of each solution into a plastic cup. Then pour the hardener into the resin and mix for 6 minutes. Make sure you mix for a full 6 minutes. Then pour the solution you just mixed into another clean cup and mix for another 6 minutes. Now you should be ready to pour.
6. Pour the mixed resin onto the middle of each wood slice. Take a plastic putty knife and spread the glaze towards the edges. I used a disposable foam brush to wipe the edges on each tree slice. If you do see bubbles appear use a heat gun or a flame 8″ above the surface to make them disappear.
After 24 hours, the craft resin was completely hard.
Ready to see my whimsical stepping stones?
Look how they sparkle in the sun! I have to admit, this project turned out way better than I expected!
My kids are going to love these!
I love this before and after picture of how you can transform a simple tree slice into something beautiful! If you can do this with an old tree slice, imagine what else you can do with Unicorn SPiT!
The pictures don’t do them justice. They are so beautiful and sparkle like glass jewels.
Now that I’ve seen how easy this product is to work with I’m already thinking of my next project. What could YOU do with Unicorn SPiT?
Lindsey
Learn how to use Unicorn SPiT with this instructional video about how I painted a few wood slices and crafted beautiful stepping stones.
Enjoyed the project?
Resources for this project:
See all materials
Comments
Join the conversation
-
 Peggy L Burnette
on Apr 18, 2022
Beautiful
-
-
 Dlagardens
on Apr 09, 2023
Great idea! I might try with glow in the dark paint
-















Frequently asked questions
Have a question about this project?
Where can I get the wood slices? I don’t personally know a tree trimmer.
How thick are the slices from the tree trunk? How many inches thick?
Did you treat the bottom and sides with anything to prevent or at least slow down the eventual rotting of the wood? How have these held up?