How To Save An Old Deck

We live in a very old farmhouse, and for lack of better words, the deck has seen better days.
It wasn't quite rotting, although the railing sure was. But the wood is cracked, lacking moisture, and all the layers of paint had been chipping off. It wasn't in our budget or our schedule to replace it this year, so we had to find a quick solution!
We chose to use Rust-Oleum's 20x deck resurface solution which promised a deck transformation in a day!
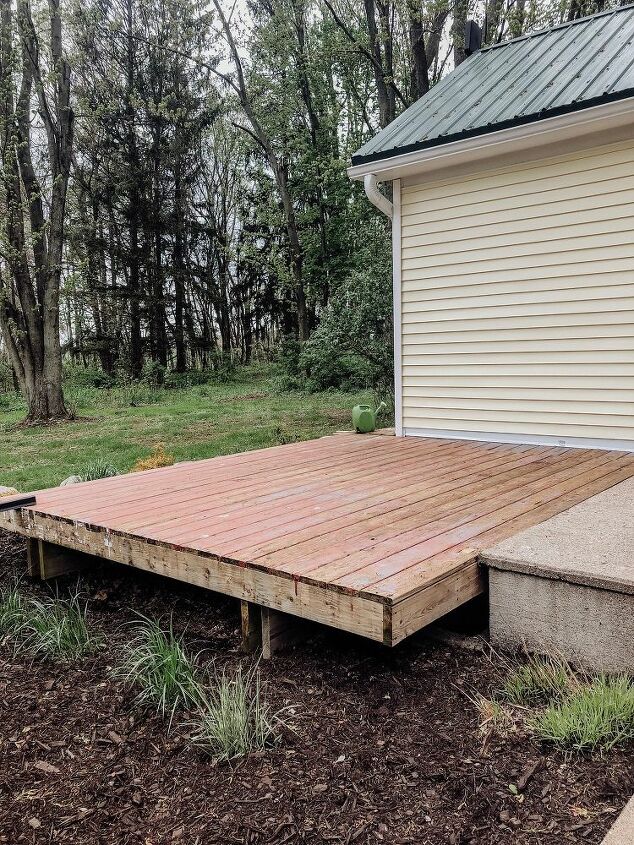
This was one side of our deck before. We have a large concrete patio separating the two wooden decks, but altogether have approximately 300 square feet of wood decking that surround the side of our farmhouse.
And the other side of the deck after we ripped down the rotting railing that served no purpose!
You will need to measure your deck to decide how much of each product you will need! Each product specifies the square footage it covers.
You will need each of the following:
- RockSolid Deck & PatioCleaner
- RockSolid 20x Deck Resurfacer in White
- RockSolid Roller Cover
- Paint Tray
- Foam Roller
- Paint Roller Extension Pole
- Deck Start Wood Primer
Step One: Wash
The First thing we did was wash our deck with the deck and patio cleaner. It is a concentrate so you do need to mix it with water according to the directions on the back. We had a long handled scrub brush, and used this to apply it to the deck and scrub the years of dirt and mildew off.
Once you’ve washed the entire deck with this, let it sit. We waited about 10 minutes since we had already power washed our deck prior, and rinsed the deck wash all off.
The directions say to only let your deck sit for 30 minutes after cleaning and rinsing before moving on to priming. This means your deck WILL still be wet when you apply the primer. Just remove any standing water with your deck brush, a squeegee or a leaf blower (which is what we used) and you’ll be ready for priming!
Step Two: Prime
Once you’ve washed and rinsed your deck off, let it sit for 30 minutes, and then removed any standing water, you can start the priming step. We simply poured it into a painting tub we had and used a spare 3/8″ nap roller we had on hand to roll the primer onto the deck. This step was very quick, and the primer applied in a milky color. When completely dry, it does dry clear!
This DOES need to dry before applying your topcoat. Let it dry for two hours, until it has dried to a clear color, and is dry to the touch! Now you’re ready for the exciting part!
Step Three: Topcoat
This is where that handy special roller cover comes into play! After stirring VERY thoroughly, we poured some of our topcoat paint into our painting bucket, and swapped out our roller for the one specially made for this paint. The paint is VERY thick and almost feels like a wet concrete. Which is why it requires the special roller cover.
Keep in mind, this product is meant for HEAVILY WORN decks/patios. If your deck is not in as bad of shape as ours, maybe thinking about using Rustoleum’s 6x or 10x product versus the 20x we went with. This particular paint does dry texturized, as it’s meant to fill cracks and hide large imperfections. And it did just that!
It was now or never, so we just went for it and started applying the paint. I read as many tutorials as I could when it came to this point. Some people said to not roll back and forth, but rather roll in one direction. We found it didn’t make a difference, and rolled in both directions, ensuring the deck was covered in white paint. We did always work with a wet edge, meaning we never painted next to or over an area that was drying, but instead waited once it was all dry to touch up some spots that needed it!Because this paint is so thick, it can get messy and splash. It is a water based paint, so while hubby painted, I just followed along with a wet washcloth, and cleaned up any mishaps we had. We then waited for the entire deck to dry, and cut in the hard to reach areas with a paintbrush. Overall, the deck covered well with one coat, with minor touch ups here and there to ensure full coverage! Where I painted with a paintbrush, I did need two coats.
Once done with your topcoat, you are done and now it is only drying time standing between you and enjoying some quiet time on your brand new patio!You will need to allow 4-6 hours of drying time before paint will be dry to the touch. Wait 12 hours for light foot traffic, and 24 hours before replacing furniture. It does take 7 days for it to fully cure to a hard finish. Also remember to tackle this project when there is a MINIMUM of 24 hours with NO RAIN! I cannot stress this enough. We had a 10% chance of rain, and it still rained. Thankfully we had enough tarps to cover up our deck for the sprinkle!!
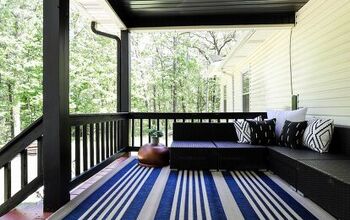
Patio after!!
After a few days, we placed our furniture back and got to work planting planters and decorating our patio!
We are loving enjoying summer dinners out here now!
We can't say enough good things about the Rust-Oleum products we chose to use and are so glad we went with their 20x rocksolid deck resurface paint!
You can see more of our finished patio at my blog here and I also linked all of our patio furniture and decor there!
Enjoyed the project?
Resources for this project:
See all materials
Comments
Join the conversation
-
 Raymond Recine
on Jun 04, 2024
My deck continued to rot under the paint.so now I need total replacement
-
-
 Carol Cole
on Jun 04, 2024
Can't get over how clean it looks after cleaning it. I thought maybe you would of painted a rug on it. 👍️♥️
-









Frequently asked questions
Have a question about this project?
You have a cost of $450. Is that correct?
Does this product only come with white topcoat?
Does this product only come with a white topcoat?