


How to Organize Your Fridge With a Tension Rod

Maintaining a well-organized fridge isn't just about playing Tetris with your groceries; it's a game-changer for both efficiency and freshness.
Think about it: a tidy fridge not only makes it easier to locate what you need (no more spelunking for that elusive jar of pickles), but it also helps reduce food waste. When items are neatly arranged and visible, you're less likely to forget about that bunch of kale hidden behind the yogurt.
And don't even get me started on leftovers. An organized fridge means you'll actually see that container of lasagna from two nights ago. No more science experiments growing at the back.
So, here's a glimpse of how I've transformed my fridge, to ensure every item finds its place, making my daily kitchen routine a breeze.
Tools and Materials:
- Tension rods
- Disposable plastic trays
- Upcycled containers
- Plastic baskets
Hometalk may receive a small affiliate commission from purchases made via Amazon links in this article but at no cost to you.

Best heavy duty double sided tape!
These are a few budget-friendly essentials I'll be using to tidy up my fridge.

Don't hesitate to rearrange your shelves and set them at varying heights. Consider the types of groceries and leftovers you store, and determine the optimal shelf height for each.
I wanted an additional, smaller shelf, but I still needed the two existing shelves in my fridge. That's where tension rods came to the rescue.

I kicked off the process by positioning the first rod towards the back of the fridge. I hung it over the brackets that securely hold the shelves, providing a reliable ledge to prevent slipping. If this setup isn't available to you, consider using clear double-sided tape at the ends of the tension rods to keep them firmly in place.

Next, a second tension rod was added, parallel to the first, towards the front of the refrigerator.

Now, I slid in my 3 plastic trays.
You can stick them down with double-sided tape, but I liked being able to slide them out.

I added a sink caddy to the inside of the door as well.

Now for some upcycling.
I cut the lid off of an egg carton.

The lid was placed in one of the trays in the door.

The bottom of the tray, I slotted into a plastic basket.

I also placed a few old packaging containers into another section of the door.

All the sauces went into the upcycled trays to keep the fridge clean in case of spills.
Additionally, a new plastic basket found a place for butter, and the sink caddy was filled with sauce packets.

The basket, with the egg tray at the bottom, was filled with eggs, the tray provides added protection.
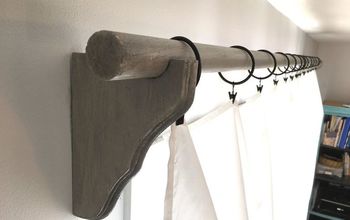
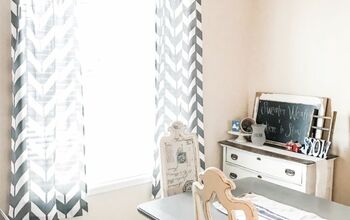
More Tension Rod Ideas

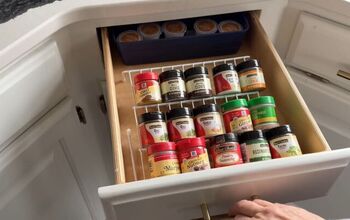
Check out the finished fridge! I used some cheap plastic baskets to keep different foods separate, and I saved the bottom shelf mostly for leftovers.
That extra shelf I created with the tension rod worked out perfectly. It's just the right size for sliding in all my thinner containers of cold cuts, smoked salmon, and different hard cheeses.

How to Use a Tension Rod to Organize Your Fridge
I have had this set-up in my fridge for a few weeks now and it has worked wonderfully.
In essence, a well-organized fridge isn't just a testament to your domestic prowess; it's a practical approach to keeping things fresh, minimizing waste, and ensuring your fridge is a beacon of culinary order in the chaos of daily life.
Share your own tension rod tips in the comments below.
Comments
Join the conversation
-
This is a great idea. Just keep in mind that the inside walls of the fridge are not completely solid. There is foam between the exterior and interior walls. Be careful when setting the tension on the tension rod that it is not so tight that it would puncture through the interior wall lining.
-
Hey love the ideas but like one said moisture is in all fridges get to much they can move and will say tried eggs in basket to just to let you's know they go bad twice as fast and don't slam the door doesn't work well with little ones that won't comprehand that right now


Frequently asked questions
Have a question about this project?
What size tension rods?