Stationary Industrial Crane Rods

6 Materials
$28
30 Minutes
Easy
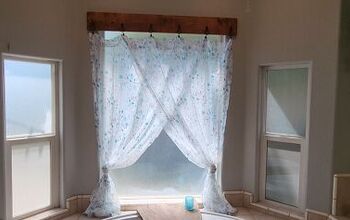
Do you like curtains? I love curtains. I feel they give my windows a softness and a finished look that compliments the decor in any given room in the house. I found the cutest curtains on sale but upon opening them, discovered they were skinny panels. Since they were on sale, they were non-returnable. When I returned to the store to buy another set, they were sold out. So instead of hanging them on a regular curtain rod, as the skinny panels won’t cover the whole window, I decided to make my own Industrial Stationary Crane Rods.

Hometalk Recommends!

Get the industrial look with these industrial curtain rods that Amazon reviewers swear by!


Living in the PNW the sun rises early and sets late in the summers which means we like our blackout curtains and they tend to be heavy. I wanted sturdy rods but didn’t need one all the way across the window. Just two short ones on each side. I was going for an industrial look. Even though these curtains are not blackout, most of the crane rods we found to purchase were on the flimsy side. I also didn’t care for them to hinge or swing out and I wanted the option if I ever chose to purchase blackout curtains I would replace the short rods with a long rod and keep the same industrial look.

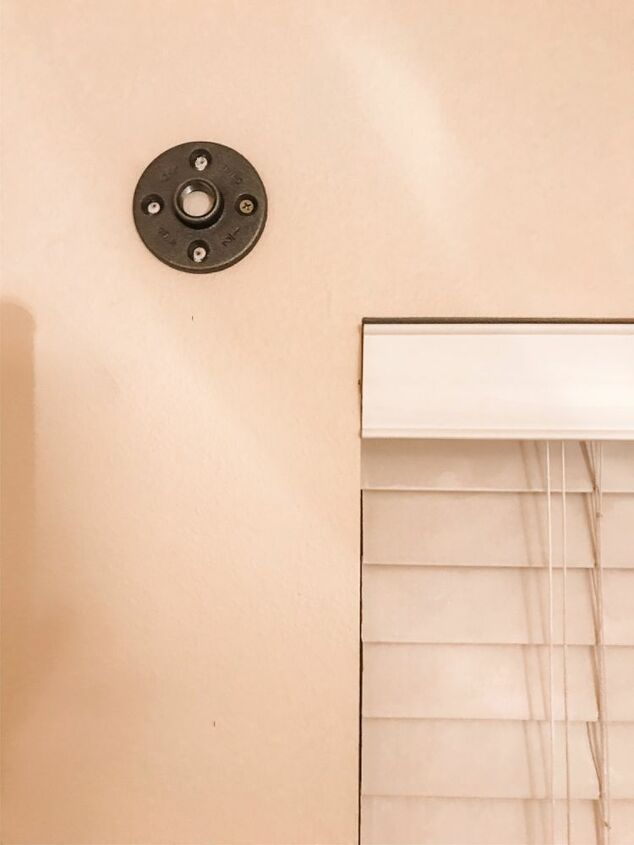
First, let’s gather our materials:• 2- flanges for 1/2” pipes • 8- screws• 2- 1/2” 90 degree elbows • 2- 1/2”x 1” nipples• 2- 18” galvanized pipes• 2- 1/2” end caps• power drillWe were able to find everything in black at Lowe’s.The next thing we did was find a stud we could screw the flange into.
Once all 4 screws were secure in the flange (we used the power drill to screw them into the wall), attach one end of the 1/2”x1” nipple to the elbow. Then twist the other end into the flange.
Make sure the open end of the elbow is facing towards the window and is tight enough that the weight of the curtain won’t pull the rod down or un-level it.
Twist the 18” galvanized pipe into the open end of the elbow.
Slide one of the skinny panels onto the galvanized pipe.
Twist the end cap on. Then repeat the steps on the opposite side.
I’m happy with how these rods turned out. I love the industrial look mixed with farmhouse chic. To see more projects and photos of how we style our home visit us on our Instagram page @beaus_and_belles.
Resources for this project:
See all materials
Any price and availability information displayed on [relevant Amazon Site(s), as applicable] at the time of purchase will apply to the purchase of this product.
Hometalk may collect a small share of sales from the links on this page.More info
Joleen | The Refining Home
Want more details about this and other DIY projects? Check out my blog post!
Go
Frequently asked questions
Have a question about this project?
3 of 14 questions
  • Angie Angie on Jan 26, 2022

    If you're trying to blackout the room with curtains, why did you only use a partial pipes? Doesn't look like they will close all the way and did you use the same set up as the outside to hold them up on the inside ?

  • Jessica Evanson Jessica Evanson on Jan 26, 2022

    I love this idea!!!!! I'm in the PNW (Tacoma/Spanaway area) as well and my house has the same farmhouse vibe I will be definitely trying this out in one of my rooms! This is a cute cute idea!

  • FRAN FRAN on Nov 06, 2022

    Have you thought about adding solid fabric to the bottom of each panel so the length just skims the floor


Comments
Join the conversation
2 of 169 comments
  • Janice Janice on Oct 20, 2023

    Nice work! I like it! Thanx for sharing!

  • Dolores Esparza Dolores Esparza on Oct 20, 2023

    I would use PVC for all bit the flange that screws into the wall -- since I could only find Schedule 80 PVC flanges that are more expensive than the metal ones. Weight of the curtain should NOT be too much to twist pipe either. Also, all parts can be painted to fit color scheme you want.

Next