Outdated Coffee Table + Side Table Redo

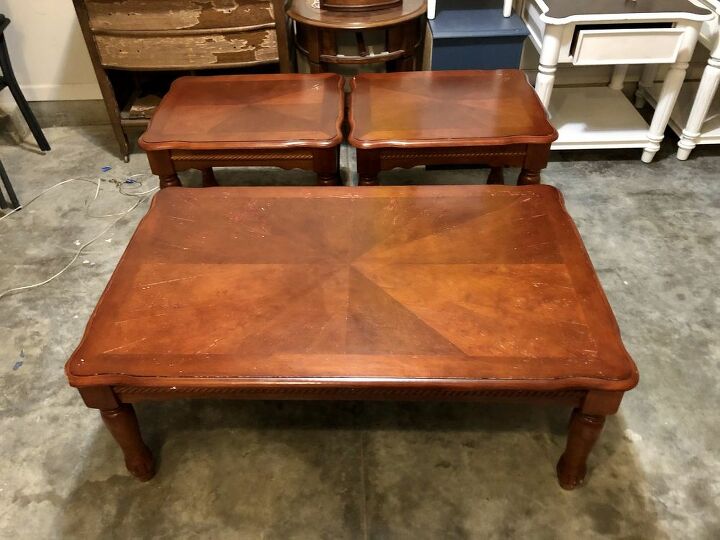
Have an old outdated table set in your living room and want a change? Get some paint + stain and you'll have a fresh new look in no time!
Clean off any grime and dust with a clean rag or cleaning wipe and remove legs using an eklind tool.
Materials needed. Not pictured - Gloves for staining
Link to stain -
https://www.amazon.com/Minwax-70006444-Finish-Penetrating-Special/dp/B000BZZ3GA/ref=sr_1_1?dchild=1&keywords=minwax+golden+special+walnut&qid=1594401475&s=hi&sr=1-1
Link to sanders -
https://www.amazon.com/BLACK-DECKER-BDERO100-Random-Sander/dp/B00MLSS1SW/ref=sr_1_59?pf_rd_i=328182011&pf_rd_m=ATVPDKIKX0DER&pf_rd_p=aebdcf2a-c487-557d-8d80-d62a0ddc594d&pf_rd_r=P9Y6J57AW03QNCJYNWM5&pf_rd_s=merchandised-search-10&pf_rd_t=101&qid=1557660956&refinements=p_72%3A1248909011&s=power-hand-tools&sr=1-59
https://www.amazon.com/TACKLIFE-Multifunction-Sandpapers-Efficient-Collection/dp/B07X148FRH/ref=sr_1_3_sspa?dchild=1&keywords=electric+sander&qid=1585832868&sr=8-3-spons&psc=1&spLa=ZW5jcnlwdGVkUXVhbGlmaWVyPUEyVkQ3U0gzVkI4WTYzJmVuY3J5cHRlZElkPUEwNzc0NjYzMkVYVEUyU1kzVkRBViZlbmNyeXB0ZWRBZElkPUEwMzI5ODQ1OTNKS0c3UTg1UjlMJndpZGdldE5hbWU9c3BfYXRmJmFjdGlvbj1jbGlja1JlZGlyZWN0JmRvTm90TG9nQ2xpY2s9dHJ1ZQ==
Link to my paint brushes I always use to paint with -
https://www.amazon.com/dp/B07DT5YJQ2/ref=cm_sw_r_cp_api_i_vNXWDb3CWGHJW
Link to sealer -
https://www.amazon.com/dp/B000PRNXNY/ref=twister_B07JLY244F?_encoding=UTF8&psc=1
I wasn’t so lucky when it came to one of the pieces of the set. A corner of the coffee table was missing quite a big chuck out of it. No need to worry though, It’s an easy fix! I took some wood filler and shaped it into what the other corners look like. This was no problem because I was painting that part of the table anyways, so it was going to get covered up very easily.You want to allow proper drying time for the wood filler to dry. In the end I had to fill, sand, fill again, sand again, and fill one more time and sand for a final third time to get the shape correctly.
When sanding start off with a medium to fine medium grit sandpaper (100 - 150). You never know exactly what material you’re sanding down to, it’s always better to start off safe with a higher grit than with a coarse grit like 60 and sand down too far.If painting the furniture piece you don’t have to sand down completely to the wood. You just want to sand down enough so the paint will stick. If sanding down to stain (piece must be wood), you’ll need to completely sand down to the original wood removing all paint or stain previously on the piece.Once you do your initial sanding with whatever grit you use, you’ll want to finish it with a finer grit such as 220. This is extremely important when staining.
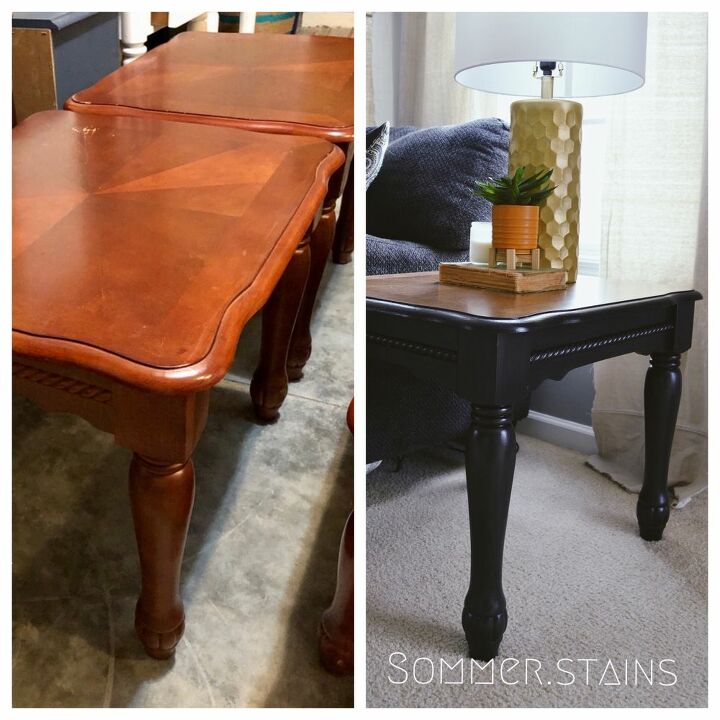
What a difference just sanding away all that old stain can do for a piece! Bringing a piece back to life isn't as hard as you think.
Once done sanding all the dust needs to be removed. I use a little handheld duster and a rag, but you can also use an air hose, damp cloth or “oil free” tack cloth.
Use your color of choice and paint away. Most pieces usually take 3 coats, 2 if you’re lucky. Make sure you’re painting with an even coat throughout the whole piece. Allow drying time between each coat (this is why it can take a couple days to complete).
For these pieces I stained the whole top, and painted the bottom. Since they were so separate I did my painting and staining all at once. This saves time too! Make sure to wear a glove, stain can be a pain in the butt to get off your hands and finger nails.
Paint used - Toasted Poppyseed by Kilz
For the top of these pieces I stained with two coats of Special Walnut by Minwax. I use a scrap piece of cloth to stain. I find it gives me the most control with the product. I've also seen people brush stain on with a paint brush, I just prefer a cloth - it's easier to wipe off if you get a little too much on.
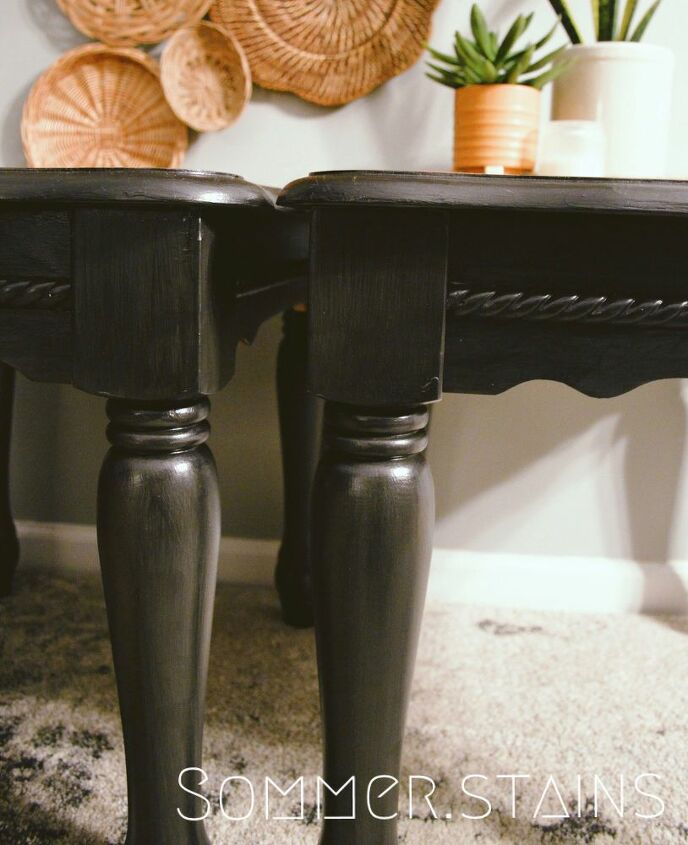
Depending on what kind of paint you use you’ll seal with poly or a wax or a glaze finish, something that’s relatively new to me (thank you American Paint Company!) For this piece I used a chalk finish paint and used the Glaze Finish from American Paint Company in Black to seal it. If you were using a chalk paint I recommend using a wax or glaze to seal.
To apply the glaze I use a clean paint brush and brushed it on evenly. I did two coats of this. You want to allow proper drying time for this, it doesn’t take too long, their products are really great quality.
I love how well this picture shows the difference between non sealed and sealed. It's like two completely different pieces!
To seal the stain I always use Polycrylic Matte finish, it’s my favorite. I usually do two coats of this and sand with 220 grit in between coats, making sure I remove all dust particles with a cloth before applying the next coat. For these pieces I did do a third coat just because they’re living room tables and most likely will be getting a lot of things set on them.
Link to sealer -
https://www.amazon.com/dp/B000PRNXNY/ref=twister_B07JLY244F?_encoding=UTF8&psc=1
Now that you have a beautiful new piece of furniture, the fun part starts - finding it’s new home in your house and decorating!
I love the look the Black Glaze finish from American Paint Company gives a finished piece.
Enjoyed the project?
Resources for this project:
See all materialsComments
Join the conversation
-
-
 MJ
on Jan 25, 2024
I love the combinations of paint and stained wood --- I think it really highlights the beauty of the woodgrain more so than having the whole piece in the wood look. Just donated a similar set last year, so hope the new owners see your "how-to"! [Also, very good description of your process and products used, so I'm saving for future projects!]
-
















Frequently asked questions
Have a question about this project?
I have coffee & end tables that are similar. However on the coffee table, there are 3 glass inserts... one is broken.
what could I do with these??
Is your couch Navy blue in the last picture? I love your tables you did by the way! I would never had thought of using black for tables. I am loving the new white, black, and gray washes on the scene of tables now! I am reupholstering my couches and trying to figure out what color I am going to do and this couch has made me question again.
That looks stunning. Did the tops have laminate on them? I always assumed intricate patterns like that was done with laminate.