How To Paint an Old Upright Piano

I recently had the opportunity to do something I have always wanted to do… paint a piano. My husband has a fancy piano in his music room that I have always wanted to get my hands on, but he would kill me. So I was so excited to get a call from a friend a few weeks ago asking “Hey Cait, would you paint a piano”… YESSSS!
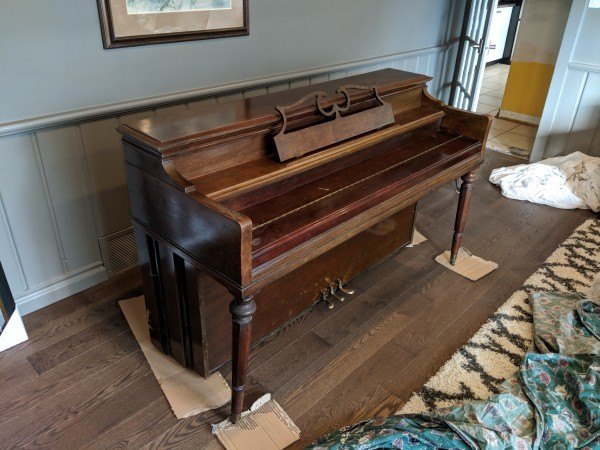
I have a huge workshop that I normally paint pieces in, but it didn't make sense to move the piano to my shop because we would have had to pay movers. This thing weighed a ton. There are a number of Piano sizes – a spinet is the smallest upright piano but can still weigh up to 400lbs. So, I decided to paint the piano at their house over a few days.
The home owner decided on House&Canvas Furniture Paint in Industrial Blue... one of my favourite colours!! It's a beautiful deep blue with a grey undertone. Perfect for those times when you want blue to feel warm and cozy.
When I arrived at the home, the owner had already pulled the piano from the wall for me. I slid some cardboard under it where I could to protect the floors. And taped off the keys, foot pedals and the wheels. Usually I would lay a down a drop cloth, but the piano was so heavy, I couldn’t lift it… and honestly, I didn’t want to. With my luck, I’d break the thing (the front legs on a piano like this are for decoration).
I easily removed the music stand and painted it at the shop along with the piano stool.
The best thing about House&Canvas Furniture Paint is that there is basically NO prep work. No sanding and you don't have to prime your surface. Literally, you just start painting!!
I painted the inside of the key cover first. The paint dries SUPER fast, so once the inside was dry, I opened it and painted the outside. I used a fine artist brush to get inbetween the keys evenly. Soooo much easier than taping all that off!!
The first coat of paint took me about 45 minutes. I had a cup of coffee and painted my second coat! Literally in 3 hours, I was done two coats!! Super quick!
The next morning, I decided to give the piano a bit of distressing around the edges to add some character. I ran a 180 grit sanding block around the edges to take off some paint and let the wood show through.
After a quick dust, I applied one coat of House&Canvas Furniture Wax Top Coat in clear with a wax brush. The brush really helps get into all those nooks and crannies. The wax seals and protects the painted surface. It's a great alternative to a clear poly because it has that beautiful matte finish. It's streak free, non-yellowing and SOOOOO easy to apply.
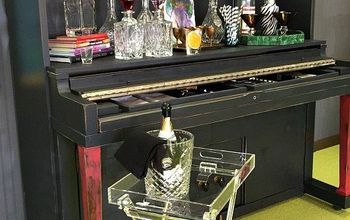
That's it! In just two quick mornings, I was able to give this old piano some pizzazz!! I love how it turned out and my friends are super happy!!!
Enjoyed the project?
Resources for this project:













Frequently asked questions
Have a question about this project?