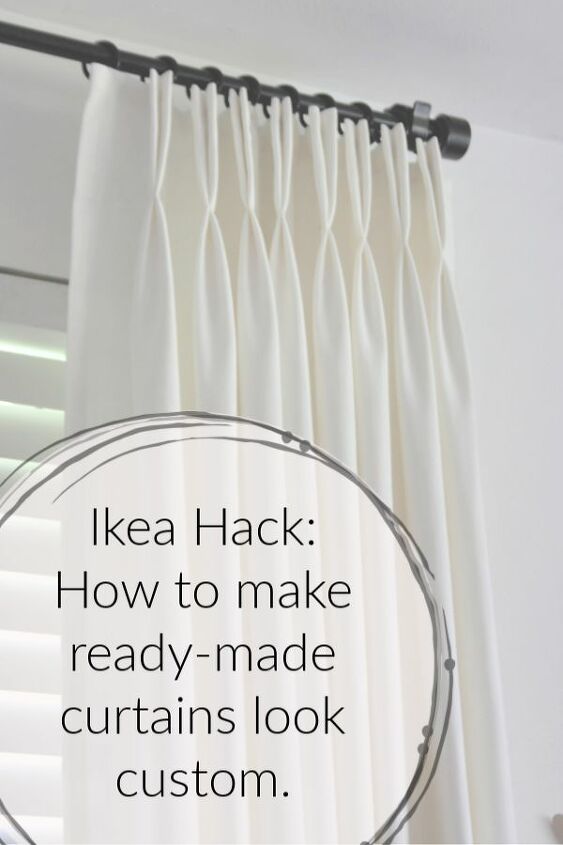
How to Make Ikea Ritva Curtains Look Like Expensive Custom Made Drapes

You don’t have to spend a fortune on custom drapes…I’ll show you how to make ready-made Ikea Ritva curtains look like expensive custom drapes.
I think beautifully designed and created drapes(window treatments) are second only to good lighting in a well designed space.
Step 1. Cut the Ritva to the proper length for your window.
Hang your curtain rod, including the rings. Measure from the bottom of the rings to the floor…this is the finished length of your drapes. Then add 8″ to this measurement and now you have the length at which you will cut your drape(cut length).
Step 2. Open the side seams with a seam ripper. Easy, but be careful not to rip into the face fabric.
Step 3. Press and sew in the double 4″ bottom hem.
Step 4. Cut lining to the proper size. The lining should be cut to the exact finished length and width of the drape.
Since these curtains are for my own house I used white sheets from the thrift store for my lining. It’s cheaper than buying lining fabric and it’s already hemmed.
When you position your lining to sew it under the side seams you’ll place the lining fabric 1.5″ to 2″ above the bottom of the curtain(pictured above). The bottom is NOT sewn together…the lining and the face fabric hang independently.
You only sew the lining to the face fabric on each side and at the top header.
Step 6. Create pleats.
I generally make my leading edge 3″ and my return 3″. Then figure out whats left to divide between my pleats and spaces. Your spaces should be between 4″-6″ and pleats should be between 4″ and 8″ typically. I actually made my pleats 3″ on this panel because it’s only double pinch pleat and I wanted more pleats. If you’re making a triple pinch pleat you’ll have go with a 6″ -8″ pleat, because you’ll obviously need more fabric to create a triple pinch pleat. There’s tons of tutorials on pleat spacing.
Step 7. Sew pleats. I move the binder clips closer to the edge of the pleat and sew the pleat behind the folds(only sew through two layers of fabric on all the folds).
Then sew the “pinch” at the bottom edge of the buckram.
Step 8. Insert drapery hooks
Your finished! You can now hang and style your drapes. You may need to train your drapes for a while by tying the drapery panels so they’ll stay pleated properly(like the pros do). I’ll make another tutorial on styling drapes so stay tuned.
This is a step by step tutorial on how to make Ikea Ritva curtains look like expensive custom made drapes.
Enjoyed the project?
Resources for this project:
See all materials
Comments
Join the conversation
-
 Miss Daisy
on Oct 12, 2021
Love your curtains , airy and elegant. I consider them Charlestown Classic.
-
-
 JakeJ
on Jul 31, 2024
Adding curtain rings can also give a more polished appearance and make the curtains easier to open and close. Consider sewing in a blackout lining, which adds weight and improves the drape of the fabric. Hemming the curtains to the perfect length and adding iron-on hemming tape to create a crisp edge can also elevate their look. Another idea is to pair the Ritva curtains with linen custom curtains, like those available at 3H Linen. Linen curtains offer a luxurious texture and complement the simplicity of the Ritva fabric. Mixing and matching these elements can result in an elegant, cohesive look that rivals custom-made options without the hefty price tag.
-










Frequently asked questions
Have a question about this project?
Hello Mimzy ... do you actually sew the bottom of the pleat through the four layers or just underneath it? You say you sewed the bottom of the buckram but never really said it included all four layers. I am assuming not. ???
Love your tutorial!! What is the total width of your curtain panel after the pleats? Looking to try this out but want to make sure they will cover the width of my window when closed.
Great job! I just bought the Ritva curtains and hope to do this as well. Can you tell me when you iron the whole thing? Is it better to wait until it’s all sewn or press them before?