How to Build a Versatile Laundry Room Storage Container

Sometimes, there's nothing more aggravating than not having a proper place for your laundry soap and other essentials.
That's why I've come up with a DIY hack for creating a laundry room storage container that will keep everything organized.
Using a half-inch sheet of plywood and a few tools, you can make a practical and stylish storage container for your laundry room.
This post was transcribed by a member of the Hometalk editorial team from the original HometalkTV episode.
Hometalk Recommends!
Tools and Materials:
- Half-inch sheet of plywood
- Painter's tape
- Ruler
- One-inch paddle bit
- Jigsaw
- Sandpaper
- Forstner bit (1.5 inches)
- Wood stain
- Wood glue
- Pin nails and nailer
- Hinges
- Level or straight edge
Hometalk may receive a small affiliate commission from purchases made via Amazon links in this article but at no cost to you.
1. Mark and Tape the Plywood
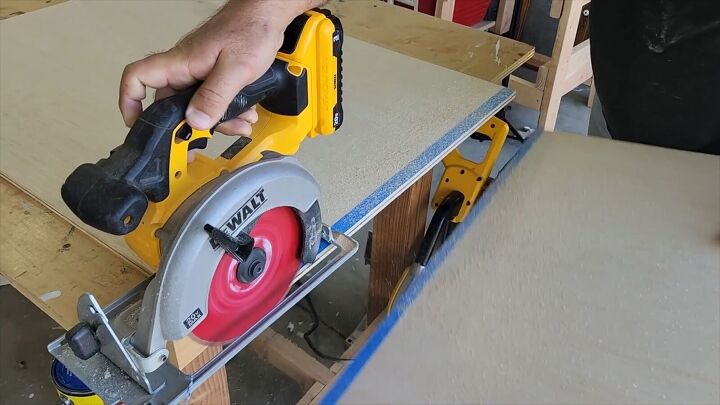
First, lay out the half-inch sheet of plywood and apply painter's tape to it.
Use a ruler to mark a straight line down the middle of the tape. The painter's tape will help create a clean edge when cutting.
2. Cut the Plywood
Using a jigsaw, cut along the marked lines.
The painter's tape will help prevent splinters, ensuring a smooth edge.
Pull away the tape after cutting to reveal clean, splinter-free edges.
Repeat this process to cut pieces for the top, bottom, and sides of the laundry room organization container.
3. Create a Slot
On one of the side pieces, pre-drill holes using a one-inch paddle bit.
These holes should be about an inch from the edge. This will make it easier to assemble the container later on.
Take a straight edge and mark 2 parallel lines between the tops of each pre-drilled hole.
Use the jigsaw to cut through these marks. This step helps create an opening that will be a useful part of the container's structure.
After cutting, sand the edges slightly to smooth them out. This is important for both the appearance and the functionality of your storage container.
4. Create the Organizers Base
Using a 1.5-inch Forstner bit, drill into the piece that will be used for the bottom of the box.
This will be where the soap dispenser lid or other items can be placed securely.
5. Stain the Wood
Before assembling the container, stain all the pieces. This ensures that you get an even finish on all sides.
Let the stain dry for about an hour or two.
6. Assemble the Container
Apply wood glue to the edges of the pieces.
Use pin nails to hold them together while the glue dries.
After about two hours, the glue will be strong enough to handle.
7. Attach the Bottom and Hinges
Turn the assembled pieces over and glue all four sides to the bottom piece.
Use the pin nailer to secure them. Wipe off any excess glue.
Attach hinges to the top lid to complete the structure.
8. Final Touches
Place your fabric sheet box inside, making it look like a Kleenex tissue box.
Position the soap dispenser on top, with a slight bevel to ensure it drains towards the front.
This will keep your washing machine clean from drips.
There is even enough room to collect lint to make your own fire starters!
Need more storage in your laundry room?
DIY Laundry Room Storage Container Tutorial
Building a multi-functional storage box is a simple and effective way to keep your laundry room organized.
This project not only adds functionality but also a touch of custom style to your space.
If you found this guide helpful, please comment below and share your thoughts.
Happy building!
Enjoyed the project?
Comments
Join the conversation
-
 Dar93683200
on Oct 26, 2024
I like the project, except being a little older I don’t want to lift bottle for every load to put the link in the holder…. Love the idea of fire starter too, just an observation for older people
-
 Pas119969683
on Dec 24, 2024
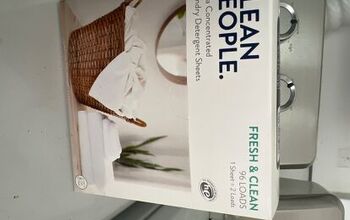
If you buy eco friendly it’s SO much better for the environment and you don’t have to pay for all the water that is very heavy. It’s a win, win to use laundry detergent sheets. I have no interest in this product, just a satisfied customer.
-
-
-
 Hope
on Dec 26, 2024
Hi Mitch...
I LOVE it!!! I will definitely make this to corral everything neatly in one place. I did like the suggestion above, from Leslie, to add dowels to stabilize the detergent jug so it doesn’t move around from any machine vibrations. We heat with a wood-burner and love to have fires in the firepit. The fire-starter-section/suggestion is genius…I wouldn’t have thought of that at all and we will actually USE them. (I currently ‘waste’ and put the lint in the garbage)
For those that use the Laundry Sheets (I’ve got to try these!!) instead of the “jug”…you could add another slot to the opposite side of the box…one for Laundry Sheets on washer side and one for Dryer Sheets on the dryer side. ;)
-
















Frequently asked questions
Have a question about this project?