My Kitchen Updo - How I Marbled the Counter Tops With Paint!

by
Janis.greener
(IC: homeowner)
$80
2 Days
Medium
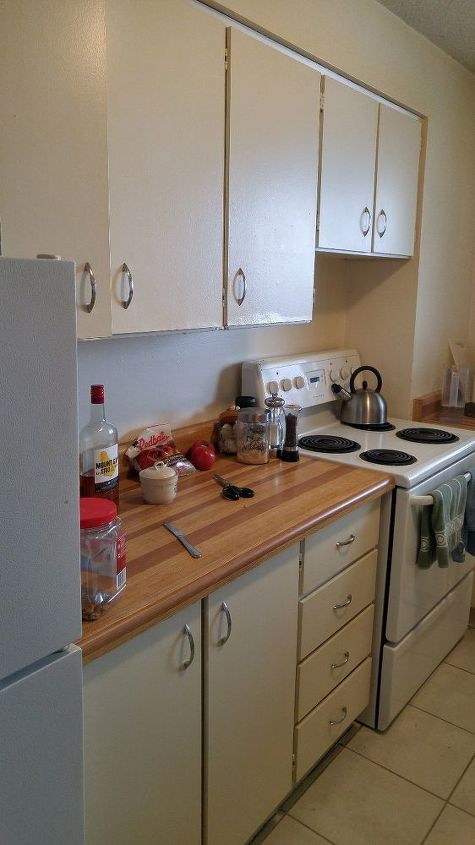
I had grown to hate my kitchen in our rental apartment. After 11 years it was time for a change. This is how I marbled the counter tops!
I did write my landlord for permission and they contributed by doing some repairs and painted the ceiling! I have had lots of questions about the counter tops so I thought I would share how I did them!
I did write my landlord for permission and they contributed by doing some repairs and painted the ceiling! I have had lots of questions about the counter tops so I thought I would share how I did them!
Preparation:
5. Prime the countertop. I used a white waterborne alkyd primer from Dulux. Follow the product instructions for drying time.
6. Paint the base colour and allow it to dry. Follow the product instructions for drying time. I used a medium grey colour as my base. Again I used a waterborne alkyd paint from Dulux.
Now for the fun part! The Marbling!
v. To add the veining, I used a fine longer bristle paint brush and followed the same principals as the video shows using a feather. Twist and twirl the paint brush while creating the veins. I added white veins in the whiter areas and fewer dark veins in the darker areas Join some of the veins together on the opposite diagonal direction of the original veins. I found this video helpful for the veining technique: https://youtu.be/grIVDUdMUZQ
x. I then applied a polyacrylic sealer with a brush. I used semi-gloss but you could use satin as well. Lay down a thin layer but wet enough to cover. It will self-level. Don't over-brush or you will see the brush marks. I tried a high density foam roller but it created bubbles which you do not want. I did two coats of the sealer. The sealer is a semi-opaque white but dries crystal clear and will not yellow. Once dry, If you do end up with brush marks, go over that area with another coat of sealer wet enough to self- level. Once dry this area just blends right in with the rest of the surface.
This is the finished counter!
I added some under cabinet lighting and love how it looks!
Before and after!
Enjoyed the project?
Published July 3rd, 2016 11:48 AM
Comments
Join the conversation
2 of 73 comments













Frequently asked questions
Have a question about this project?
My countertops look exactly like the original ones you hated but more worn and I also HATE. Did you remove your sink or is it possible to do this with sink intact? My sink and stove are set into counter.