


How to Make a Compost Bin From a $9 Garbage Can
Up next in my late summer garden series is how to make your own compost bin from a $9 garbage can! Super exciting, right!? I may be a novice gardener as this is the first year I've had my own garden outside of tomato plants in pots on my deck but I do know that if you want your plants to really thrive you need fertilizer or compost. Plus now that my family is eating healthier we can throw some of our garbage in the compost instead of in a landfill and then use that garbage to help grow more healthy fruits and vegetables. Win, win in teaching the kiddos about reducing our carbon footprint and living off the land. I could have just purchased one of these fancy tumbling composters and called it a day (I still might, they are pretty awesome) but I'm cheap and I prefer to DIY anything and everything I can, plus this DIY compost bin is super easy to make and requires minimal supplies.
Hometalk Recommends!
Compost Bin Supplies:
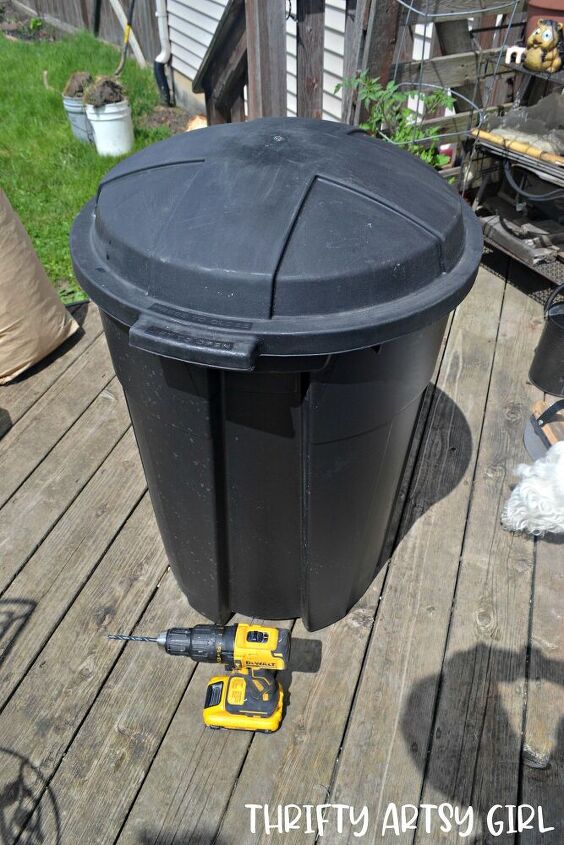
- Garbage Can (I bought mine at Menards for a little less than $9)
- Drill
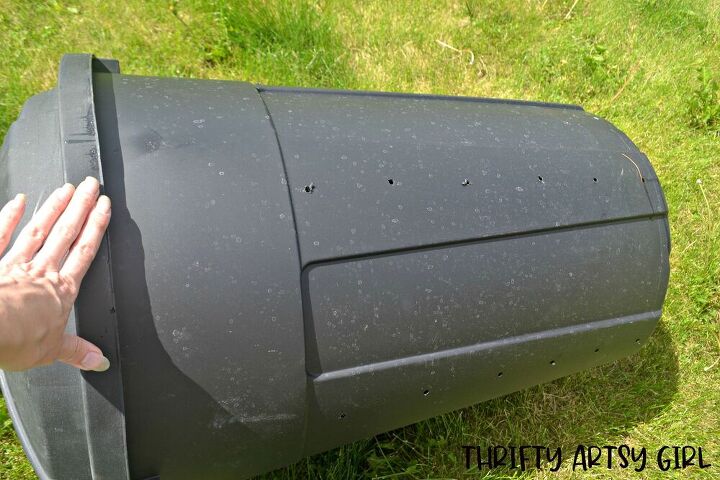
I gathered my supplies and set to work drilling holes so that air could circulate inside the bin to speed along decomposition. Make sure your garbage can has a lid so that any critters that might want to get into your compost are not able to and so that it doesn't get too soaked with rain or too dried out from the sun.
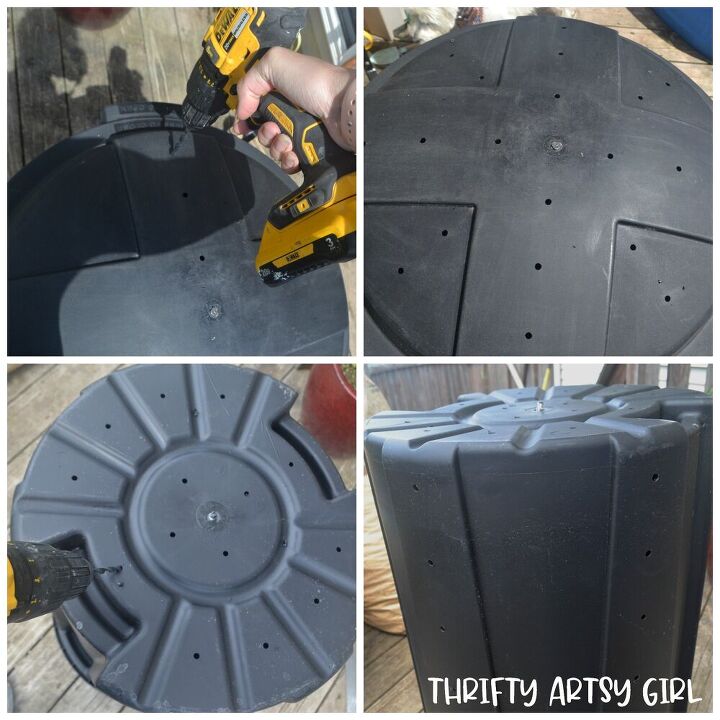
I drilled holes all along the top, bottom and sides of the bin for plenty of aeration. It was very easy and it was actually pretty fun to be honest.
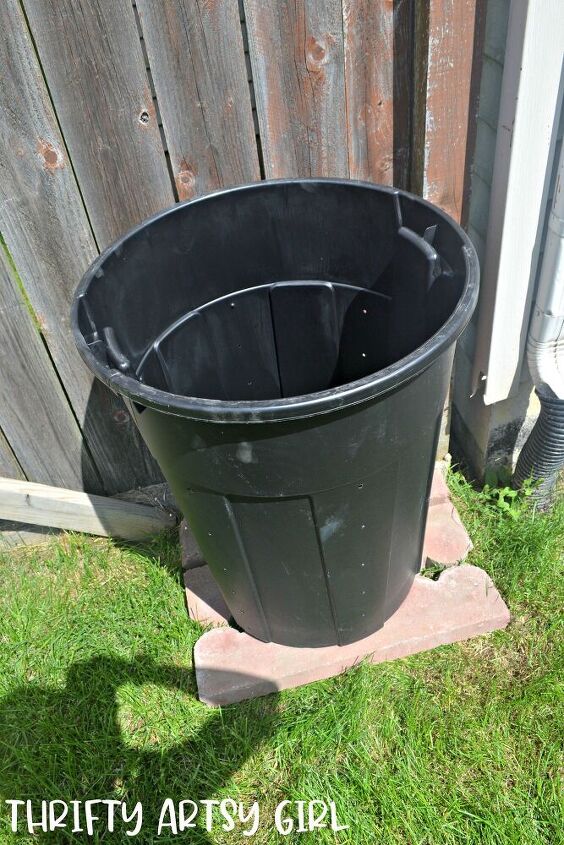
After my compost bin was complete I needed a place to put it that would be easily accessible for dumping scraps and for gardening. I found a spot right by the deck and the garden and placed the bin on top of some of the same concrete pavers that I used for my garden so that it would be off the ground.
Now that I had my bin all set up I needed compost. Making compost is pretty simple, you just need a 3 to 1 ratio of brown (carbon) to green (nitrogen) material. Here's some good examples of brown and green materials that you can use. Also keep in mind that the smaller the pieces you use of these materials, the faster they will break down, so shred, tear or cut down your materials as small as you can get them!
Brown Material
-Dry Leaves
-Wood Chips
-Shredded Tree Branches
-Straw or Hay
-Sawdust
-Pine Needles
-Newspaper
-Cardboard
Green Material
-Food Scraps (fruits and vegetables but NO dairy, meat or cooked foods)
-Grass or Plant Clippings (that are free from chemical herbicides)
-Egg Shells
-Coffee Grounds (you can throw in the coffee filter too)
-Manure (NOT from dogs or cats though)
-Recently Pulled Weeds
If you don't have a good mix of brown and green material your compost may not heat up, which is necessary to break down organic matter, and it may take longer to break down into usable compost. Your compost may even start to smell bad if you don't have a good ratio of brown to green.
But not to worry, composting is very user friendly (seriously, if I can do it, ANYONE can). If your compost looks too wet and smells bad, simply add more brown material and/or aerate (stir) more often. If your compost looks brown and dry, add green material and water to make it slightly moist. Your pile should always be slightly damp (about as wet as a wrung out sponge), but not too wet or it will rot.
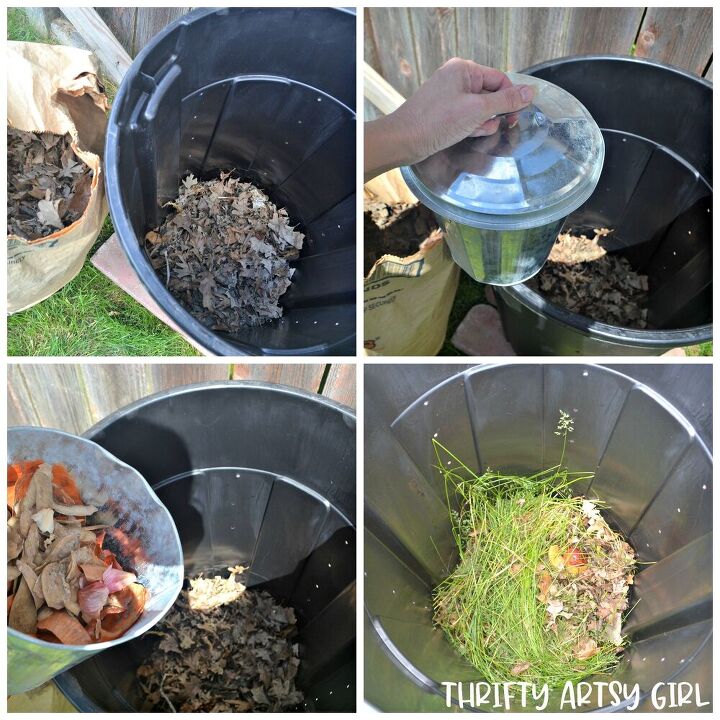
When I first started my bin I didn't have much for either brown or green material. I took a bag of dried leaves from my Mother in laws house to help with the brown part. I also stole a little metal garbage can from my son's room to put food scraps (green material) in and store under the kitchen sink until it was full enough to dump into the compost bin. You can buy some pretty cute compost containers from Amazon if you don't happen to have children that are obsessed with garbage cans.
Even though I didn't have much to start my compost pile I still wanted to get it started right away. I gathered together what I had and dumped it into my compost bin. I put 3 parts brown material (dry leaves) to 1 part green material (food scraps and grass)
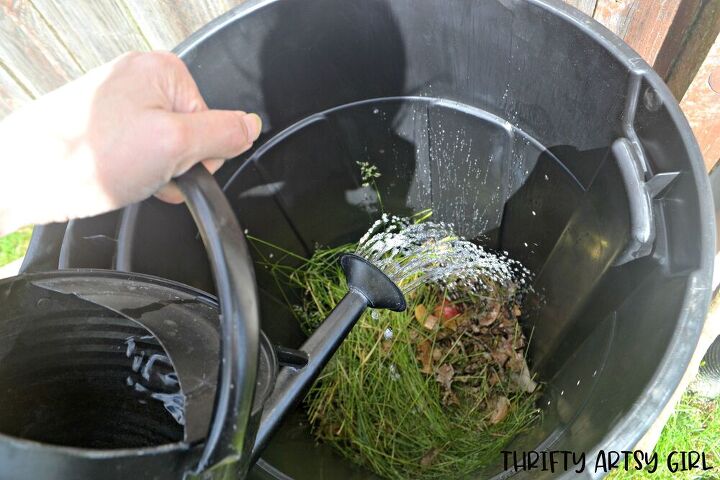
I then watered my compost so that it would be moist but not waterlogged.
Last, but not least, I needed to aerate my compost. You can use a pitchfork, shovel or even a branch to stir up the material. Since my compost bin has a lid that seals pretty tight I rolled my bin along the ground to get everything really stirred up. Make sure to aerate at least once a week and add water as needed to keep it all moist.
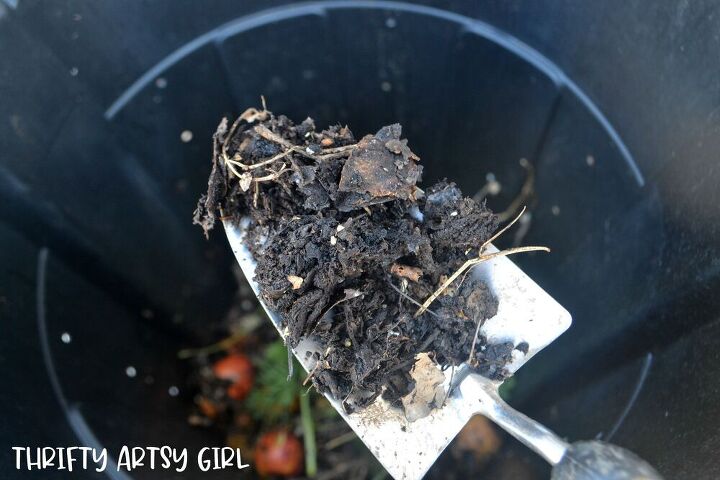
When your compost no longer gives off heat and becomes dark brown and crumbly, like rich earth it's ready to feed to your garden! My compost has been going for a few months and is almost ready. I'm going to continue to compost during the winter and hopefully have a large amount for my garden next spring. Here's a picture of how my compost is looking three months in. So far composting has been very easy with minimal effort (saving food scraps and dumping brown and green material and keeping the compost moist and aerated) and affordable since the only money we've put into it was $9 for a garbage can. What I love the most is that our whole family is involved and we're reducing our carbon footprint while also helping to grow healthy foods. Hopefully this DIY compost bin has inspired you to start your own compost pile! To see more on my compost bin check out my blog post https://www.thriftyartsygirl.com/2020/09/how-to-make-compost-bin-from-9-garbage.html


Comments
Join the conversation
-
I’d set it up to spin.
1) Find 4 pieces of 2” x 2” about 3 to 4’ long and make a couple of large X’s.
2) Plant one end of each X in the ground far enough apart so the garbage can fits easily between them when laid on it’s side.
3) Now you need a long pole (perhaps a 2” pvc pipe around 4 to 5’ long.
4) Drill/cut a 2” hole in the center of the top and in the center of the bottom and pass your pvc pipe through this so you have about a foot or so sticking out on each end.
5) Place your garbage can between the 2 X’s and your ready to spin.
6) Next I’d cut a door in the middle of the can maybe 2’ long and 1’ wide.
7) Attach a couple of hinges at the top of the door, a handle at the bottom and a slide lock on each side to keep it secure when you spin your new compost ben.
8) Finally, to make spinning easy, figure out some way to attach a handle on one end of the 2” pvc pole.
Naturally this will add to the cost but these few materials shouldn’t be more than $10 - 20 and (personally) I think it would be worth the extra cost and effort.
P.S. You may also want to figure out a way to secure the top on the garbage can so it won’t fly off. You could even glue/caulk it down permanently if you want to.
-
I have seen this and similar but your post might encourage more to try. Even if you can’t find trash can under $15, still worth it and significantly less expensive than anything premade (some in the hundreds). My only advice is when drilling air holes keep small as snakes and mice could get in if too large and you don’t want holes so large that compost falls out as bin fills


Frequently asked questions
Have a question about this project?
When everything turns to compost do you need to remove it or can you just keep adding 3 to 1?
Hello. Can the compost you create be used on houseplants?
What about bears, porcupines, skunks, etc? Doesn't the smell attract them to the neighborhood?