Plywood Plank Flooring

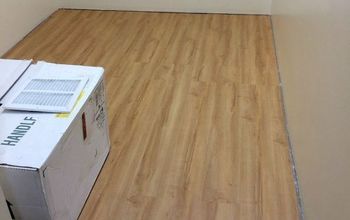
Last year we ripped up the carpet in our bedroom and laid plywood planks as a "filler" floor until we could afford hardwoods. They turned out so well, we might actually keep them for the long haul!
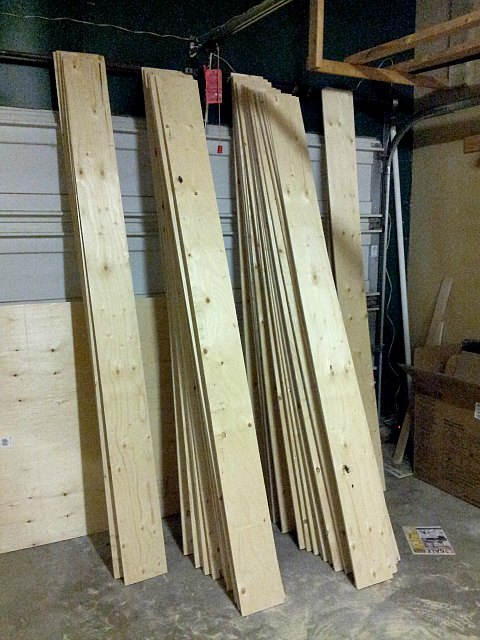
I used my compact circular saw to rip each sheet into six 8″ planks. Once I had the first plank cut, I used the straight edge from that one as my guide (clamping it down on the board I was ripping) and it worked really well for the most part. It took me about 3.5 hours to do all 10 sheets of plywood, and though not perfect, the lines were pretty straight.
After the sheets were all ripped and stacked, it was time to begin the arduous task of sanding. It took me about 10-15 minutes per board to get them as smooth as I wanted. I don’t want any feet getting splinters, so they needed to be smooth as silk. (Ergo, all the sanding.) It really took all that nasty yellow, rough, plywood-y looking surface off the planks and transformed them into wide pine boards. This step takes time and is a lot of work, but trust me it is so worth it to put in the extra effort here. Make sure you also bevel the edges of your planks with the sander to take down the harsh/splintery cut edges.
I pulled up the carpet with some pliers starting in a corner and just kind of went from there, rolling it all into a pile in the middle of the room. It came up a lot easier than I had anticipated, but to get it out of there I had to cut it into three smaller strips with my utility knife and roll it up that way. (These two really didn’t want to let go of their beloved carpet!) Next the nasty foam underlay came out, and I also had to pry up all of the tack strips the carpet had been attached to around the perimeter of the room. The final step in this process was to remove all of the staples from the floor. I used pliers, and also my screwdriver when needed.
Make sure you start on a wall that is as square as humanly possible; otherwise your boards will become janky and crooked. After laying the first row, you just kind of go from there, laying another row then another then another. I did not use liquid nails or any type of adhesive in case we ever want to replace these floors.
Nailing every 8 inches or so (lining up the nails on each side) and three in the ends of each plank was sufficient. If I had a stubborn plank that was bowed or did not want to lay flat, I would add a few more.
I did not butt the planks up flush with one another because I was worried about the floor buckling if the wood expanded with the seasons. In some spots I used a quarter to make sure there was a gap, in others I just eyeballed it. Because my cuts were not 100% precise, there is definitely a variation in the gaps between the boards, which is okay. Some are a little wide for my liking, but that really can’t be helped and I guess it adds to the character of the floor.
All of the boards were finally down, and I was ready to add the stain. Before I did, I vacuumed the floor really well, using the nozzle to suck up any sawdust or debris that had fallen between the cracks as we were working. I settled on Minwax Pickled Oak as my stain of choice. I love the look of whitewashed flooring, and I also thought that if I had stained them darker, it would result in them looking more like plywood.
To apply the stain, I used a 7.5″ Shur-Line stain applicator and it worked really well! It went on smoothly and evenly, and took no time at all to cover the floor. I did inside the closet first, and then worked my way from one side of the room to the other, going towards the door so I didn’t box myself in.
I let the stain dry for a full 24 hours before adding the first coat of finish. I used Minwax Ultimate Floor Finish, because it claims it will never amber over time, making it ideal over light stains. I used satin because I wanted a matte finish, but it comes in gloss and semi-gloss as well.
Aside from claiming it dries (and stays) crystal clear, some other perks of this finish are that it’s soap and water clean up, low odour, you can re-coat in two hours, and no sanding between coats is required. Also, the directions state if you’re applying the finish over stain, only two coats are necessary. (I did three just because I wanted the extra protection.) I applied the finish the same way I did the stain, using a fresh Shur-Line applicator, starting in the closet and then going from one side of the room to the other. I did three coats total, sanding between the second and final coat.
After the floors were finished, I painted the walls and trim a nice, fresh white (it’s called Polar Bear, by Behr).
After a week and a half of hard work (plus a month of sanding!) the room was finally finished and I could not have been happier with how it turned out. The floors ended up costing us about $1.27 per square foot, including the stain and finish. You can visit my blog, www.sharktails.ca, for more images and instructions on how to lay down plywood in your own home. I also have an update on how they are holding up after one year: http://sharktails.ca/2017/04/02/plywood-floors-update-faqs-durability-update/ !
Looking for more budget-friendly ways to increase your home's worth?
Enjoyed the project?
Resources for this project:
See all materials
Comments
Join the conversation
-
-
 Jamie Haas
on Apr 19, 2025
Love this look! What's the thickness of your plywood and is it any special kind? Thanks for sharing...
-












Frequently asked questions
Have a question about this project?
The floors look beautiful! Pine can have issues with staining blotchy, did you have any issues?
Hello, how thick was plywood?
Looks great. But the last time I priced plywood it was so expensive. When did you do this? At todays prices (2/15/23) I doubt you could do for $1.27/sf. However, might be able to do for less than many other wood products. If nothing else you have underlayment in place should you choose to cover in future. Good option. Thanks for sharing