Repurposed Door Hall Tree

by
Rob & Coco, Hometalk Team
(IC: paid contributor)
15 Materials
$60-100
3-5 Hours
Advanced
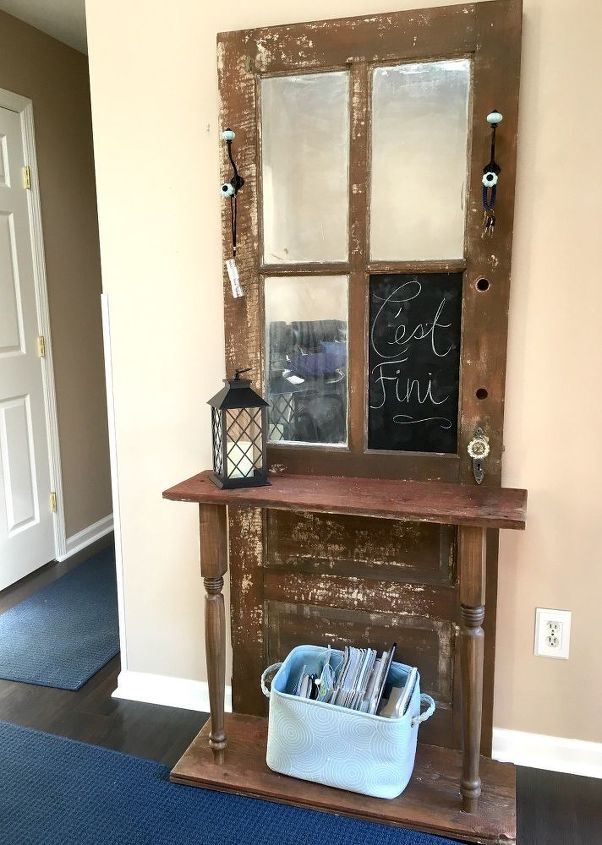
Some of you may have tuned in to our Facebook live segment a few weeks ago—if you did, you’ll remember the T-shirt giveaway went to a viewer who suggested I create a hall tree out of an old door we had sitting beside our garage. I have to admit that I had never heard the words “hall” and “tree” together before doing this project, but once I looked it up, I knew exactly where I wanted to go with it. I did all of the prep work for this project but Rob helped me with the construction of it and I’m so pleased with how it came out.
Because we don't have a foyer or much room in our current house, I set this hall tree up in my in-law's house to take the final photo. I think it really goes well in their space!
Supplies: -old door -2 – 29” country pine legs -ProLuxe stain -foam brush - rag -hooks Not pictured: -Kreg jig -pocket screws -paint scraper -fine grit sandpaper -Minwax finishing wax paste -Mirror Effect spray (2-3 cans) -barn wood slats -brush sander (or wire brush) -chalkboard sheet
STEP 1: Prep door and barn wood slats The first thing I did for this project was prep the door and barn wood slats. For the door, I scraped off all of the loose chipped paint with a paint scraper and a wire brush. Rob has a brush sander, so with the troublesome paint that didn’t want to come off, I used the sander to flake it off. I also removed all of the hardware I didn’t want to keep such as the deadbolts and door hinges; I wanted to keep the door knob but I had to remove it in order to take it apart so that the back would sit flush with the wall once this project was finished. Then, I hammered out all of the old nails on the barn wood slats and took a piece of fine grit sandpaper to knock off any chunks of residue. Unfortunately, because the red paint was so old on them, a lot the paint came off in a dust form but I was still able to salvage some of the red pigment.
STEP 2: Finish door, barn wood slats and table legs Next, I chose what finish I wanted for my hall tree. I used a stain for the door itself and the table legs, then I used Minwax finishing wax paste for the stained door and the barn wood slats. For the table legs, I applied two coats of the stain because I didn’t feel they were dark enough with just one coat. *Note: for my first coat on the legs, I brushed it on with the sponge brush and wiped it off with a rag, then for the second coat, I brushed another thin coat of stain on with the same sponge brush but didn’t wipe it off.
STEP 3: Spray windows with mirror effect paint After all of the wood was dry, I cleaned the windows and sprayed the glass with mirror effect spray. YOU MUST SPRAY FROM BEHIND! I flipped my door over so that the back was facing me and I applied several LIGHT COATS (probably 10-12) to each window pane. One of my window panes was missing the glass so I grabbed a sheet of chalkboard at Home Depot and Rob cut a piece to fit in the opening.
STEP 4: Square off barn wood slats and door, put together Next, Rob squared off the the barn wood slats using a table saw and squared off the bottom of the door using a track saw (we know not everyone has one so a skill saw and a T-square will suffice). Then, we drilled holes in the door where the table top and bottom shelf (barn wood slats) were going to sit, and drove in 4” screws from behind so that no hardware showed. *Note: we attached the BOTTOM shelf first, then completed STEP 5.
STEP 5: Attach table legs Finally, it was time to add the table legs. Rob used a Kreg jig to drill holes into the top backside of the table legs. Then, he drove in 1.5” pocket screws to attach the legs to the underside of the table top. After that, he laid the table top where we had drilled the holes in the door (just under the bottom two window panes) in STEP 4 and he attached the table legs to the BOTTOM SHELF by driving in 4” screws from the very bottom. Once the legs were attached to the bottom shelf, he secured the table top to the door by driving in 4” screws from the back of the door, using the pre-drilled holes from STEP 4 as a guide.
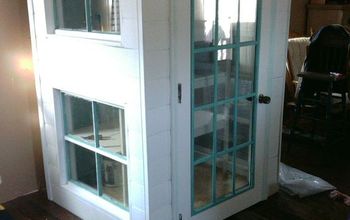
STEP 6: Attach hooks and add re-attach door knob Lastly, I added two hooks for hanging coats, hats, or whatever else needs to be hung by the door. I grabbed these two hooks at Home Depot because I loved the shabby chic style and how the hint of mint would pop against the stained door and reddish shelves. Rob also re-attached the door knob to the front.
I was hoping to keep a lot of the whites and grey tones of the original look of the door but once all of the flaked paint was scraped off and I added stain, this hall tree took a whole other form and life of its own. It wasn’t my original vision when I started this repurpose project but ultimately, I’m happy with the outcome. To me, it looks like it would belong back in the olden days, sitting in the foyer of an old farmhouse.
Enjoyed the project?
Suggested materials:
- Old door (on hand)
- 29” country pine legs (2 of these) (Home Depot)
- ProLuxe stain (on hand (from Home Depot))
- Foam brush (on hand (from Home Depot))
- Mirror Effect spray (2-3 cans) (Home Depot & Michaels)
- Rag (on hand (from Home Depot))
- Chalkboard sheet (Home Depot)
- Hooks (Home Depot)
- Kreg jig (on hand)
- Pocket screws (Home Depot)
- Paint scraper (on hand)
- Fine grit sandpaper (on hand)
- Minwax finishing wax paste (Home Depot)
- Barn wood slats (on hand)
- Brush sander (or wire brush) (on hand)
Published August 29th, 2016 7:35 AM
Comments
Join the conversation
2 of 42 comments
-
-
You did a beautiful job. I'd like it in my house!!
 Lynne Bonavita
on Mar 04, 2017
-










Frequently asked questions
Have a question about this project?